
This Carrot CRM feature is available for any of our paid plans.
Get access to this feature, plus included setup support, with any of our paid plans (Carrot CRM Essential, Scale and Team or InvestorFuse Essentials, Pro or Premium). If you’re interested in upgrading your Carrot CRM account, choose your new plan here. If you’re interested in upgrading your InvestorFuse account, please email billing@investorfuse.com
Video Version
Introduction
You can upload your contracts into the CRM, pre-fill fields using information that is already available in the CRM, and send them to sellers directly without leaving the platform. No other subscriptions or services are needed to use this feature. Simply upload your contract template into the CRM, finish the setup, and start sending it to your sellers.
The number of contracts you can send every month will depend on your plan. Below are the limits:
- Essentials – 5 contracts/mo
- Scale/IF Pro – 20 contracts/mo
- Team/IF Premium – 50 contracts/mo
This guide will cover the following:
- Create your branding
- Upload your contract template
- Add contract fields
- Map the contract fields
- Test the contract
Let’s get started!
Step 1: Create Your Branding
You need to create your branding first which will be used for the outgoing emails when we send a contract.
- Click Settings in the left menu
- Go to Transactions & Contracts
- Select Contracts & Signatures
- Click the Start button in the center to create a new template
- Input the company name that will appear in the contract as the buyer
- Upload a company logo in PNG format to generate a color scheme for the contract emails. You can change the individual colors if needed.
- Input the domain for your website
- Click the Save & Next button below
- Enter a Name for the email that will be used to send the contracts
- Enter the Email that you want to use to send the contracts
- Click the Save button
- Refresh the page to load the new menu
🚨 IMPORTANT: The email you enter in Step 9 will receive an email from Boldsign, our provider, to authorize the connection. Confirm the email to fully connect the email inbox for contract-sending.

Step 2: Upload the Contract Template
After creating your branding, create a new contract and upload the template.
- In the Contracts menu, click the + plus icon in the top-right corner of the page
- Input the Contract Name and Description (optional)
- Click the Save button to proceed
- Go to the Contract tab
- Click the Upload Contract button
- Add Roles for the people that need to sign this contract
- If you want 2 sellers to sign for this contract template, add 2 roles for Seller 1 and Seller 2 so they can sign individually.
- The signing order will follow the order of the roles. If the Seller role is listed before the Buyer role, the Seller will sign first.
- After adding a role for the Buyer, check the box below to pre-fill the information always
- Click the Save & Continue button to move forward
- Click the Upload Contract button and locate the contract template in PDF format from your computer
- Click Save & Continue

Step 3: Add the Contract Fields
The contract template you uploaded will be displayed in the menu so you can start adding the contract fields.
🚨 IMPORTANT: Only use the fields Label, Signature, Initials, and Date Signed to avoid any issues with the setup.
- Drag the Label field from the left menu and drop it to the fields that should be filled out in the contract
- The field settings will appear in the right pane after adding the field. Change the ID of the field to the field name i.e. seller_name, property_address, close_date, etc.
- Uncheck Required for this and all label fields
- Drag the Signature field for the Seller to sign
- Change the Role above the field options to Buyer, and drag the Signature field for the Buyer to sign
- Click the Create Template button in the upper-right corner of the page

Step 4: Map the Contract Fields
After adding the fields to the contract template, refresh the page and navigate back to the Fields tab of the contract.
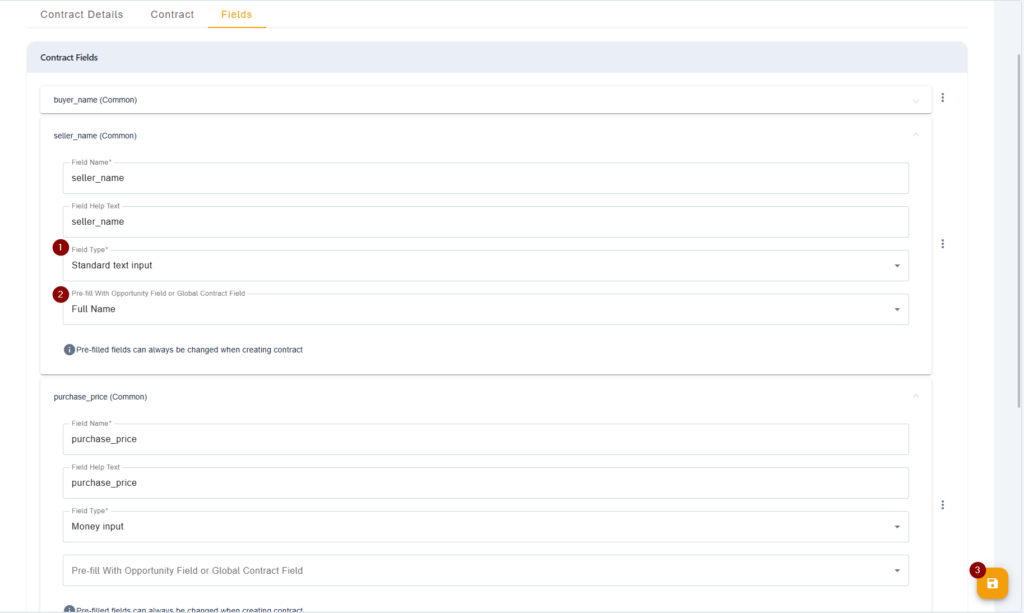
🚨 IMPORTANT: Avoid changing the field name to prevent mapping issues, but you can adjust the Field Help Text as needed.
- In the Fields tab of the contract, open a field and change the field type if needed. For example, you can use the Date Selector field type if the respective field is a date field.
- Set the pre-fill if appropriate. The most common pre-fills to set are the seller name, phone, and property address.
- Click 💾 the Save button in the bottom-right corner of the page to save
Step 5: Test the Contract
After creating your own branding, uploading the contract template, adding and mapping the fields, you are now ready to test the contract to ensure everything is working.
- Find or create an Opportunity with your info to send the contract to yourself
- In the Action tab of the Opportunity, update the current action and assign Send Contract
- Change Send Contract Later to Send Contract Now
- Select the contract that you want to test
- Fill out the contract roles. The emails entered here are where the contracts will be sent
- Fill out the contract fields to populate the contract
- Fill out the Document Settings fields to adjust contract expiration, message body, and title for the email
- Fill out the CRM tracking fields. This is for internally tracking the offer and to push the Opportunity to Transactions later
- Click the Next button at the bottom
- Assign the action Follow Up On Offer which will send the contract to either the seller or buyer via email depending on the signing order
- Review the contract and ensure everything is populated. Make any necessary adjustments if needed

Conclusion
You can set up contract sending from the CRM as long as you have a contract template in PDF format, a company logo in PNG format, and an email you want to use to send the contracts. Upload the contract template, configure the fields, and test to ensure everything is working correctly. If you get stuck on something, feel free to reach out to support via the Live Chat.