This tutorial will teach you how to edit existing, as well as add new navigational menus so that your visitors can find information on your site easily! This tutorial will begin from the Dashboard of the site you would like to make changes to. So, let’s get started!
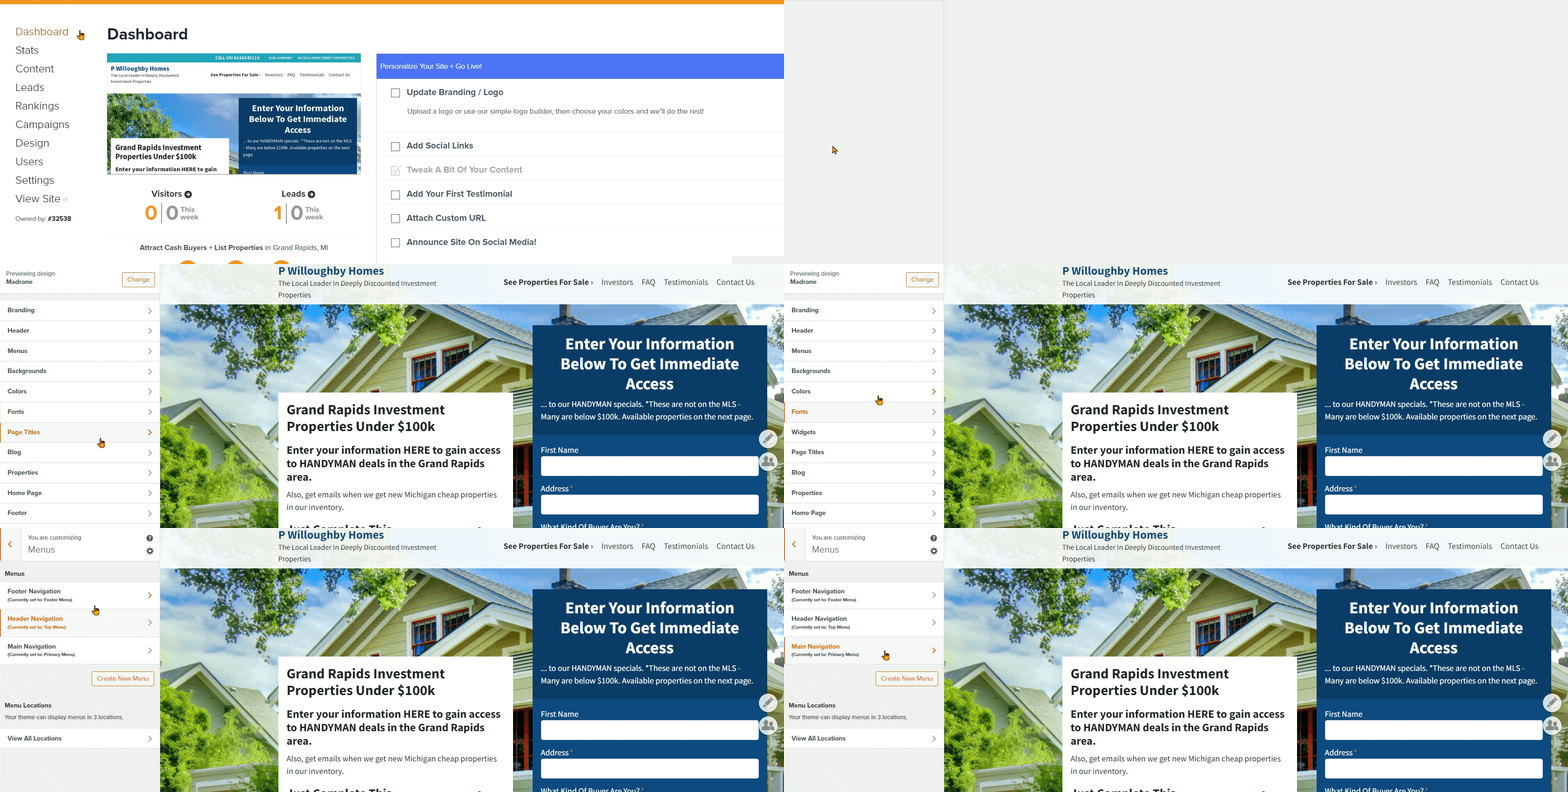
Step 1: Click “Dashboard” from your account

Step 2: From Dashboard, go to Design > Menus
Click on “Design” and then on “Menus”
Step 3: Adding New Menus and Menu Locations
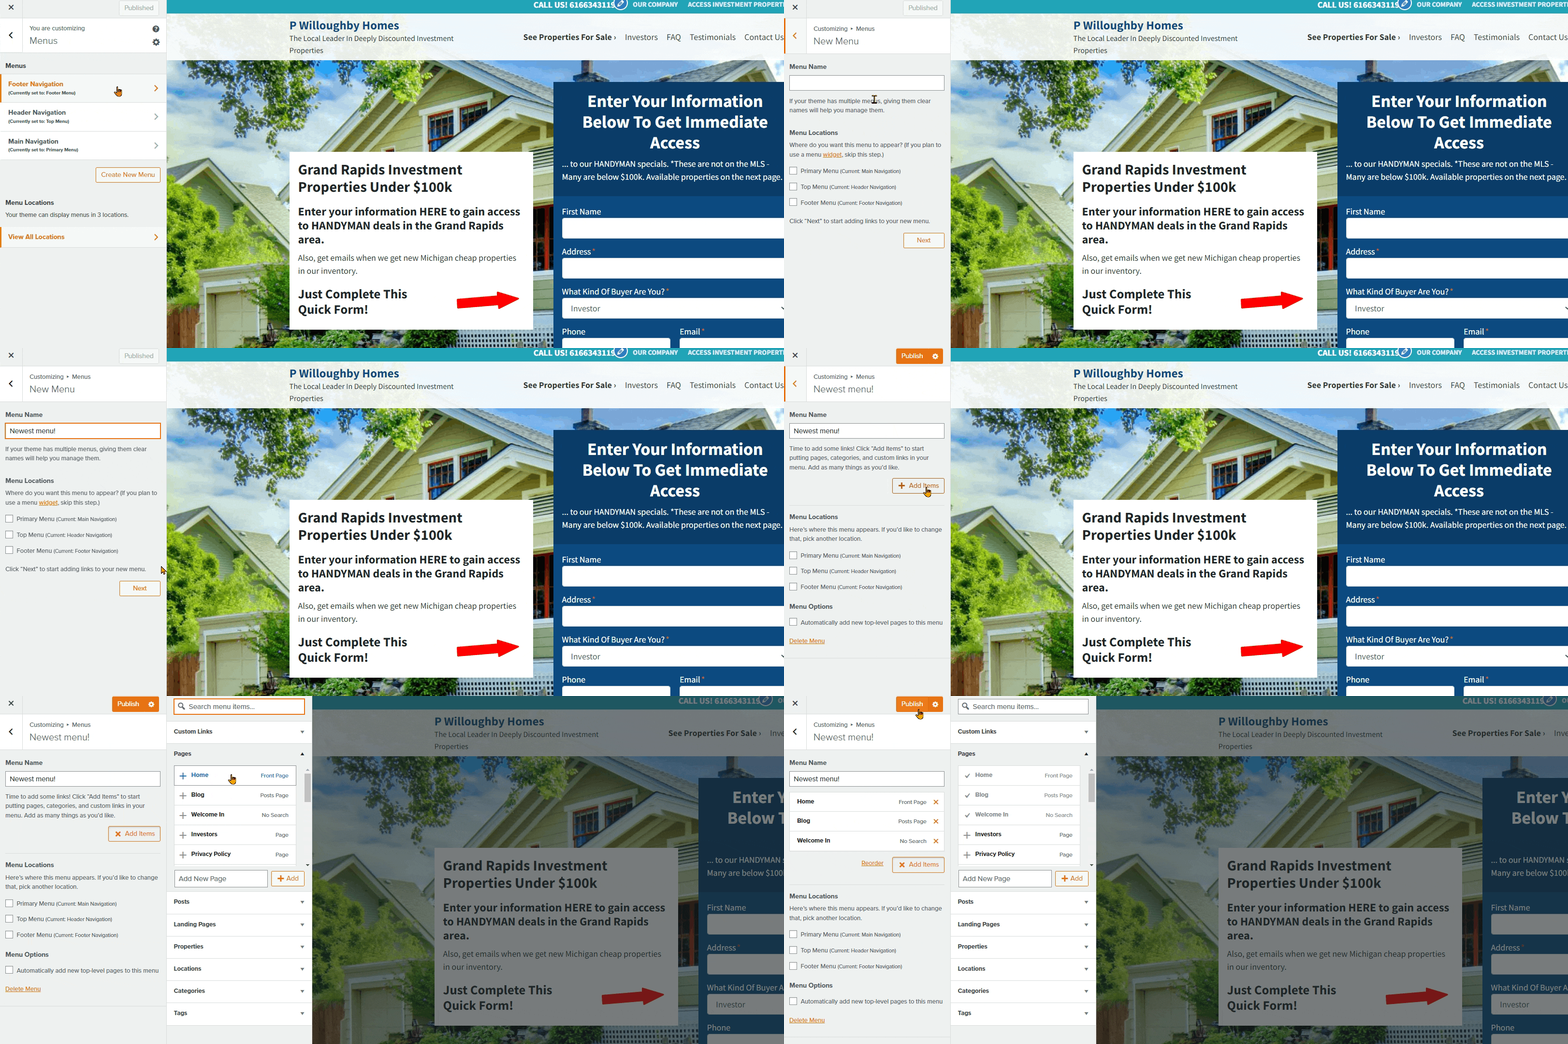
- By default, newly launched Carrot sites will have 3 menu areas in the 3 standard areas. However, you have the ability to create more should you want to! To do this, click on the aptly named “Create New Menu” button shown in the example below and then title your new menu.
Finally, choose which pages of yours you want to appear as tabs on this new menu and hit Publish!
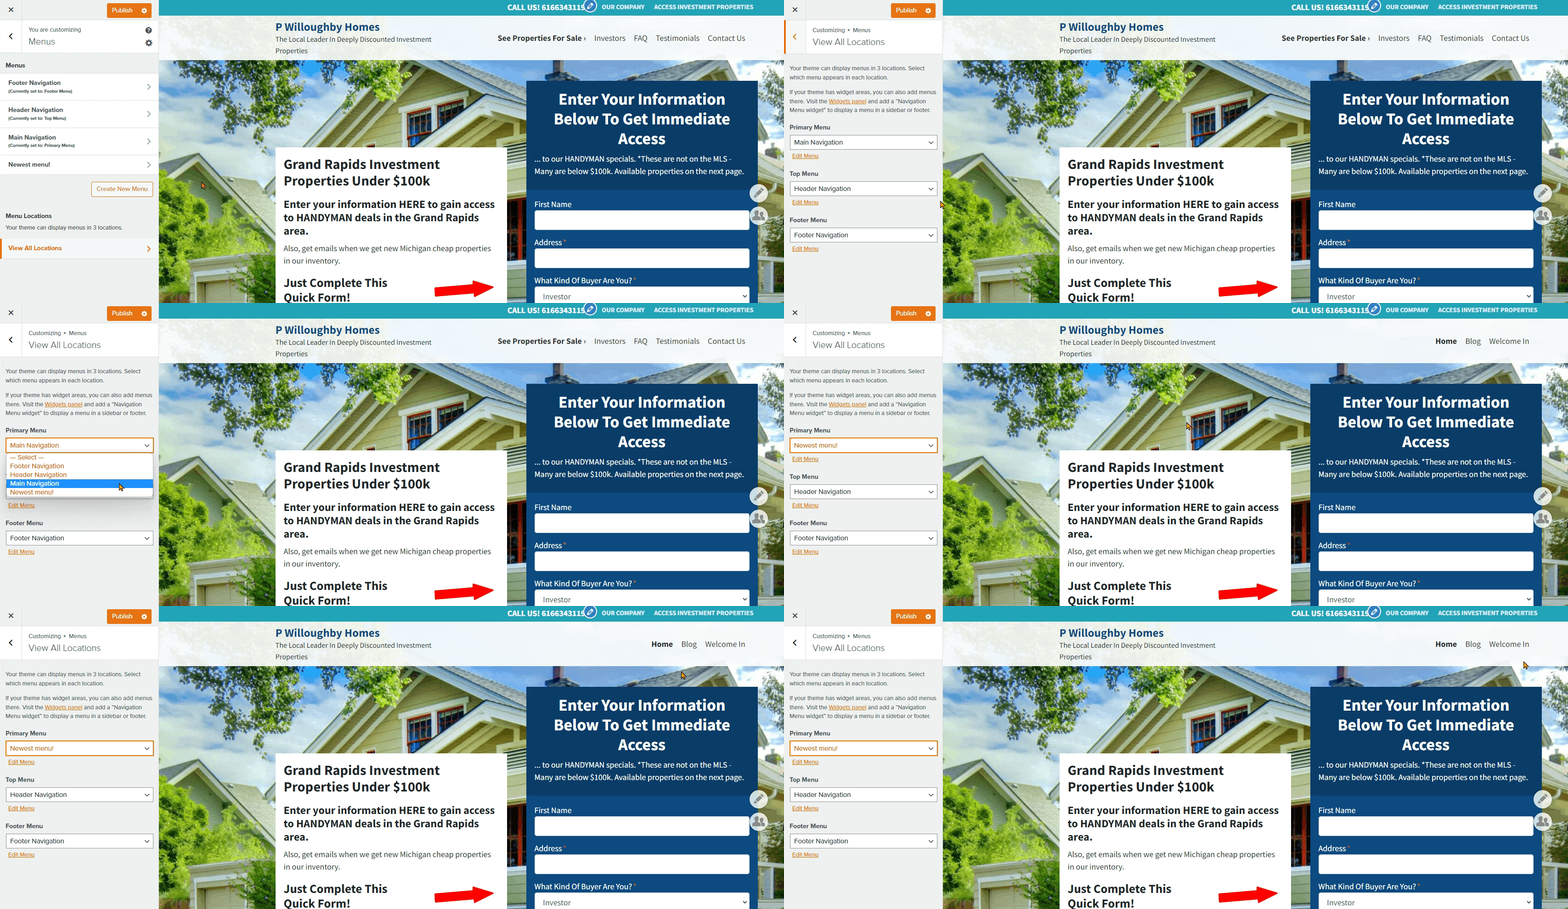
- Menu Locations allows you to set which of your created menus appear in which of the 3 default locations. For example, you can set the menu we just made in the last step to the most prominent area of your site by choosing it under the drop-down menu titled “Primary Menu”
Step 5: Adding Tabs to Your Existing Menus
- From Dashboard > Menus, click on the specific menu that you want to add tabs too, and then click the “Add Items” button on the following page. In this example we are opening up a menu and adding the page named “Investors” to it:
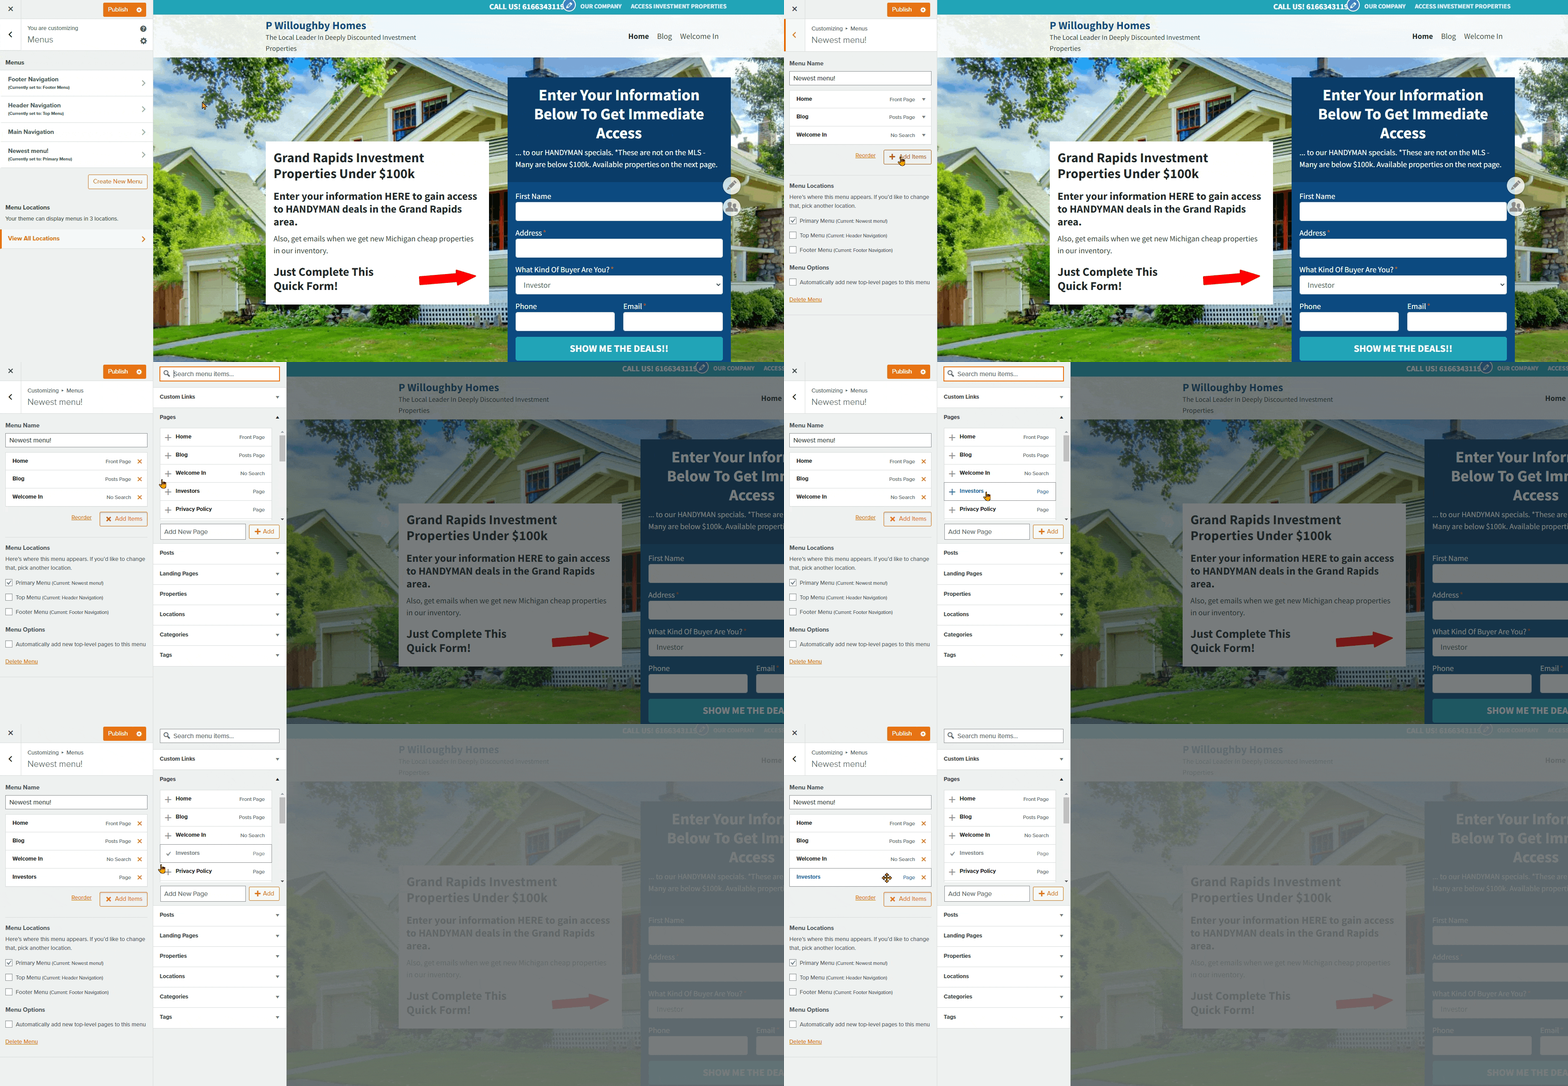
From this page, you can choose which items to add to your menu. The most common choice is “Pages,” which will open by default. But you can add many types of items to your menu, including:
- Custom Links (insert your own URL)
- Posts
- Pages
- Landing pages
- Properties
- Locations
- Categories
- Tags
Step 6: Removing & Renaming Items from Your Menu
- You can remove an item by clicking the arrow to open more settings for that item. There is a “Remove” link that will allow you to delete an item from the menu.
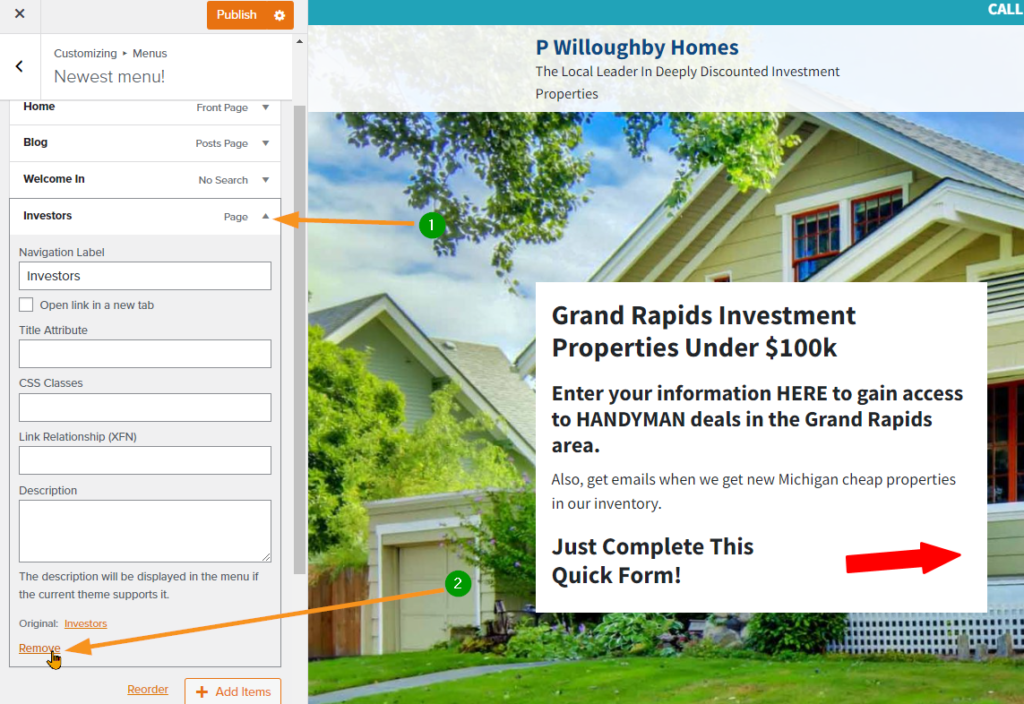
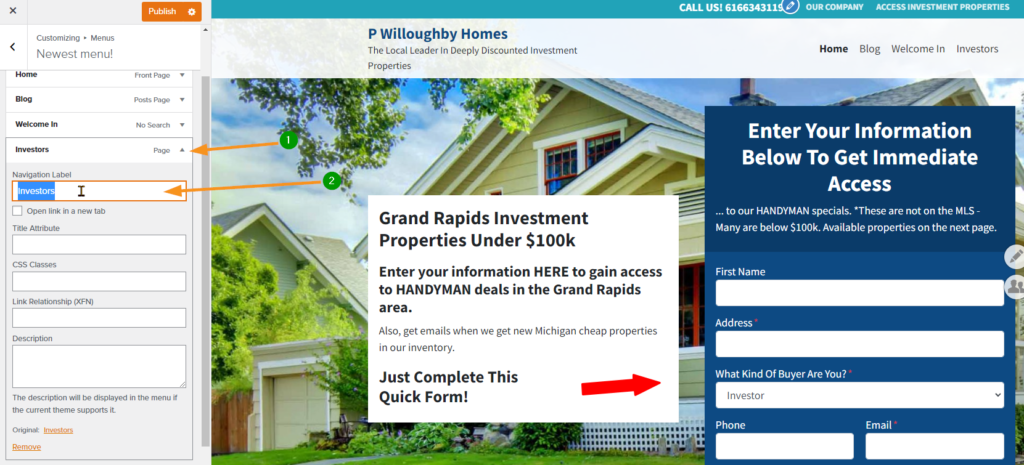
- You can rename an item by clicking the arrow to open more settings for that item. The “Navigation Label” is the box to insert the new title to the item. For example, if you are adding the Testimonials page but you want to have “reviews” on your menu, you’ll type “reviews” into the Navigation Label box. This will not change the SEO title of the page.
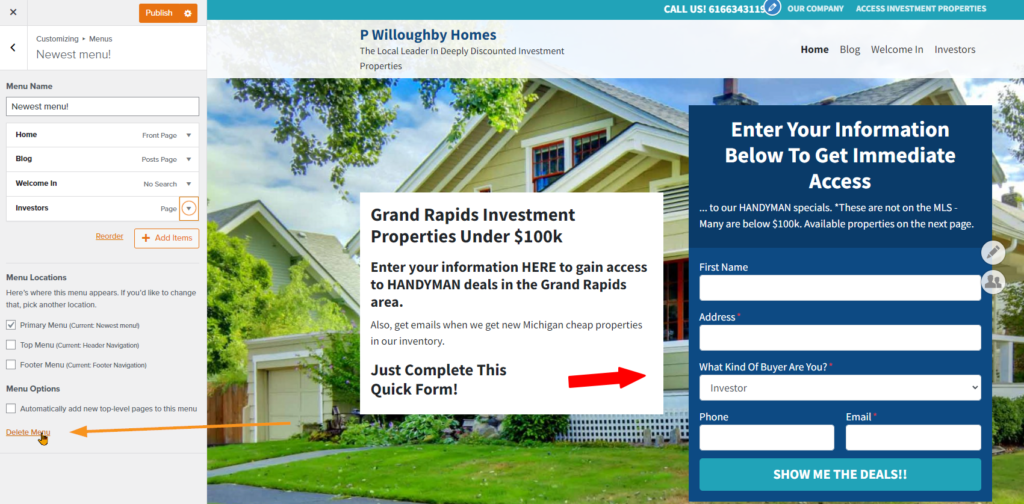
Step 7: How to Delete a Menu
You can delete a menu by clicking the menu title to open options for the menu. Then scroll to the bottom of the screen and select the red link to “Delete Menu.”
Conclusion
We learned a lot about making new menus and editing existing menus. If you would like to make an update and are not finding the option on this tutorial, let us know with a thumbs up/down rating and reach out to us via chat or email. Thank you!
New to Carrot?
Welcome!

Here’s our full guide for what to do when getting started with your Carrot website:
Want Us to do Some
Editing for You?

You are busy doing what you do best, running your business. Leave the site work in Carrot’s hands.
