Leveraging video to create search engine optimized content can be an effective way to enhance the trust and credibility for your business along with creating traffic to your Carrot website.
An automated VideoPost transcription takes those ideas in your head and quickly gets unique content on your site that search engines love – fresh content, higher rankings, more leads!
First, you’ll want to film your video and add it to Youtube. Once you have uploaded your video, you’ll add it to your site as a post then transcribe it.
Let’s get started!
🚨 Note: this VideoPost Transcription service is only applicable to the English language and is available to members with the Content Tools Add-On. VideoPost only works with standard YouTube videos. (You cannot use YouTube “Shorts” with VideoPost.)

This feature is included in our Content Tools add-on! If you currently have only limited access but would like to take advantage of this helpful feature, you can update your membership options.
How to Plan and Record Your Video
What you’ll need:
- Video camera or smart phone to record your video
- Youtube Account
Step 1: Identify your topic
We recommend planning your videos as part of your overall blog content SEO strategy.
You can create videos for your niche topic pages (pillar pages) and/or your supporting blog posts. You can choose video and/or blog topics based on your business expertise or speciality. Learn more:
Step 2: Keyword research and content plan
Once you choose your topic, it’s time to choose the keyword phrases you’ll want to build the content around.
YouTube is one of the world’s biggest search engines, and it’s also owned by Google. By planning your video content with a target keyword in mind, you can optimize both your video AND your blog post to get found in search.
- Write out your general topic or idea
- Do keyword research using Carrot’s Keyword Explorer to determine the relevant keyword phrases that you’ll want to target
- Plan the content for your VideoPost, inserting your relevant keyword phrases. Make sure your content still feels natural and provides a great experience for the viewer or reader
- Use your content as an outline or script to follow when recording your video
Need some help with keyword research? Check out these resources:
Step 3: Record your video
Use your content as a guideline while recording your video.
It’s important to include the targeted keywords you want to rank for in your video, but you’ll also want to keep it as natural as possible. People engage with content they feel is right for “them” that is helpful and interesting.
You can use a teleprompter app while recording if needed, but try to maintain eye contact with the camera to make it feel like you’re talking directly to the viewer.
When recording your video, plan to upload it to YouTube as a standard video, and not a YouTube Short.
If your video is shorter than three minutes in length, use a wider aspect ratio such as 16:9 for long-form videos. VideoPost does not work with YouTube Shorts.
Step 4: Upload recorded video to your YouTube account
Once your video is recorded and ready to go, you’ll need to upload it to YouTube.
- Name your raw video file with your keyword phrase
- Upload your video to your YouTube account
- Keep your video in private / unlisted while you are working on it!
- Use the content you wrote up from STEP 2 to help you write a title and description for your YouTube video. Be sure to include the main keyword phrase you want to rank for in your YouTube title and description.
- Utilize YouTube tags with similar keywords to your primary keywords
- Add a thumbnail image for your video
- Put your blog post URL in your description so the video serves as a backlink
- Make the video LIVE by changing the visibility to Public. VideoPost will only work on YouTube videos that are Public.
Once you’ve added your video to YouTube, you can head back to Carrot to create a VideoPost!
🚨 NOTE: VideoPost only works with standard YouTube videos. (You cannot use YouTube “Shorts” with VideoPost.)
How to Publish a VideoPost to Your Carrot Site
Step 1: Copy the video’s URL
Locate your video on Youtube. The video’s visibility should be set to Public. VideoPost will not work for YouTube videos that are Private or Unlisted.
At the top of the browser, copy the URL in the address bar:
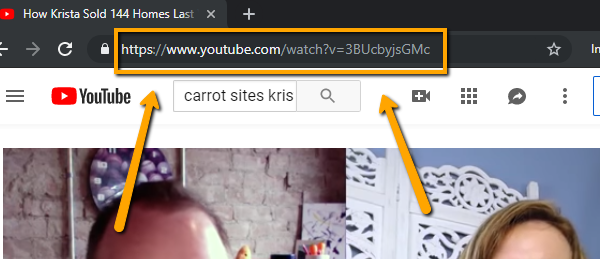
Note: VideoPost transcriptions are only able to be submitted if you use the full URL.
For example, you will need to use
✅ https://www.youtube.com/watch?v=hNTJhhhUSyM
and not
❌ https://youtu.be/hNTJhhhUSyM
Notice the first link has youtube.com and the second has youtu.be without the .com. You must use the link with .com.
YouTube Shorts do not work with VideoPost. A URL with /shorts/ will not work:
❌ https://youtube.com/shorts/hNTJhhhUSyM
Step 2: Add a new post
Go to your site’s content, then find Posts on the left-hand side. Click the “Add New” button on the top right.

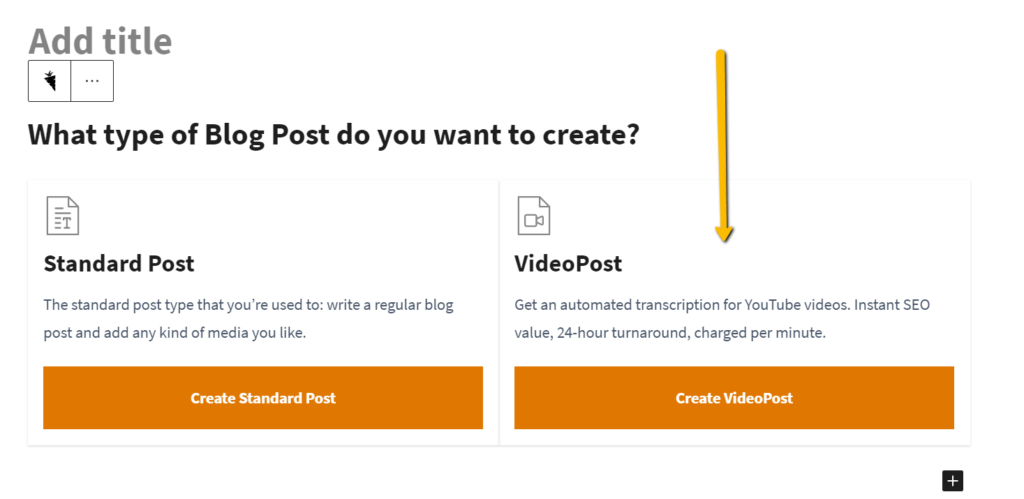
Step 3: Select “Create VideoPost”
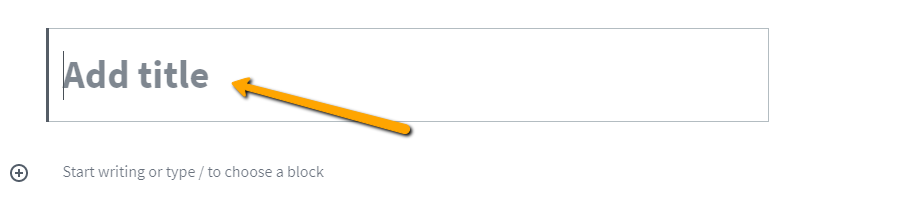
Step 4: *Optional* Title your VideoPost
If you do not add a title, your VideoPost transcription will automatically add the Youtube video title as your VideoPost title.
Step 5: Add your video to the VideoPost
Step 6: Confirm your purchase
You will see the total charge for your transcription prior to submitting the VideoPost to be transcribed. After review, click the button to “Purchase Now” to begin the transcription process.
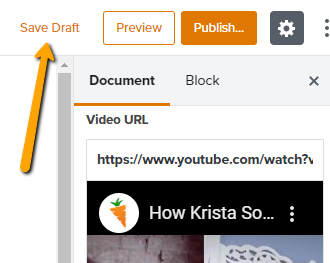
Step 7: Save the post
You can save or publish the post. Saving the draft will allow you to keep the post private until you are ready to publish it. Publishing the post will immediately make the post public on your blog page.
Refresh once the post is saved.
Step 7: Let us do the magic
You’ll see a notification at the top of your post reflecting the status of your transcription. A light orange bar will appear to let you know we are working on the transcript and to check back soon.

We’ll send you an email with confirmation that your transcription has completed. At that point, you’ll see a light green bar at the top of your post confirming the transcription is complete.
Step 8: Edit your transcript and publish the post
Because the transcription is verbatim, we recommend you hop in and update the content. There will be some “um’s,” “so’s,” and other words that can be filler content and hurt the flow of the written post. To best optimize the page, you will want to review this content for grammatical errors and readability.
If you’d like to add headings or other media to the VideoPost content, you’ll need to copy the entire transcript and then paste it to make edits to separate paragraph blocks. We are working on separating content into blocks upon transcription. At this time, your content is entered into a single block, which requires you to copy and paste the entire transcript and it will then show up as individual blocks. Please don’t forget to delete the single-block that you just copied or you’ll have duplicate content. (A fix is coming!)

VideoPost FAQs
I’ve been charged and submitted a VideoPost but it’s showing an error. What happened?
There are 2 common causes for this:
- The video’s visibility should be set to Public. VideoPost will not work for YouTube videos that are Private or Unlisted.
- VideoPost transcriptions are only able to be submitted if you use the full URL with
.comincluded.
For example, you will need to use
✅ https://www.youtube.com/watch?v=hNTJhhhUSyM
and not
❌ https://youtu.be/hNTJhhhUSyM
Notice the first link has youtube.com and the second has youtu.be without the .com. You must use the link with .com.
If you have submitted yours without youtube.com, please reach out to our support team and we will manually start this for you. Thanks!
What types of videos can I use with VideoPost?
VideoPost only works with standard YouTube videos. You cannot use YouTube “Shorts” with VideoPost. For example, you will need to use
✅ https://www.youtube.com/watch?v=hNTJhhhUSyM
and not
❌ https://youtube.com/shorts/hNTJhhhUSyM
Notice the second link includes /shorts/ – this will not work with VideoPost.
Do you transcribe any languages outside of English?
We currently support English-speaking videos and are not able to transcribe any other language at this time. Please reach out to our team at support@carrot.com if you’d like us to include another language.
Can I use another video platform, such as Vimeo, to host videos?
No. You must upload your video to Youtube for the VideoPost transcription to work.
How long does it take to transcribe a VideoPost?
VideoPost transcriptions are typically quite fast and can be added to your site within the hour it’s requested. This has been known to take up to 24 hours. If your video has passed 24 hours and the transcription is not on your site, please reach out to our Support team.
I received an email that my transcript is complete but it’s not on my VideoPost.
If you receive the email and the transcription is not available on the site, please give it a couple of hours to fully populate. Sometimes the email is sent before our transcription service and your site have fully connected.
My transcript won’t allow me to add spaces and heading to the content. What do I do?
If you’d like to add headings or other media to the VideoPost content, you’ll need to copy the entire transcript and then paste it to make edits to separate paragraph blocks.
We are working on separating content into blocks upon transcription. At this time, your content is entered into a single block, which requires you to copy and paste the entire transcript and it will then show up as individual blocks. Please don’t forget to delete the single-block that you just copied or you’ll have duplicate content. (A fix is coming!)
I don’t see VideoPost when I add a blog post. How can I access this?
If you are not seeing VideoPost as an option when you are adding a new blog post, it’s likely you have a plan that does not have access to that feature. You’ll want to update your membership and get the Content Tools add-on in order to take advantage of this option for your blog posts.
Conclusion
Getting a video to rank in YouTube and Google can help drive traffic and leads for your business.
Once you’ve published your VideoPost, make sure to promote both your blog post URL and the Youtube video on your social media accounts. This will create momentum for your blog post and video to help them continue to grow over time.
Learn More:
- How to Create Real Estate Content in Under 10 Minutes
- Agent Video Marketing Playbook
- Watch: Youtube SEO: Get More Leads Using Videos with Your Carrot Site
- Watch: YouTube SEO & Ranking in Google Using Video

