Capturing leads is fantastic, but responding quickly is key to closing deals. This tutorial will walk you through setting up Admin Notifications and Customer Autoresponses for forms on your Carrot website.
This guide will show you how to set up, edit, and create new notifications so you can:
- Instantly notify yourself and your team about new leads via email or text message.
- Automatically send custom responses to your leads, even setting them up to go directly to your cell phone.
- Manage all your form submission notifications, including adding multiple email addresses and getting SMS notifications.
We’ll help you get these essential notifications dialed in so you can wow your leads with super-fast responsiveness!
📝TABLE OF CONTENTS
Default Notifications
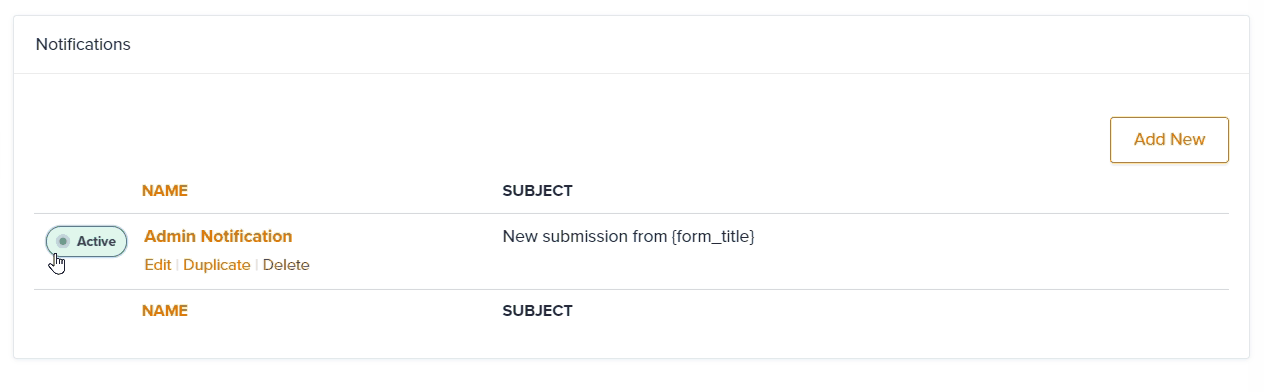
Some forms have two default notifications: Admin Notification and Customer Autoresponse (aka Lead Notification).
The Customer Autoresponse is an email notification that is sent immediately to your leads after they fill out a form on your website. These notifications are known as autoresponders.
The Admin Notification is an email and/or SMS text message notification sent to the website admin every time a lead submits a form. Every default form has an “Admin Notification” built into it.
These default notifications can be updated so you control exactly what is being said.
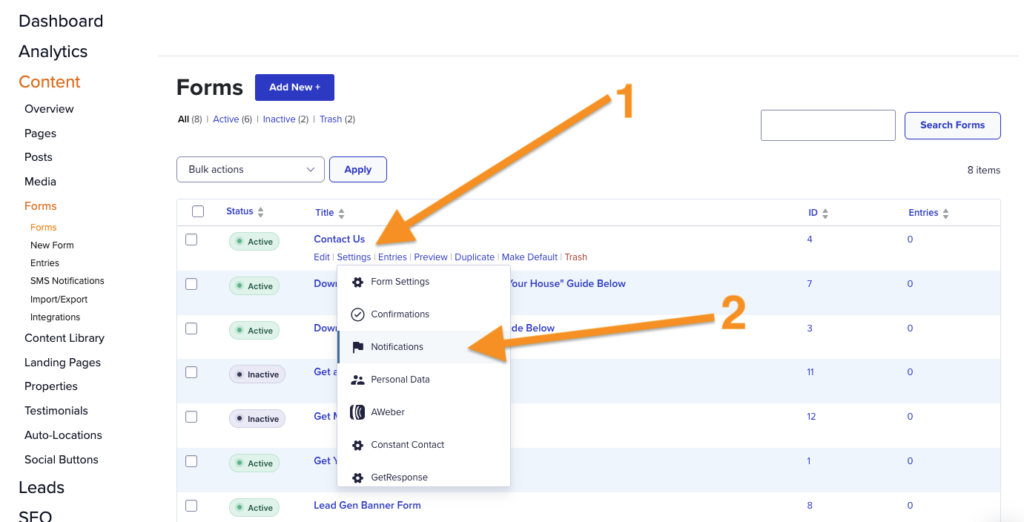
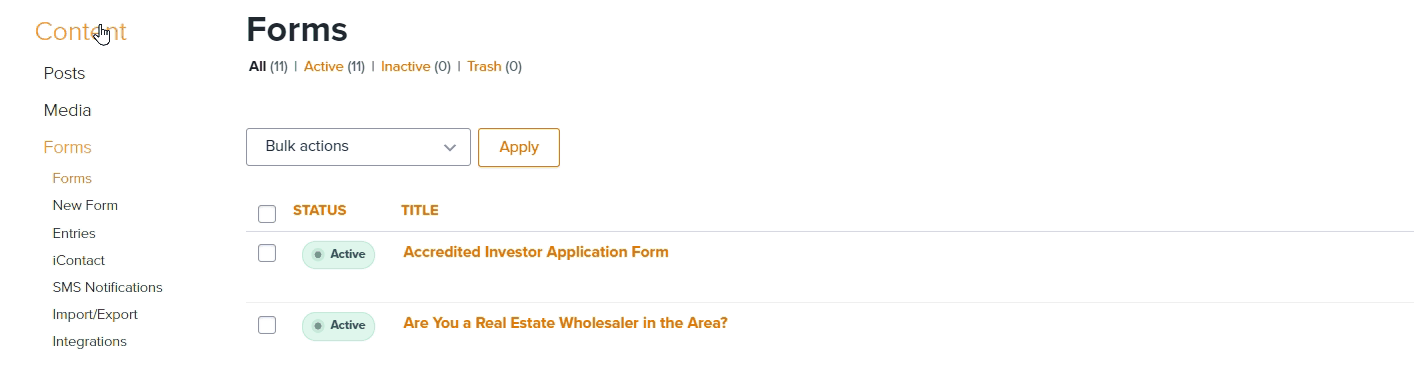
You can access your form’s notification settings from your main forms page by hovering over a form’s title. From the menus that appear, go to Settings, then click Notifications in the drop down menu that appears:
You can also access the settings from a form’s editor. This 🔗link will take you to your form settings.
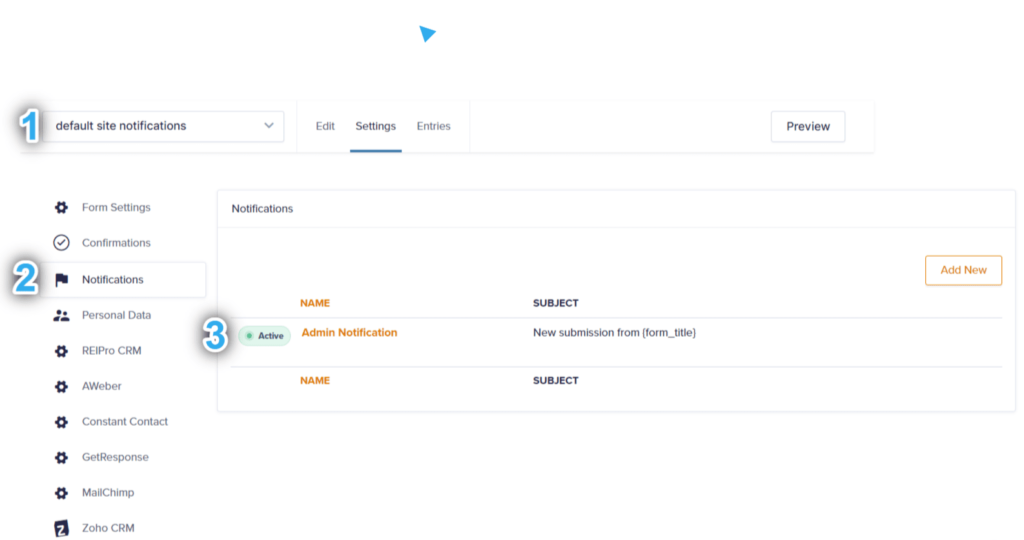
Here’s what you will see when reviewing the Notifications settings.
1️⃣ Switches to a different form, 2️⃣ access Notifications, and 3️⃣ toggles on/off a published notification. Click the title to edit to the notification.
Email Notification Settings
Status Settings
Quickly toggle on/off the active switch to change the status of a notification.
Sender Settings
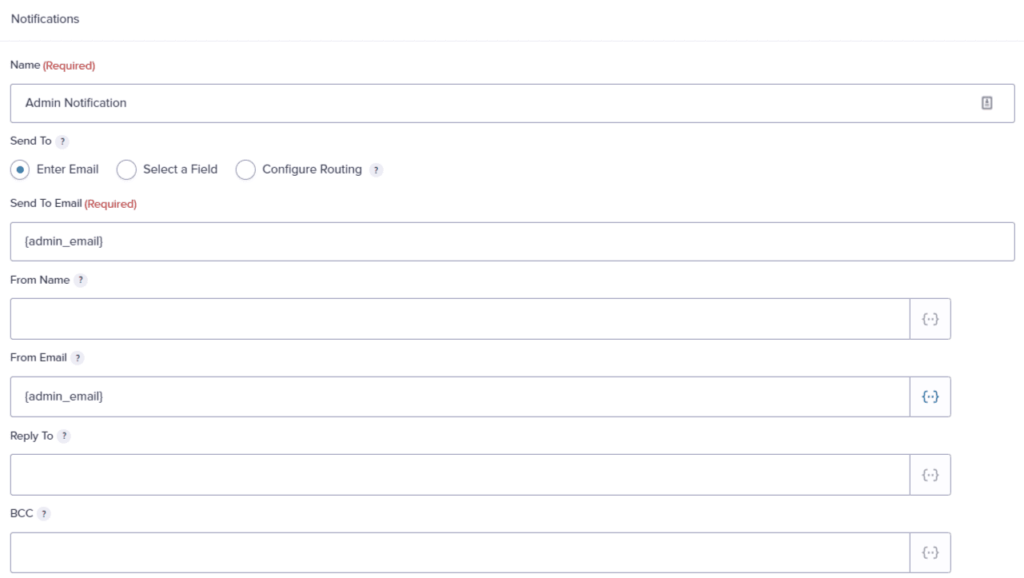
- Name: This is the name of the autoresponse you will edit and see in the list of all other autoresponses
- Send To Email: This is the email where you want to receive notifications of new leads.
- By default, it will be set to send emails to the admin email you used when you signed up for Carrot. You can always change the admin email in your account by following these steps.
- You can add multiple emails to this area via a comma-separated list. Example: {admin_email}, assistant1@gmail.com, assistant2@gmail.com
- From Name: This is the name that will appear in the email inbox on the receiver’s end
- From Email: This is the email address that will appear in the email inbox on the receiver’s end
- Reply To: This is the email all replies will be sent to. It is the admin email by default.
- You can add multiple addresses in this line if you want multiple persons to be notified when a lead comes in. To do so, you’ll add a comma then space between each email address. For example: {admin_email}, assistant1@gmail.com
- BCC: This is a way to send a private email to someone. A blind carbon copy is a person who receives an email copy but whose email address is invisible when the email is sent.
- Subject: This is the subject line that will appear in the email inbox on the receiver’s end
Message Settings
- The email has a subject line above the message
- The message can be edited below the subject box
- You can insert required fields into the text by clicking the small down-arrow box on the far right and choosing the field you want in the message. Any form fields that are in the message will appear with a curly-cue bracket, such as {all_fields}
- If you’re adding fields into your notification, we recommend adding context. For example, adding {last_name} might be confusing if the last name is “Todd” but adding Last Name: {last_name} to the email notification will insert their response into the email and you’ll have context with the “Last Name:” part.
- If you see words in square brackets, such as
[company]or[phone], then these are shortcodes and they are updated in your site’s settings if you want to include your overall site information within an email. Check out these tutorials to learn more:
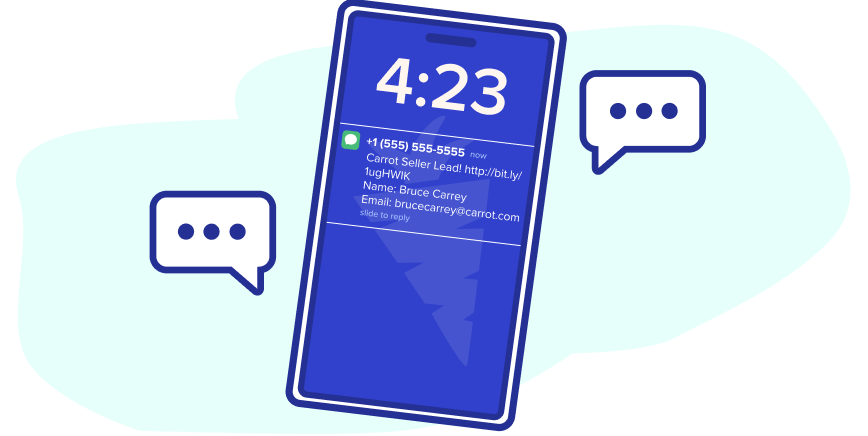
Admin SMS Notifications
Want to get text message notifications of new leads sent directly to your cell phone number? You can manage that via SMS Notifications:
Accessing SMS Notification Settings
Access your SMS notifications by going to Content > Forms > SMS Notifications. There, you’ll see a handful of forms with an inactivated status that can be toggled on/off. SMS notifications are sent to your default phone number in your site’s settings.
ℹ️NOTE: T-Mobile and Sprint have policies in place that prevent personal data from being sent via notifications. You’ll instead receive a link within your notification that takes you to your lead in your Carrot Lead Dashboard.
Editing SMS Notification Settings
- Select the form to edit the SMS notification.
- Enter your mobile number. Leave the mobile number field blank if you are using the mobile number under your company info.
- (Optional) Select any form fields you want to include in the text message.
- Click “Save Notification.”
That’s it! Feel free to test it out on your site, and just repeat the same process for each form on that site that you would like to receive SMS alerts from.
FAQ
What is my admin email?
Your admin email is the email you used when you signed up for Carrot. You can always change that in your account by following these steps.
What should I include with my lead’s email notification?
Great question! Any required field will have an answer. If you’re looking to personalize your message, using a name or address can make a big difference—especially if it’s in the subject of the email. Be sure to use the message settings to insert field data where you can ensure the message will be personalized for a great experience.
Can I add multiple email addresses to my email notifications?
Yes. Use commas to separate email addresses. It’s important to note the first email address is the one leads will always use to send a reply. All subsequent email addresses are only sent a reply if the lead chooses the “reply all” feature when sending a response.
Can I send an SMS or text response to my leads?
That would be awesome! We aren’t built out for this and would love to know if you’d like to see this as part of the product. Reach out to our Support team anytime to let us know if there’s something you’d like to see.
Learn More
New to Carrot?
Welcome!

Here’s our full guide for what to do when getting started with your Carrot website:
Want Us to do Some
Editing for You?
You are busy doing what you do best, running your business. Leave the site work in Carrot’s hands.