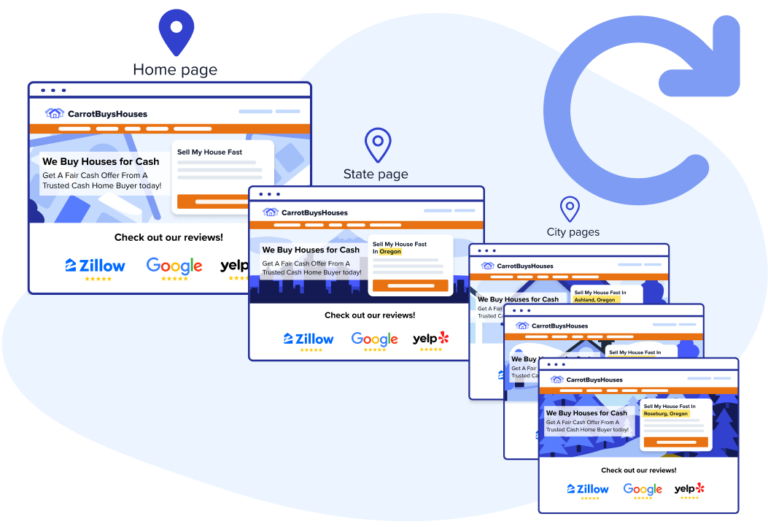
An Auto-Location page is a feature that allows for pages to mirror the homepage content without having to manually update each individual page created. Use these pages to expand your site’s secondary market reach without having to worry about maintaining anything other than the content on the homepage.
In this tutorial, we’ll show you how to use this feature and provide a video walkthrough.

This feature is included in our Content Tools add-on! If you currently have only limited access but would like to take advantage of this helpful feature, you can update your membership options.
Get Ready To Use Auto-Location Pages
Before getting started, be sure to refer to the Auto-Location page checklist in the feature admin page to make sure your homepage is ready to be connected to Auto-Location pages.
Auto-Location pages are created to “mirror” the homepage, reflecting any updates you make to homepage/parent page automatically. So it’s important to update your homepage prior to using Auto-Location Pages.
🚨 Remember: Be sure to personalize your homepage before creating new Auto-Location pages. You can use Carrot’s AI Rewrite tool to quickly rewrite your homepage. Add a Business Description in your site’s Settings prior to using the AI Rewrite tool to personalize your content and make it unique to your business.
Video Walkthrough of Auto-Location Pages
We’ve provided this brief video walkthrough of how to use Auto-Location pages. For a full step-by-step tutorial, keep reading below.
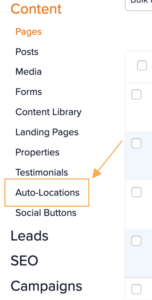
Step 1: Navigate to Auto-Locations in the Content menu
From your site dashboard or account manager, click on “Content” to expose the sub-menu on the left hand side of your site navigation. Clicking on Auto-Locations will take you to an initial start screen that will guide you through the initial steps of getting started.
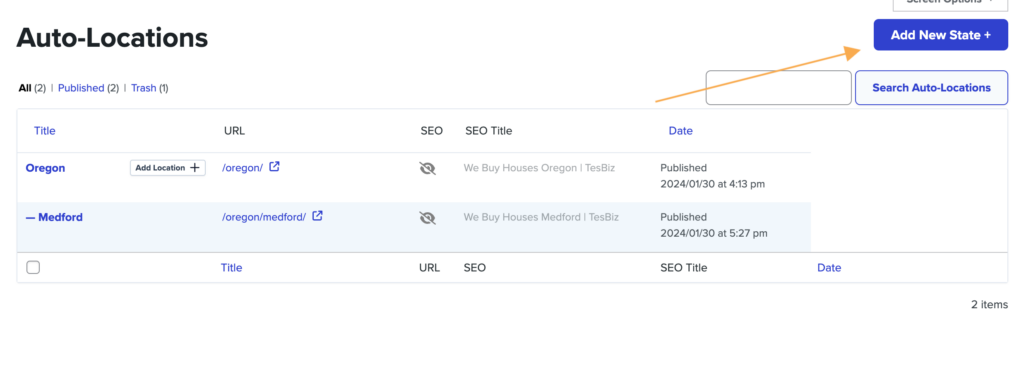
Step 2: Creating a state Auto-Location page
Making a state Auto-Location page helps establish the Location hierarchy for additional city Auto-Location pages you add later on–it’s also great for bringing in additional site traffic! See this tutorial for more on why we start with state page creation.
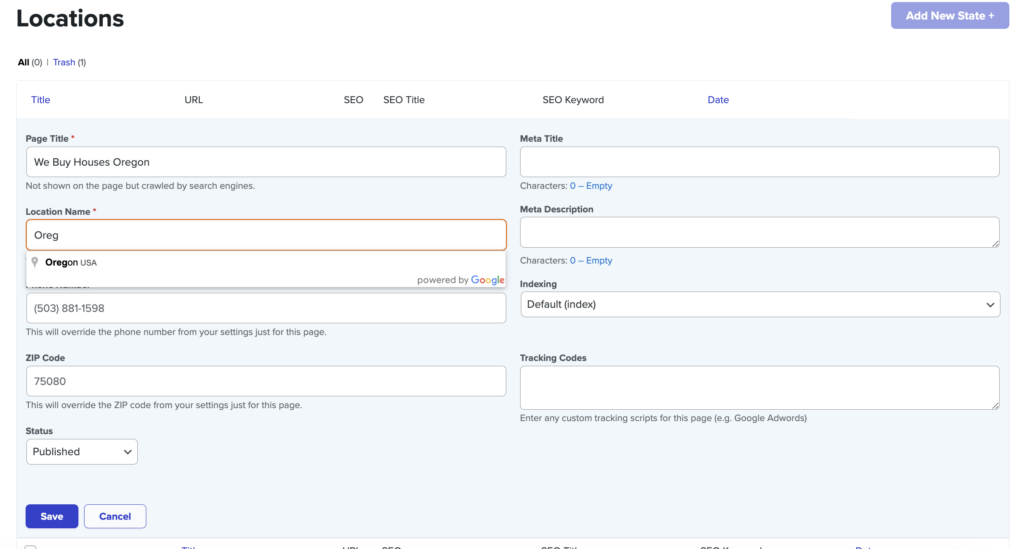
Fill out the required fields (Page Title; Location Name) before reviewing remaining fields that you may want to edit–when typing in your Location name, an autofill menu should appear. This ensures the appropriate city or state is set (and conveniently narrows your options for adding city Auto-Location pages–showing only relevant cities/areas under the specified state).
Be sure to click “Save” to finish the first Auto-Location setup!
Step 3: Add a City page
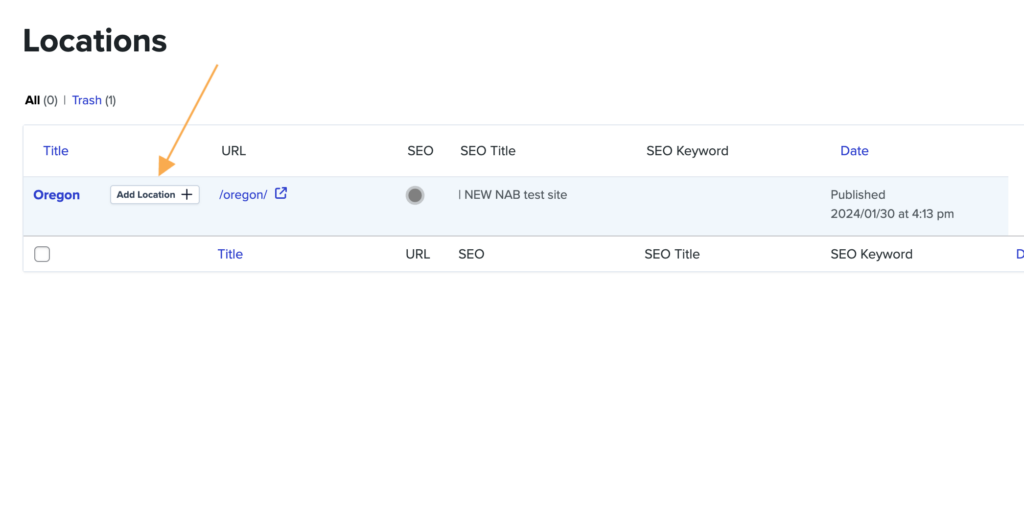
Once your State page is created, it’s simple to add a City page: click “Add Location” to the right of the State page title, and the exact same form as before will appear–only now, a City page will be generated.
Step 4 (optional): Add an additional State page
For some members with primary markets operating on the border between states, it may be advisable to have multiple State Auto-Location pages. Check out this overview of Auto-Location pages to see if your site would benefit from this approach.
If so, you’ll simply need to select the top right button to add an additional state page.
Conclusion
Adding Auto-Location pages can be accomplished in only a few steps, but it’s important to remember you’ll need to ensure your homepage and site are both ready before implementing. Refer to the Auto-Location pages checklist (located in the lower right hand corner of the Auto-Locations main page) prior to starting to give you the best chance of an easy, breezy Auto-Location pages launch!
Learn More:
- Determine The Location Focus of Your Home Page
- Location Page Strategy
- How to Create Location Pages Manually
New to Carrot?
Welcome!
Here’s our full guide for what to do when getting started with your Carrot website:
Want Us to do Some
Editing for You?
You are busy doing what you do best, running your business. Leave the site work in Carrot’s hands.