In this tutorial, we’ll show you how to update the background image and edit the content that appears in the Hero Block on your homepage.
A Hero Block is that crucial section at the top of your website—it’s your visitors’ first impression of your business and your most powerful opportunity to convert those visitors into leads. Each Carrot site comes with a Hero Block pre-installed on your homepage, featuring text, a form, and a background image working together to capture visitor information.
While your site launched with a default Hero Block, we strongly recommend personalizing the background image to reflect your local area and business. A localized image helps you establish credibility and rapport with visitors faster than a generic image, ultimately leading to better conversion rates.
You can add a Hero Block to other pages of your site as well, though remember that each page can only contain one Hero Block.
Let’s get started!

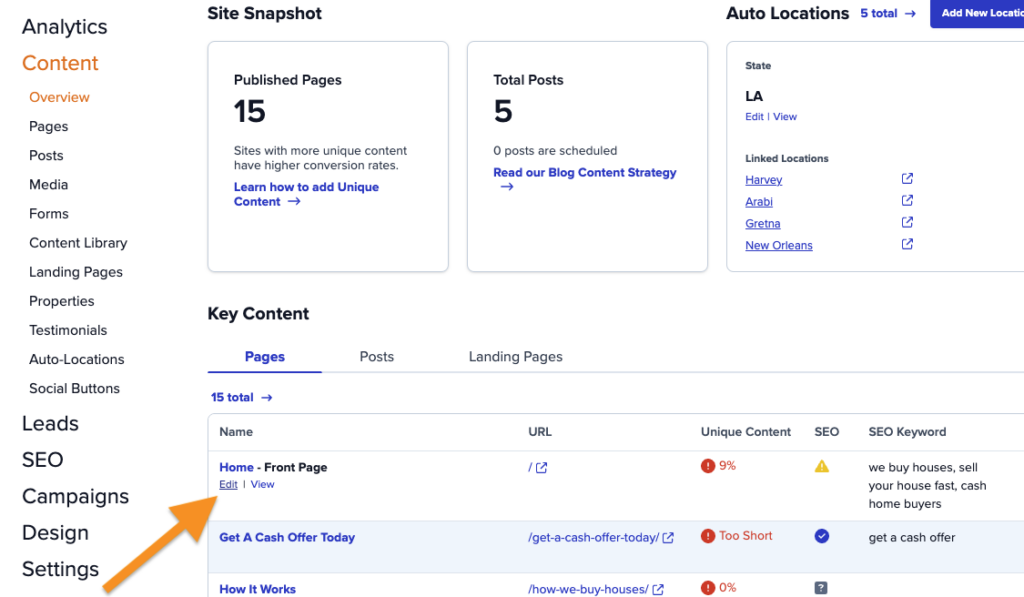
Step 1: Click on Content to Access Your Pages

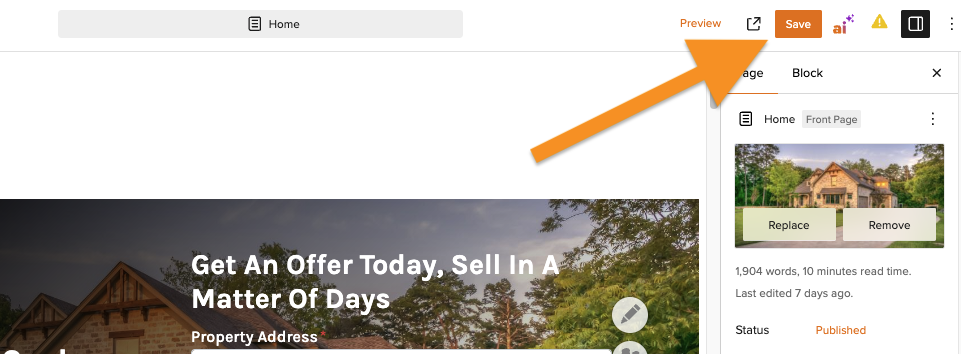
Step 2: Click on the Page to Update or Add Your Hero Block
Your home page will have a bold “Front Page” next to the title. Click to edit this page if you want to edit the home page Hero image.
Any page can have a Hero block added to emulate the home page, but a Hero block can only be used once per page.
Hover over the page you want to edit and click the “edit” button or click the title to open the page for editing.
Step 3: (optional) *Add the Hero Block if needed
If you want to add a Hero block to a page that doesn’t already have one, click the orange plus sign in the top left corner of your screen and search for the Hero Block. Then click to insert it.
*Note* There will be a default image and text within the hero block. This is to show you what the block will look like. The steps below will walk you through updating the image and adjusting the form over the hero image.
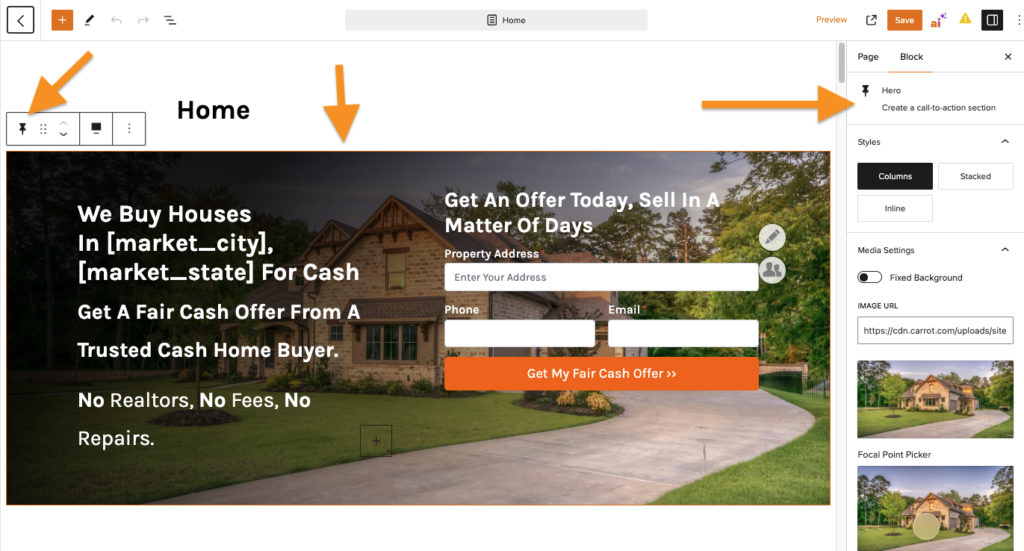
Step 4: Click Inside the Hero Block to Make Edits
To begin making edits to the Hero block, select the Hero block by clicking it.
You’ll see that it’s selected when the orange outline appears around the entire block. The block toolbar for the Hero block will also show a Thumbtack icon:
ℹ️ Your default hero design is determined by the style you chose in the design section. Click here for more information if you wanted to make changes to the overall design theme of your site.
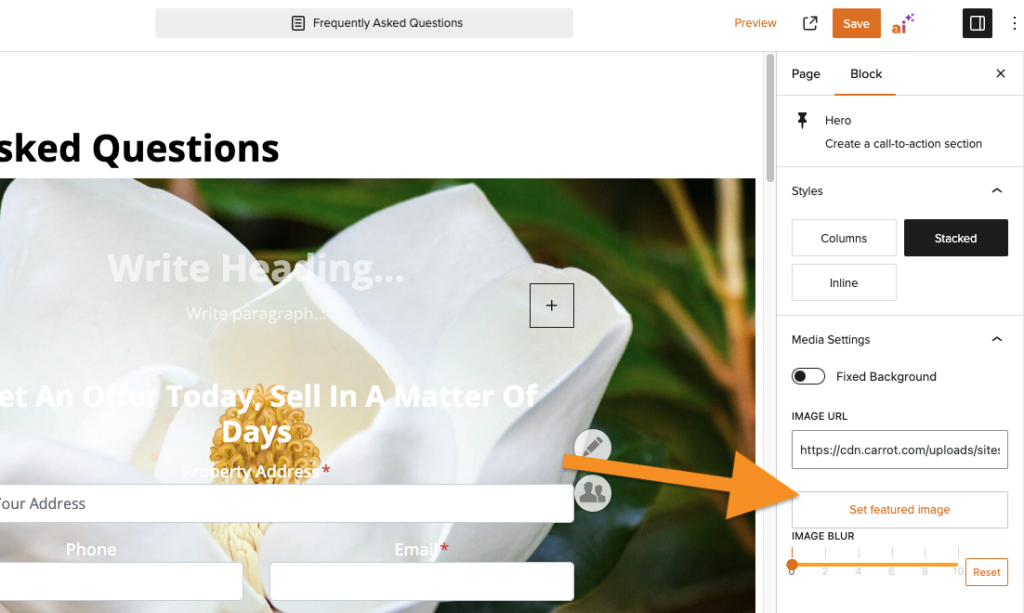
Step 5: Update Your Background Image
To update the background image, navigate to the sidebar settings for the Hero block. (You may need to toggle the sidebar settings area on.)
Click “Set featured image” to choose a new background image for your Hero block. You can choose an image from your Media Library or upload a new photo.
You’ll want to use a local image to use for your home page’s Hero section. It should be a .jpg or a .png file and have a minimum size of 1920×800 to avoid any unnecessary stretching of the image.
Be sure to Save your work, and then hit Preview to see your updated homepage.
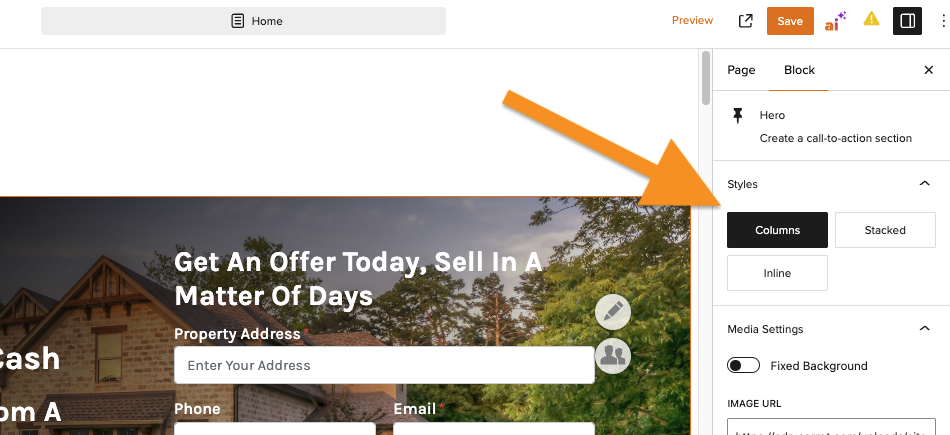
Step 6: Adjust Your Hero Style Settings
Want to adjust the placement of your Hero Block text and form? In the sidebar settings, you’ll see three options for your hero’s style: Columns, Stacked or Inline.
- Columns: the text is on the left side and the form is on the right side of the hero
- Stacked: the text is above the form
- Inline: the text is above the form and the form’s fields (boxes) are all on the same line (best for 2 or less fields)
Step 7: (optional) Adjust the Form
When you launched your site, we created Forms for you to capture info that your leads submit. One of these forms is automatically attached to the Hero block on your home page.
If you want to change the Form that appears in your Hero Block you can do that via the Call to Action section inside the sidebar settings area. You can select a different Form to use, change the info that appears or even change the size of the Form’s button.
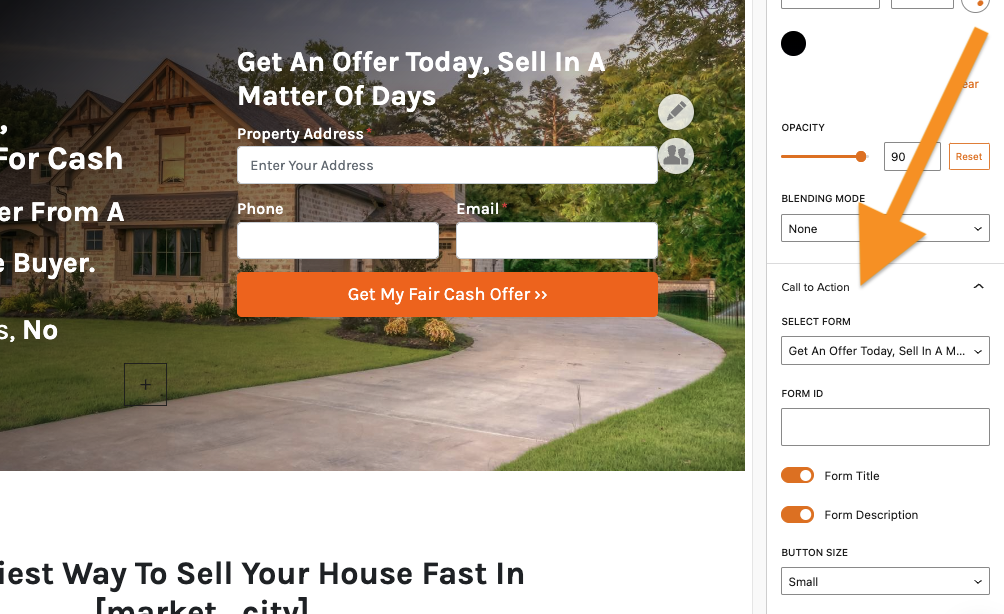
🚨 Note: You’ll want to keep your Hero’s form to 3 or fewer fields for maximum conversions.
Step 8: (optional) Editing the Text in the Hero Block
You can edit the text that appears in your Hero block by clicking into the Heading or Paragraph sections.
With that said, please proceed with caution when adjusting this written content as we have included the information here based on best practices for SEO (search engine optimization) and converting your website visitors into leads.
The bracketed bits of info seen here are called shortcodes and they are the magic behind many of our most powerful SEO features.
Even though you see [market_city] while editing your site, your visitors would see the city you do business in that you told us when signing up. You can change the info that is auto-populated into the shortcodes at any time by updating your settings.
When you’re getting started, we don’t recommend deleting your shortcodes from the Hero block. Learn more:

Step 9: Save Your Changes and You’re Done!
Conclusion
The Hero Block is one of our favorite ways to customize your site and increase conversions. Be sure to update it with a background image unique to your business! Here’s some free images to use for your hero section.
Learn More
- Update and Edit Your Forms
- Customize Your Pages with the Visual Editor and Blocks
- Explained: Shortcodes
New to Carrot?
Welcome!

Here’s our full guide for what to do when getting started with your Carrot website:
Want Us to do Some
Editing for You?
You are busy doing what you do best, running your business. Leave the site work in Carrot’s hands.