A form in the hero section (the top section of a page) is a great way to ensure that you’re providing ample opportunities for visitors to convert when they land on a page. It also prevents them from having to search or scroll around the page to find the action you’d like them to take!
Follow the below steps to add a form to the hero section of any page on your site:
Step 1: Go to pages and click the title of the page you want to edit
Step 2: Convert to blocks (if needed)
Please note: this only applies to sites launched before November 25, 2019. If you haven’t already, take advantage of Carrot’s new Visual Editor and convert your page to blocks. You’ll know if you need to do this because you will see a pale orange box at the top of the page with a button to “Click here to convert all classic containers on this page only.” Click that option to convert the editor to blocks.

Step 3: Change Hero “Style” To Columns
To enable your form to appear correctly in your hero section, you want to change the hero style to accommodate the form side-by-side with any text that is there. To do so, click in the hero section (click on the background image) and in the right menu, click on “Columns” under “Styles”
If you don’t see an image as the first item on the page that doesn’t have the options presented in the screenshot below, it’s possible your hero section is not activated. In that case, you’ll want to add a hero block first. Here are the details on how to get that inserted.

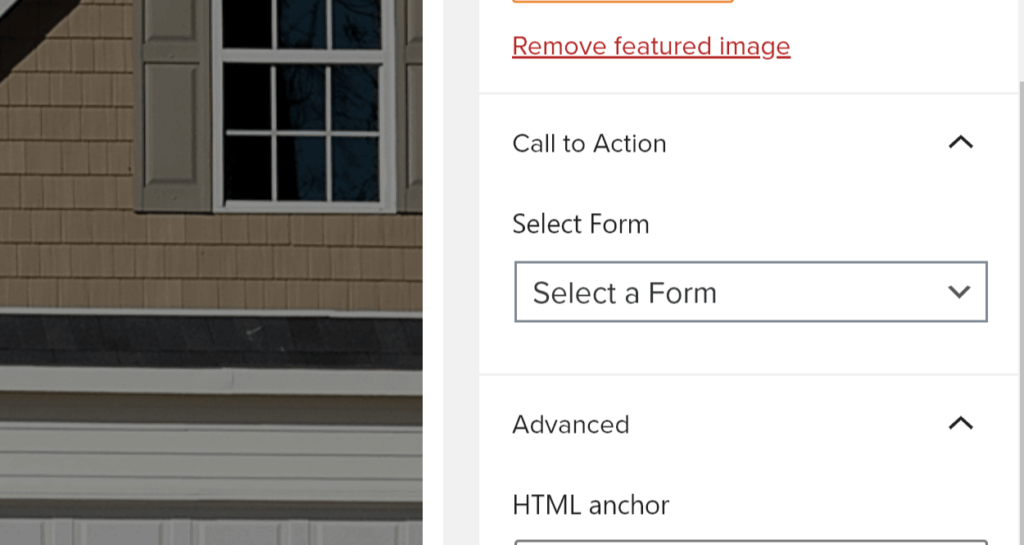
Step 4: Select The Form You Want To Include
After switching the hero style to “columns,” scroll down in the right menu to the “Select Form” drop-down. Here, you can select the form that you want to add to the header.
Your selected form should now appear in the right column of your hero section.

Step 5: Edit the text/elements in the left column (if desired)
Depending on how much text you previously had on your page, you may want to edit that text to alter how those elements appear alongside the form. Please note: on mobile devices, the text on the left will “stack” on top of the form – meaning that whatever is to the left of the form will appear above the form.
Step 6: Click Update and You’re Done!
