Block patterns are a really great way to streamline some of the editing work you will be doing to your site! These were formerly referred to as Reusable Blocks, and allow you to create a pattern of multiple blocks that are grouped, so you can save time if you need to add that pattern of blocks to multiple pages. There are two types of block patterns, synced patterns and non-synced patterns.
Synced patterns – If you add a synced pattern to multiple pages, then update the pattern, it will update the content in every instance of that synced pattern. Use these when you anticipate needing to make mass changes to your pattern on multiple pages.
Non-synced patterns – These are local to the page you are adding it on, and will only be available on that page.
Let’s dive into how you can create and manage your block patterns! If you already know how to create a block pattern but would like to know how to manage them, click here to jump further into the guide!
Part 1: Creating Block Patterns
Step 1: Craft Pattern of Blocks to Be Saved
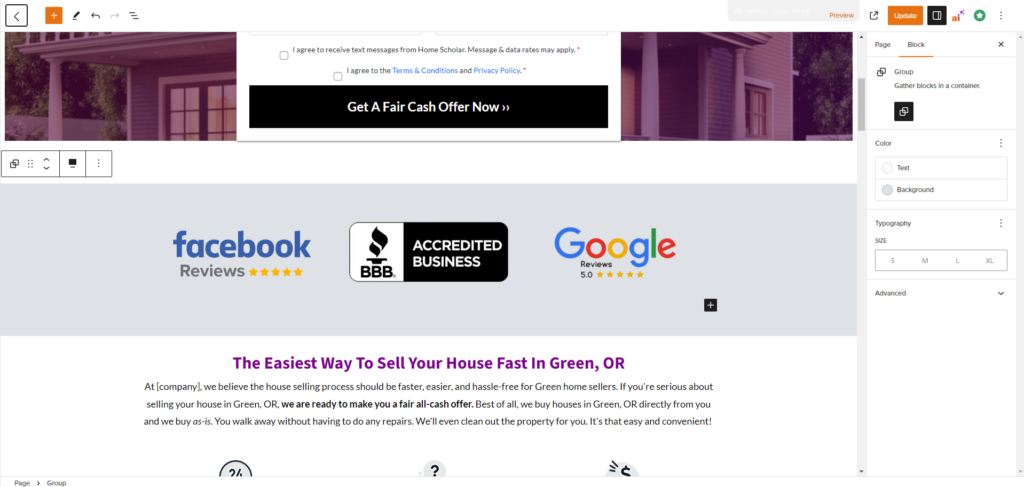
First, you’ll want to use the visual editor to create a pattern of blocks for your specific use case. This can be anything really, but for this example we are going to use a “credibility bar”. This is a good way to help increase your conversions by showcasing your credibility and trustworthiness to visitors of your website.
Below we have a standard group block, with a columns block inside of it, with image blocks inside each column:
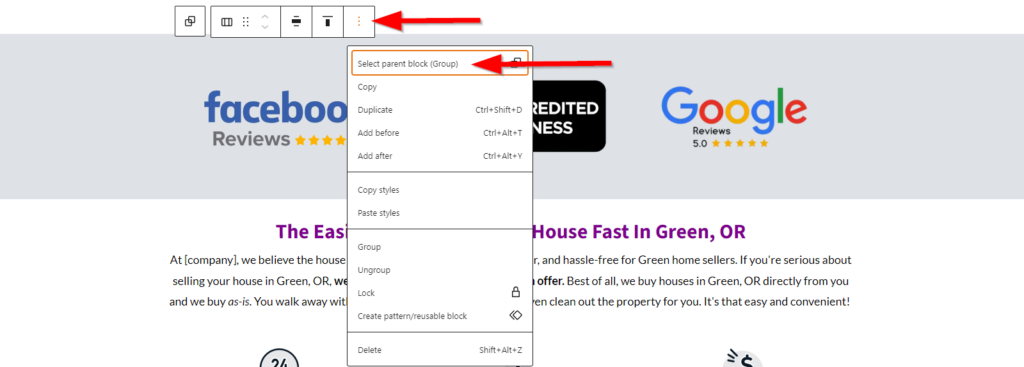
Step 2: Select the Parent Block
The parent block is the “up-most” block when you have blocks nested inside of other blocks. In this case it is the group block. You can select the parent block by using the 3 little dots on the block toolbar, then use the option to “select parent block”. If you are multiple “child blocks” in, you will do this until the option disappears.
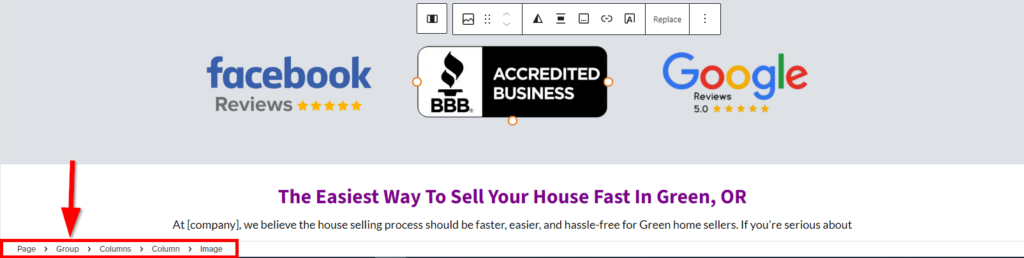
Alternatively, you can use the block navigation in the bottom-left hand corner of your editor to select the left-most block. The “page” option does not count as a block.
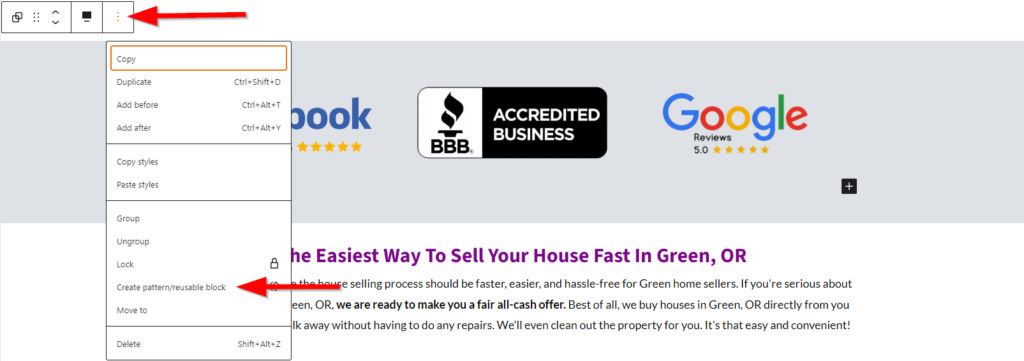
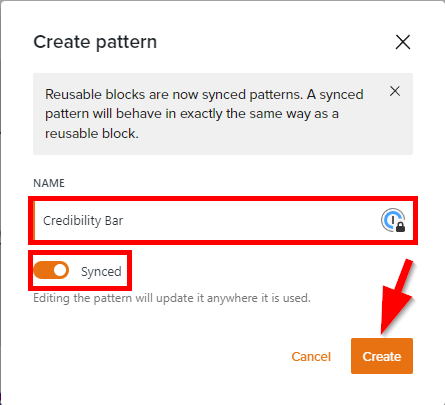
Step 3: Save Your Block Pattern
Now that you have your parent block selected, use the 3 little dots on the block toolbar, then select “Create pattern/reusable block”.
After clicking the option to create your block pattern, name it and configure it to be synced if you want to use it for multiple pages. Remember, if you update a synced pattern, it will update the pattern on all pages that it is placed on.
Note: Block patterns will have a purple highlighted border in the editor when you hover your mouse over them. Also, if you have a full-width element in your block pattern, it will not appear full-width in the editor, but will remain full-width on the page.
That’s it for creating block patterns! Synced patterns will be stored in your block pattern manager, where you can see, edit, and delete your saved patterns.
We’ll dive into managing your block patterns in the next section:
Part 2: Managing Your Block Patterns
Step 1: Save Your Work, Then Head to the Pattern Manager
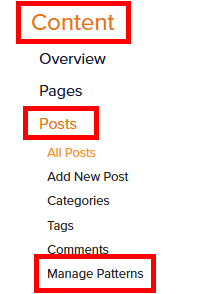
Clicking the “Manage Patterns” button will bring you to a new page, so be sure to save your changes first before going to the pattern manager. After saving, back out of the editor to go to your site dashboard:

Then in your site dashboard, go to Content > Posts > Manage patterns:
Step 2: Editing Patterns
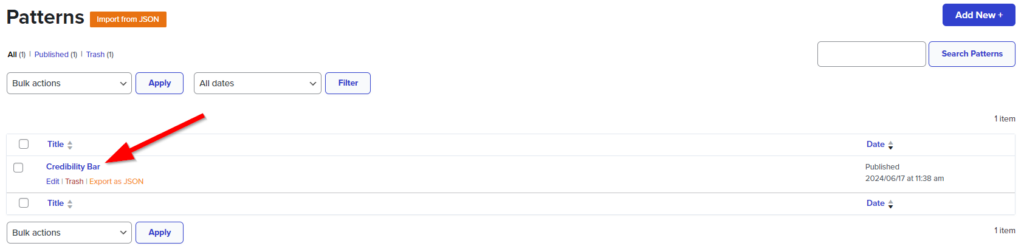
You should now be in the Block Pattern Manager! This is where you can add, edit and trash patterns as if they were pages.
Keep in mind that if you update a synced pattern here, it will update that pattern on every page that it is placed on. If you delete it, it will be removed from all pages it is placed on.
In the block pattern manager, click on the title of a pattern to edit it:
Step 3: Make Changes to Your Pattern, Then Save
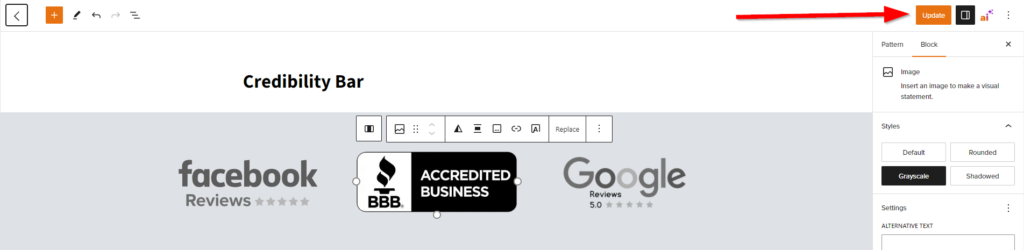
You should now be in a page-like editor, where you will have full functionality of the visual editor to manage your pattern. You can swap out images, change colors, change text, etc. Make your desired changes, then press the “Update” button like you would for a page or post.
Voila! You’ve successfully created and managed block patterns. Next up, in Part 3 we’ll go over how to explore patterns and add the existing ones to your page.
Part 3: Exploring and Adding Patterns
Step 1: Open the Block Inserter
In the page editor, you can explore and add any patterns that you have created or managed from the first 2 parts. To do this, click the + button in the editor to bring out the block inserter:

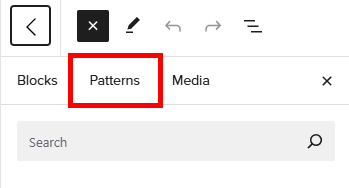
Step 2: Open the Patterns Tab
In the block inserter, click the “Patterns” tab at the top:
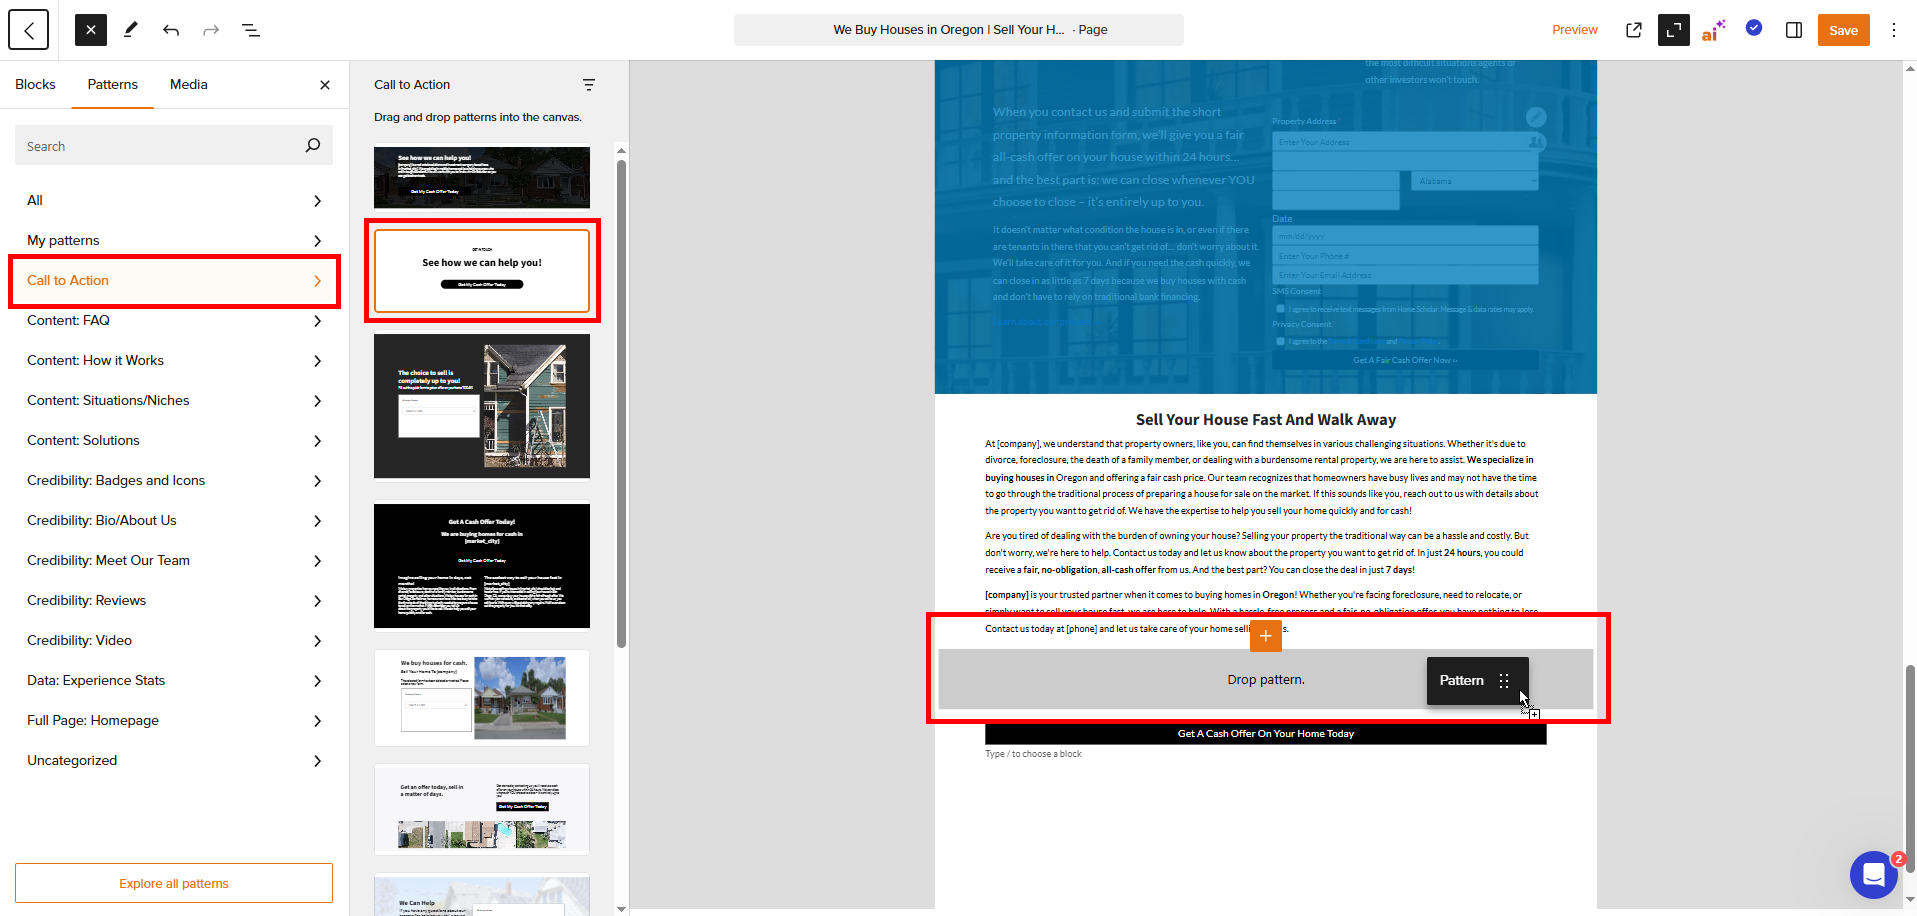
Step 3: Explore!
In here you can see a list of all pattern categories, as well as search them by name! Clicking into a category will show you a list view of all patterns within that category. Clicking on a pattern will add it to the bottom of the page, or you can drag and drop a pattern into the section you want on the page!
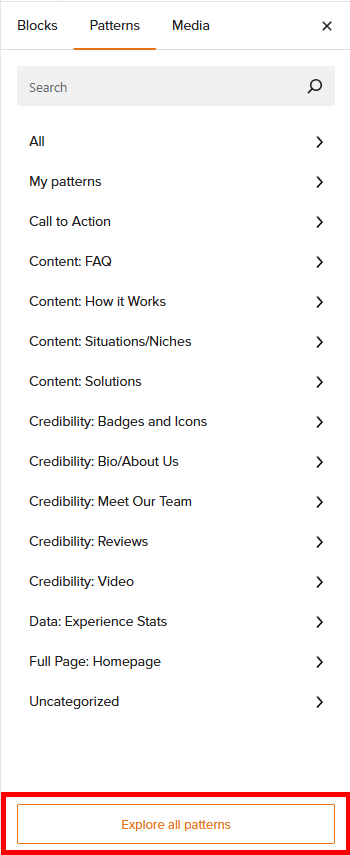
Alternatively, you can click the “Explore all patterns” button at the bottom of this pane to get a larger preview of your block patterns:
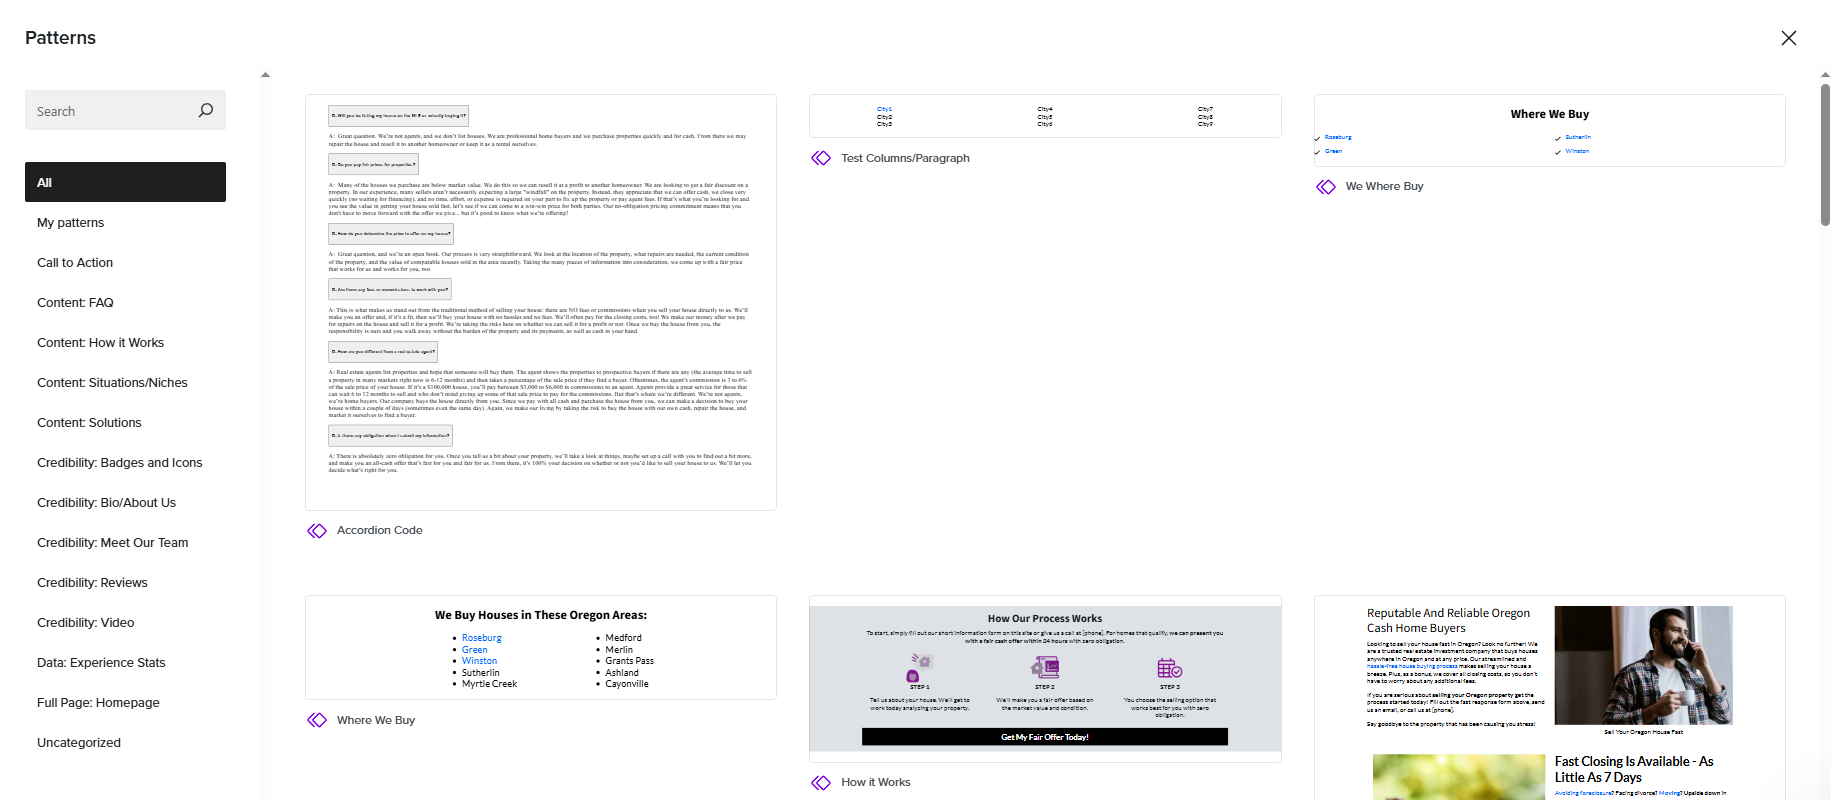
Note: This view does not have a drag and drop function. Clicking a pattern will add it to the bottom of the page. From there, you can click on the block pattern and use the toolbar to move it into position!
Conclusion
That’s a wrap! You now know how to create, edit, explore and add patterns. Block patterns can be a super valuable tool to streamline the editing process, especially if you have a lot of pages! If you’re looking for more information on blocks and patterns, check out the links below!
Learn More About Blocks and Patterns
New to Carrot?
Welcome!

Here’s our full guide for what to do when getting started with your Carrot website:
Want Us to do Some
Editing for You?
You are busy doing what you do best, running your business. Leave the site work in Carrot’s hands.