Want to add headshots to your company page or include an image to help break up the content? This tutorial will walk you through the steps to add and style your images using the Image Block.
Changing and adding images is one of the first things you’ll probably do to your Carrot site. As you go through swapping out the stock images with local ones, you’ll want to also add in some alt text and captions to help boost your SEO!
There are several reasons swapping out the default images is beneficial for you. Some of the benefits are:
- Builds credibility by localizing your site
- Boosts your SEO by adding keyword-rich alt text to your images
- Helps differentiate your site from other sites by having different images
Don’t forget to check out our Image Optimization Guide for more tips and tricks!
Let’s get started!
Step 1: Go to Your Page List and Click the Page to Edit

Step 2: Add an Image Block
Hover your mouse over the page and find the + button to “add block.” An orange line will appear to indicate where the image will go. Click the Add Block button to open the block choices.

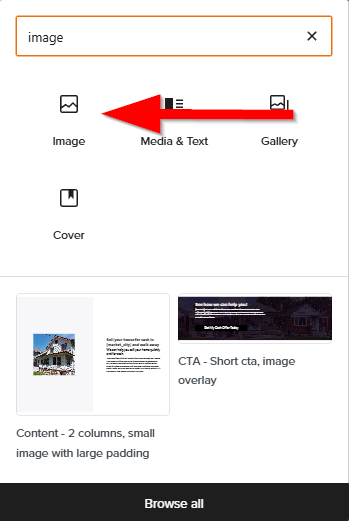
Step 3: Select Image Block
The easiest and fastest way to find your block is to start typing in the search bar above the choices. As soon as you see the Image block option, click it to add the block where you selected.
Step 4: Add Your Image
You can either upload an image directly from your device, select one that has already been uploaded to your media library, or insert an image from a URL.

🚨 Note: The maximum size for your file is 8MB. Any larger and the site can not accept it. Learn more about optimizing your images prior to upload.
Step 5: Style Your Image
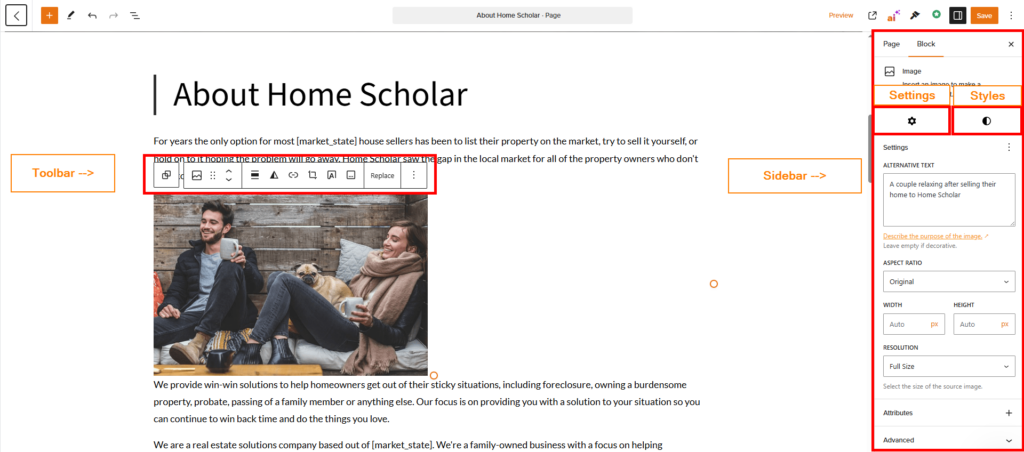
When using an image block, there are various style options in the toolbar and sidebar. You’ll want to explore these and utilize them to style the image the way you want! We’ll cover a few common options in more detail below.
Here are all the various settings and styles for the image block:
Toolbar Settings
- Alignment
- Duotone filter
- Add a link
- Cropping
- Add text over image
- Add caption
- Replace image
Sidebar Settings
- Alt text
- Aspect Ratio
- Width
- Height
- Resolution
- Attributes: alt, ID, URL, title
- Advanced: HTML anchor, CSS
Sidebar Styles
- Preset styles: Rounded, Greyscale, Shadow
- Duotone filter
- Margins
- Border
- Border Radius
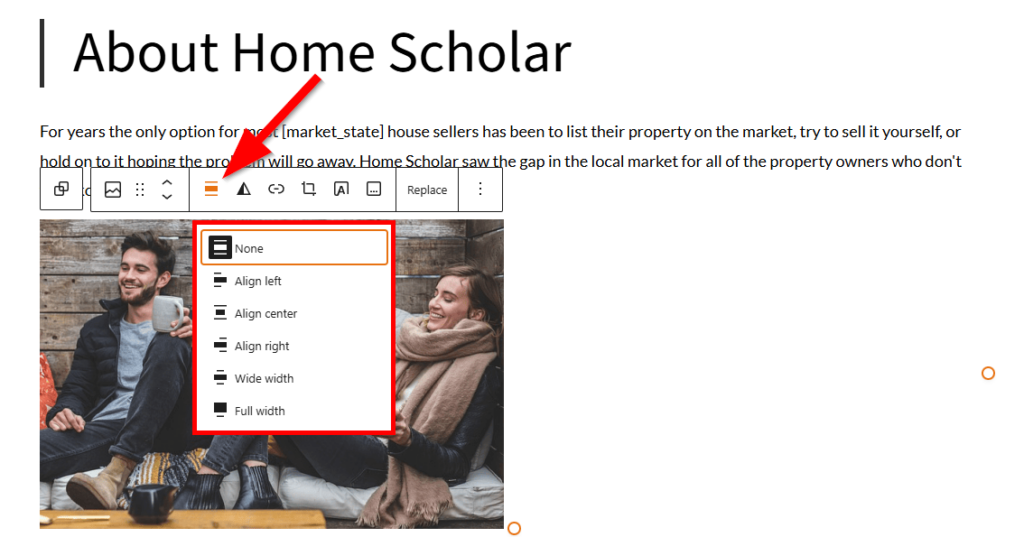
Styling Option: Align the Image
By default, every image inserted onto your site will not be aligned. Aligning the image allows the text to surround the image for readability purposes. No alignment means the text will not surround the image and the image will always remain floating to the left, i.e. it’s on its own line.
You can change the alignment of the image by clicking on the image and choosing any of the options with the lines and boxes. When you choose to align to the right or left, the text will surround your image for cleaner formatting. This is especially helpful if you are using a smaller image.
ℹ️ Larger, full-width images should use the Cover Block instead of the Image Block.
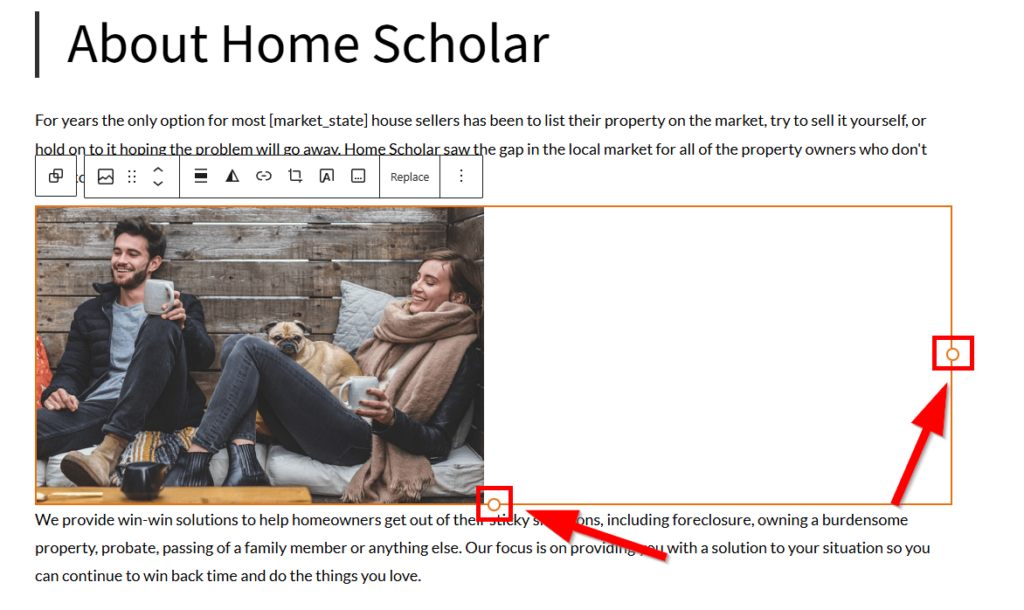
Styling Option: Adjust the Image Size
Click and drag the orange circles around the image’s right and bottom side to adjust the image to a smaller or larger dimension.
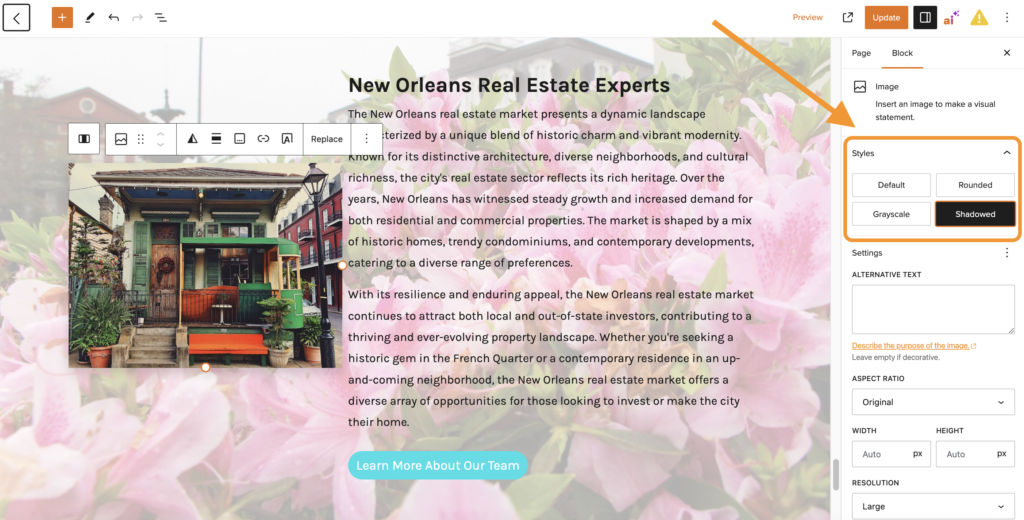
Styling Option: Preset Styles (Rounded, Greyscale, Shadow)
When editing an Image block, you can change the style from Default to Rounded, Grayscale, or Shadowed. You’ll find these styles in the Image Block’s settings in the right sidebar of the Visual Editor:
Styling Option: Cropping Images
You can now crop images right inside the Carrot editor—no extra tools needed.
Our built-in cropping tool is handy for polishing headshots and creating clean layouts in seconds. It works when inserting new images or when replacing images in a Block Pattern.
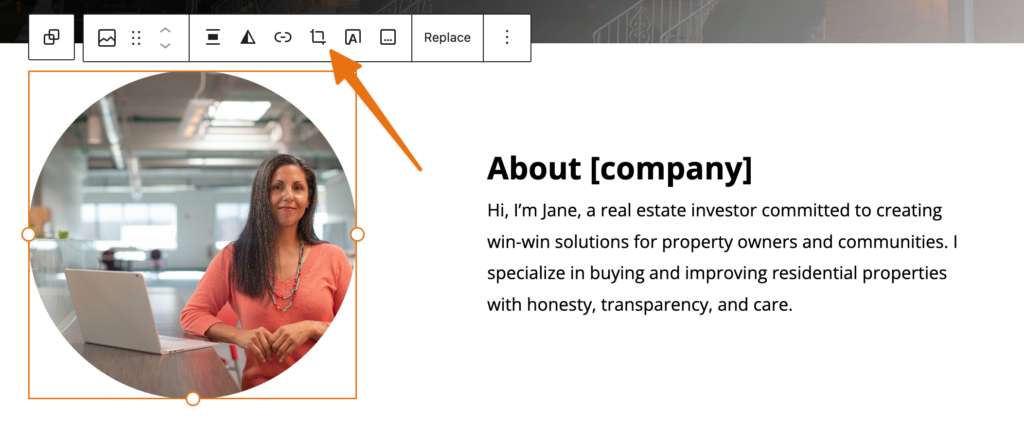
Just click on an image, hit the crop icon in the toolbar, and adjust the zoom or aspect ratio to get the perfect shot (square, portrait, etc.). Click and drag to reposition the image within the new size. Once you’re happy with it, hit “Apply” and we’ll save a cropped version to your media library—ready to resize and drop into your page.
Watch the video below to see it in action:

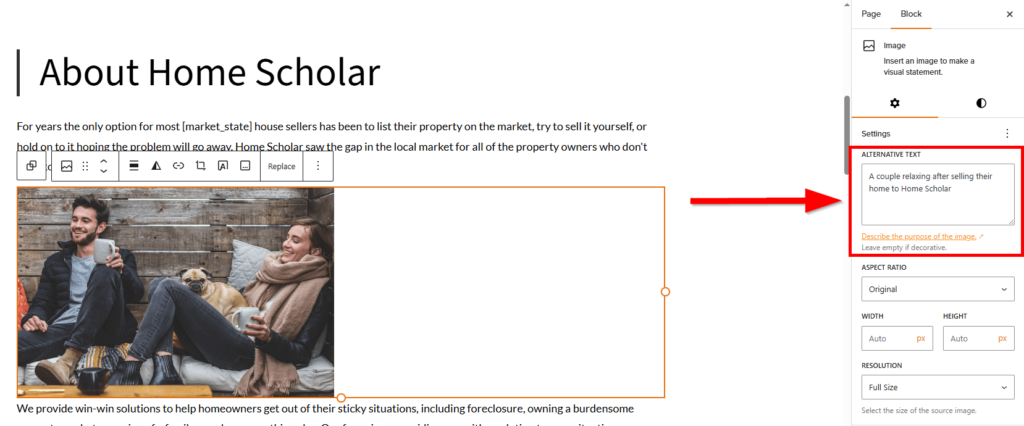
Step 6: Provide Alternative Text (Alt Text)
We recommend providing alternative text (alt text) for each image or graphic you add.
Alternative text is the text read aloud by screen readers for blind and visually impaired users and also serves as a fallback if the image fails to load.
Adding alt text also helps with image SEO. Google likes it to be an actual description of the image!
Make sure to include relevant keywords related to the image content while keeping it concise and informative. Remember, the alt tag should provide meaningful information to users who can’t see the image, so strive for clarity and relevance.
🚨 Note: If you later go to the Media Tab and add Alt Text to your images that were loaded in an image block, the Alt Text will not be pulled onto the images that are already on the pages. This is a function of WordPress that we cannot control. Make sure to add the Alt Text when adding the images to your page!
Step 7: Click the Save Button to Save Your Work
Your image is now published to your page!

Conclusion
Voila! You’ve just added an image to your page using the Image Block! This is likely one of the most common editing practices you’ll perform on your site.
As mentioned above, adding custom images to your site is important to localize your site and set yourself apart from the rest. Also, don’t forget keywords in your alt text! This will help with SEO. For more guides on editing various aspects of your pages, or using the Visual Editor, check out the links below!
Learn More
- Image Optimization Guide
- How to Embed YouTube Videos
- Customize Your Pages with the Visual Editor and Blocks
- Simple Ways to Customize Your Carrot Website Design
New to Carrot?
Welcome!

Here’s our full guide for what to do when getting started with your Carrot website:
Want Us to do Some
Editing for You?
You are busy doing what you do best, running your business. Leave the site work in Carrot’s hands.