
Forms are essential to any lead-generating site. They’re the ideal way to capture information because form leads are stored in your lead manager without the need for manual data entry.
This document will show you how to create and customize forms to suit your needs. Let’s get started!
📝TABLE OF CONTENTS
- Default Forms & Navigation
- Creating a New Form
- Adding and Editing Form Fields
- Field Types
- Editing Form Settings
- Adding Forms to Your Content
- Best Practices
- FAQ
Default Forms & Navigation
Your site is designed to generate leads, which means it has pre-built forms on your site. All forms were tested for conversions before they were added to the default design.
Here’s how you can find and access the forms editor for your site’s default forms. We’ll also point out some important things to know:

Creating a New Form
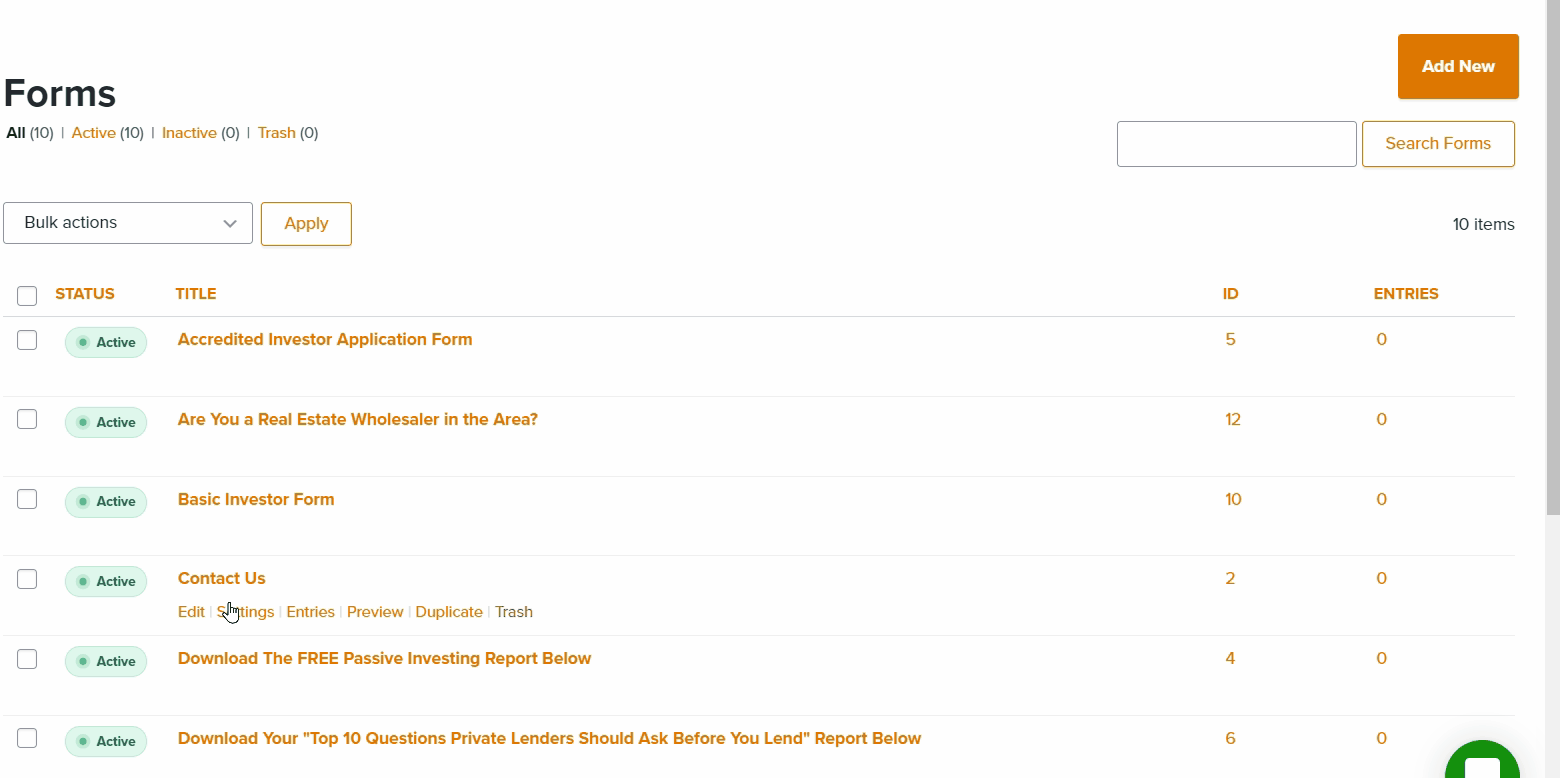
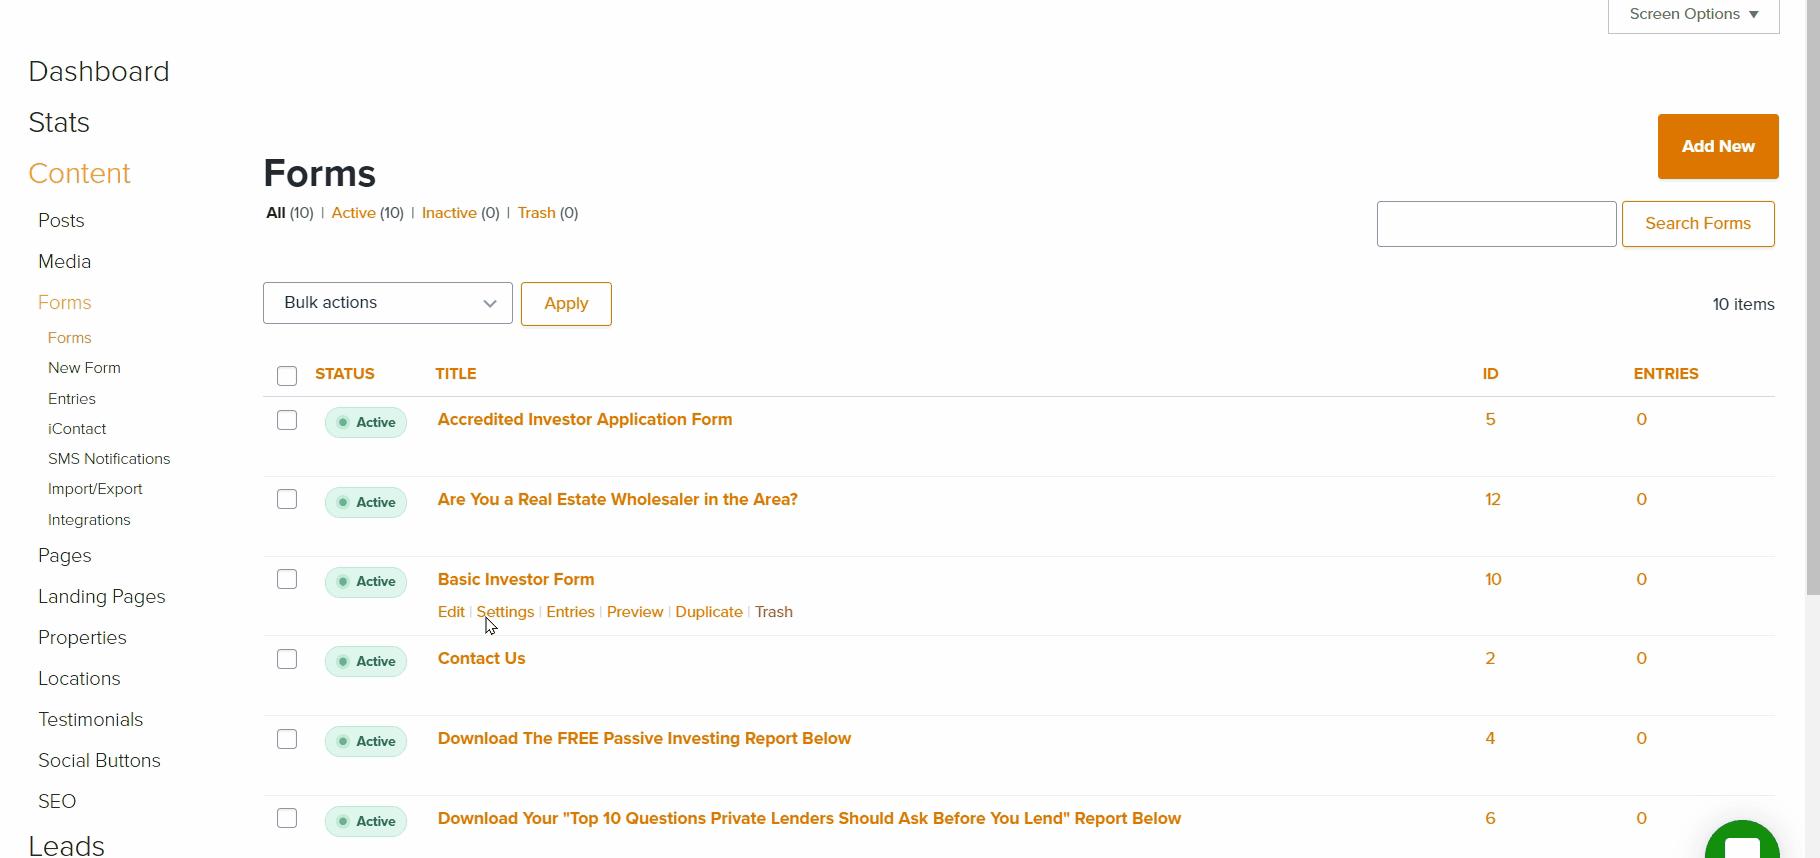
Access your forms from your account dashboard by clicking Content, then Forms on the left menu. This link will take you there.
Click the Add New button near the top. A pop up will appear to add a title and description to your form.
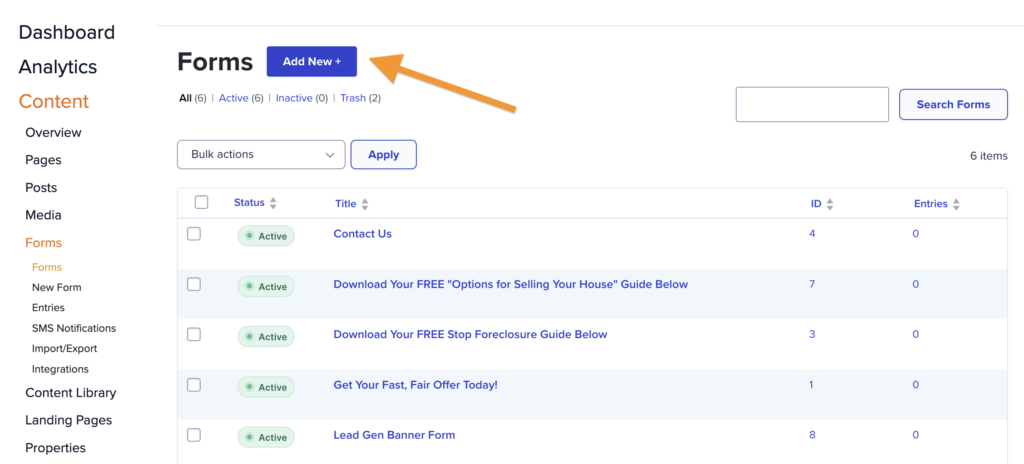
The title and description become the form’s default heading (form title) and default paragraph (form description). You can always hide those in page settings where the form is being added. Your title should be indicative of the form’s purpose. For example, we always title the form added to the About Us and Contact Us pages “Contact Us” because it’s used to encourage communicating with you and your business.
Adding and Editing Form Fields
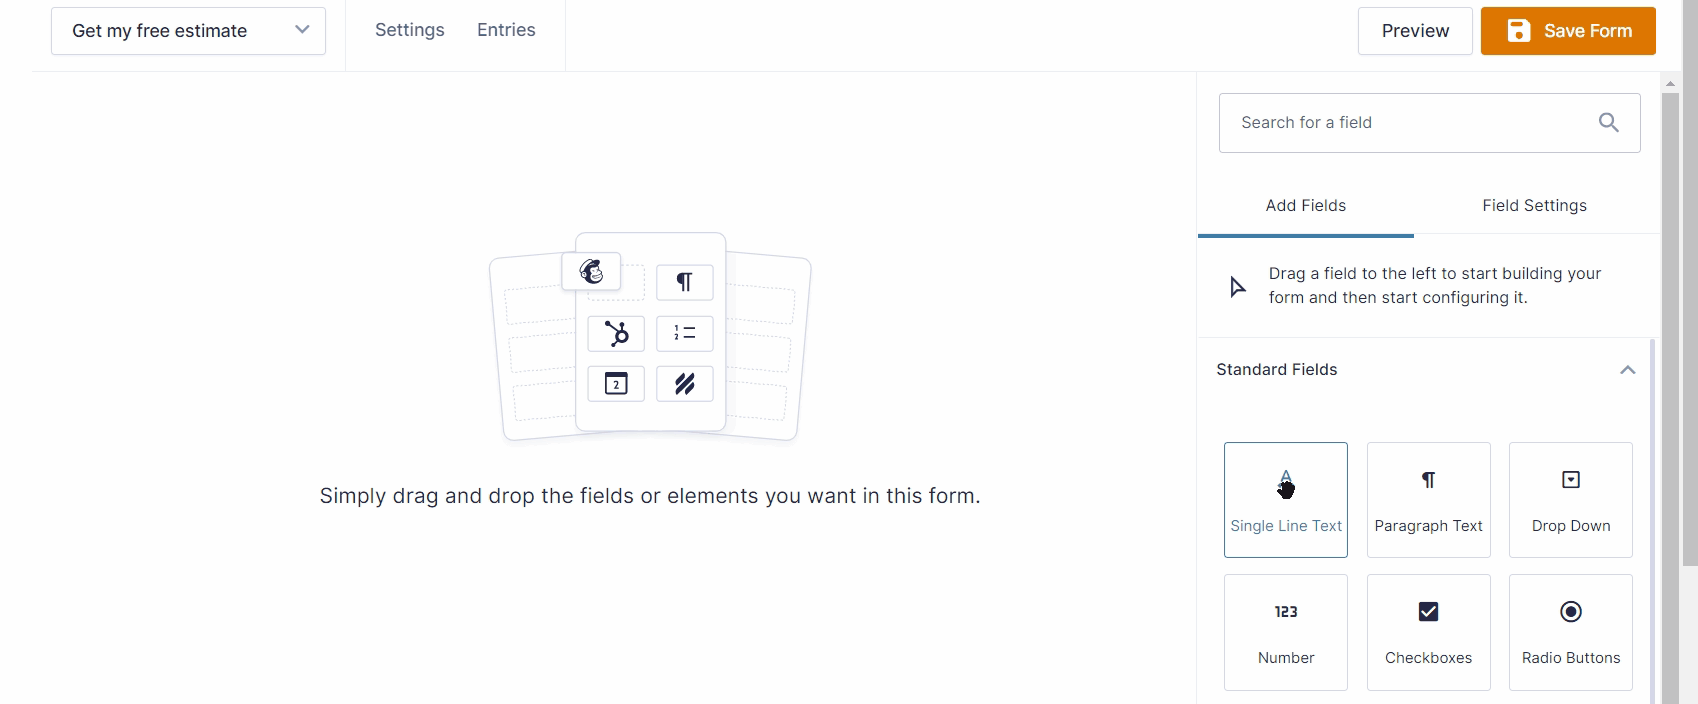
When creating a new form or editing an existing form, you can drag and drop the fields or elements you want to include in the form. Click items on the right and drag them over to the middle of the screen to drop them in place where you want them on the form.
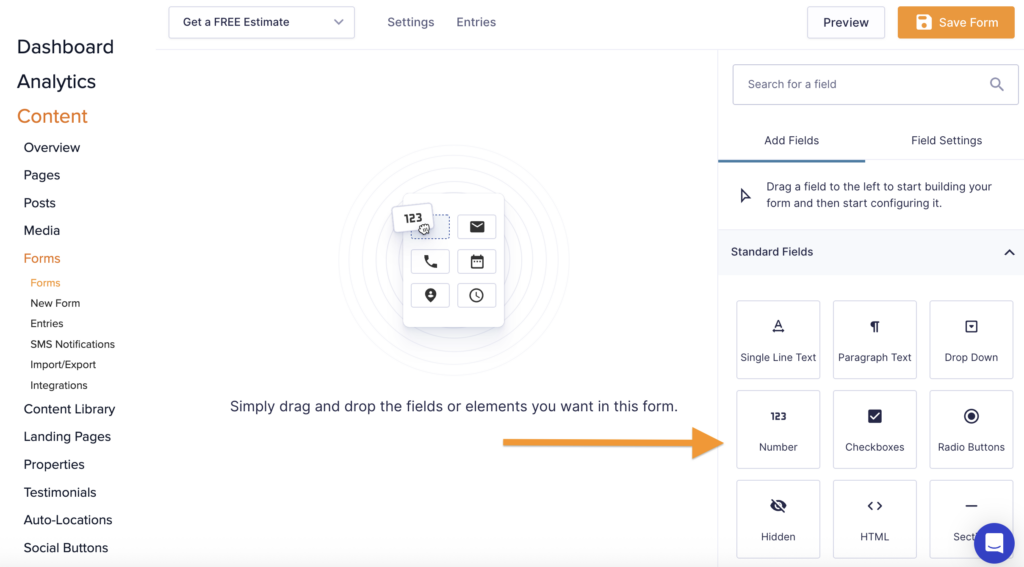
You have the following options for field types: Standard Fields, Advanced Fields, Post Fields, and Pricing Fields. You can find a list of all Field Types further down this doc.
Watch this video for more tips on editing your forms:
🥕Here are some of Carrot’s favorite form tricks
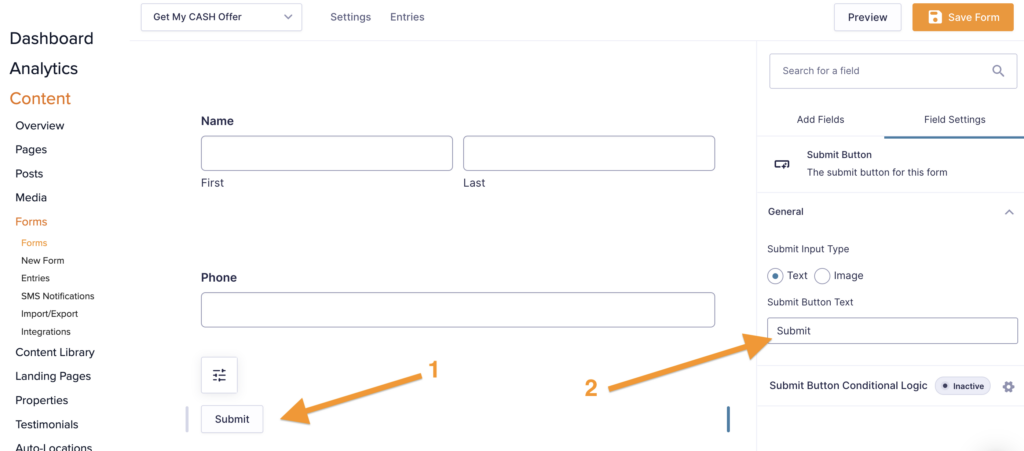
Customize the form button text
When creating a new form, the default button text reads “Submit” but you may want to update that Call-To-Action. Examples include:
- “Get My Fair Cash Offer”
- “Contact Us for More Details”
- “Get my Free Estimate”
- “Set an Appointment”
You can change the text displayed in the button via the field settings for the Submit button. Be sure to save your changes.
(You may also need to refresh your browser after saving to see the button text updated inside your editor.)
Add fields to columns
You can add fields side-by-side without having to add any extra classes. It’s just a simple drag-and-drop procedure. Add the fields to your form and drag them in the order you want them. Maximum of 4 columns in 1 row.
Hover over the field to move and click the 6 dots. Keep your mouse pressed and move the field where you want it in the row. You will see a highlighted bar to confirm the placement of the field. Release your mouse when you are ready to place the field.
Use autocomplete for U.S.A. addresses
The Address field is an advanced field type that’s added to a handful of default forms. Carrot applied autocomplete for all default forms but you’ll need to apply that to any new address field you add to forms. International businesses will need to switch the default setting to suggest international addresses, versus only U.S.A. addresses.

Return Access
If you have an opt-in form for a resource or page that leads would want to repeatedly access, it’s best to create a new form and allow “return access.” This is a bit advanced but well worth the time it takes to set up because your leads will have the best experience. For example, Carrot’s cash buyer site has return access applied by default to the properties form so a person only needs to fill out the form once to view properties. Here’s how you can set that up.
Go to your Form > Settings > Confirmations > Default Confirmation > Allow Return Access
Set the redirect text, page, or link and ensure the box is checked to “Allow Return Access”
💡 Use “Return Access” on forms exclusive to a resource and a landing page only. If you use this for forms on the homepage or About Us page, then visitors will be redirected to different resources, which isn’t an optimal user experience. It’s only ideal for resource-specific pages.
Field Types
Standard Fields
These are basic form fields for a wide range of uses. We use the Paragraph Text field on our default Contact Us form so that visitors can submit a question or comment.
- Single Line Text is a single line
- Paragraph Text allows users to submit multiple lines of text
- Drop Down allows you to select one option from a drop-down list
- Number is a single line text for numerical values
- Checkboxes allows users to select one or many checkboxes
- Radio buttons use circles to allow users to select one option from a list
- Hidden allows the form to collect information that’s not visible to the user but can be processed and saved with the user submission
- HTML enables you to add HTML to your form
- Section adds a visual only element, a content separator that helps organize and separate sections of a form
- Page breaks up a form into multiple pages, with pagination viewed with a default “next” button
Advanced Fields
These include some of our favorite form fields (like Address, Phone, and Email) which are specifically designed to handle certain data and ensure that the data stays in the correct format.
- Name adds a first and last name box to your form
- Date allow users to enter a date
- Time allow user to submit time as hours and minutes
- Phone adds a box that formats the content as a phone number
- Address allows you to add a auto-complete addresses from Google’s Map feature
- Website allows users to enter a website URL
- Email formats and accepts valid emails only
- File Upload allows a person to upload a file (For example, uploading a resume to a form on a Careers page)
- Captcha is a spam prevention feature that makes someone verify they are not a robot. Learn more
- List allow users to submit and remove multiple rows of information
- Multi Select uses circles to allow users to select one option from a list
- Consent offers a “yes/no” consent checkbox and a detailed description of what is being consented to
Post Fields
These form fields are useful for scenarios where you want visitors to contribute content to your site without giving them direct access to your Carrot dashboard. For example, you might want to gather feedback from satisfied clients to turn into case studies on your blog.
- Title allows users to submit the title for a blog post
- Body allows users to submit the body for a blog post
- Excerpt allows user to submit data, used for a blog post’s excerpt
- Tags allows users to submit tags for a blog post
- Category allows users to submit the category for a blog post
- Post Image allows users to submit an image for a blog post
- Custom Field allows user to submit custom field values for a blog post
Pricing Fields
While not commonly used by most Carrot members, these form fields can be used if you are selling physical or digital products or need to collect other pricing information.
- Product allows the creation of products in the form
- Quantity enables quantity specification for a product
- Option allows users to select options for a product, created with the product field
- Shipping allows a shipping fee to be added to the form total
- Total adds a total field to your form
Editing Form Settings
You can access your form’s settings from your main forms page by hovering over a form’s title and selecting Settings from the menu.
You can also access the settings from a form’s editor by clicking Settings, then Form Settings:
Common Settings to Edit
Enable SMS & Privacy Policy Consent Fields: If you use text message marketing to communicate with leads and clients, you may need to comply with TCR & 10DLC’s compliance guidelines. Check the boxes for both the Enable SMS Consent Field and the Enable Privacy Policy Consent Field. (Both are necessary to fully comply with TCR/10DLC’s guidelines.) You can also customize the text that appears along with each consent checkbox. Check out our full tutorial about this to learn more.
Restricting Entry Limits: If you have a special offer or a limited list you want to build, this setting will limit the amount of entries on that form. You can set a number for the amount of entries you want to limit to, and the form will become inactive once that number is reached.

Adding Forms to Your Content
Return to your site’s Visual Editor to update a page or post. Locate where you want to place the form. Use the inserter “+” to add a block. Search for the “Form” block and click to add it to your page. Then use the drop-down to choose your form or create a new form.
Watch this quick video below to learn more about adding forms and our new form customization options. Once you have the form displayed as you want it, click to Save your changes!

Carrot’s New Form Customization Options
In May 2025, we rolled out a few fresh updates to the Carrot Form Block — and we’re just getting started. Here’s what’s new:
- Button Size Control – You can now choose from multiple button sizes (S, M, L, XL) right inside the Form Block. Make that call to action stand out!
- “Minimal” Design Option – Want a cleaner, simpler look? Switch from the default style to the new Minimal style for a stripped-down aesthetic that still looks great across all design types.
- Simpler Form Creation – Creating a new form just got easier. Add the “Forms” block wherever you want it on the page, and you can either select an existing form or create a new one — right from the block editor.
Want to use the new form block that has these new features? Delete the old one and insert the new Forms block. Your form data stays safe (the data is separate from the Forms block).
ℹ️ “Legacy” Form Blocks Still Work – If your page uses the older “Legacy” Form Block (you’ll see a little tag that says LEGACY), you don’t need to make any changes. It’ll continue working just fine.
We’re laying the foundation for more customization options and flexibility in the future, so stay tuned for additional style controls and layout options. As always, reach out if you have questions or ideas.
Best Practices for Increasing Conversions
How many form fields should I have on my home page?
Your site’s home page should have no more than 3 fields (or areas) on your form. Any more than this and your conversions decrease up to 10% per extra field. For example, if you have a first name, last name, phone, email, and address, then you have 5 fields on your form, which could decrease conversions by 20%. To keep the most optimal conversion rates, 3 fields on the home page is best. From there, feel free to play with the field numbers on other forms.
Placeholder text
We rarely use placeholder text. Yes, it’s great if you’d like a minimal form look but it’s terrible from a user experience and accessibility stance. The text disappears as soon as a lead starts typing in the field and they don’t always remember the reason for the field. Placeholder text is also unable to be read by screen readers, which can leave users with visual impairments at a loss. Our recommendation, don’t use this text unless you really want to give it a go and take the chance.
FAQs
How can I remove a form field without losing the lead information that was already submitted?
You may see a warning when attempting to delete a form field. Deleting a field also deletes it from all form entries previously submitted. Here’s a full tutorial about how to deactivate a field (and replace it if needed) without losing the info that has already been submitted: How To Preserve Entry Data When Removing/Replacing a Form Field
How can I autofill information from a form on one page to another form that gathers more details?
Great question! Sometimes you may want to use a 2-part form to gather some information on the first form and then pass that field information to be auto-filled on the second form, where your lead can add additional information before submitting the form. Here’s a full tutorial that explains exactly how to do this: How to Pass Field Data from Form to Form (Query String)
Can I implement TCR/10DLC compliance on my lead forms?
Yes! Carrot sites have a one-click feature to automate this compliance for each form when collecting phone numbers for SMS text message marketing. Check out this tutorial to learn more: Text Message Marketing Consent (Carrier 10DLC & TCR)
How can I manage autoresponses and notifications for forms? Is there a way to get text notifications when a new lead comes in?
Yes, you can get SMS text notifications when new leads fill out a form, and you can also customize the autoresponder message that gets sent to a lead when they fill out a form. We have a tutorial that explains how to manage your “Admin Notification” and “Customer Autoresponse” here: Form Notifications
How can I prevent spam entries in my forms, such as those with incorrect addresses and phone numbers?
We have built-in systems for filtering and preventing spam on Carrot sites. In addition, there are a few things that you can also do to reduce spam form submissions. Learn more in our Managing Spam tutorial.
Learn More:
- Manage Form Notifications
- Adding Captcha to Your Forms
- How to Pass Field Data from Form to Form
- Text Message Marketing Consent (Carrier 10DLC & TCR)
Close More Deals
with Carrot CRM
Grow your revenue and turn more leads into closed
deals with Carrot’s built-in CRM.
Premium Support
& 1:1 Strategy Calls

Members with our Premium Support Add-On can book
a 1:1 video calls for tech questions & strategic advice.