In this tutorial, we’ll be diving into how to pass field data from one form to another! We’ll explain how to set up autofill for a form field so it pulls in data from a form field on another page.
The most common circumstance where this is necessary is on your primary lead generation form, because the submission process includes getting forwarded to a step 2 form where more information is provided. Often times, the same fields from the step 1 form are at the top of the step 2 form – this is to ensure you know who is providing the detailed information on step 2.
To make this easier for leads to submit their information and prevent redundancy, you can use a query string to pass the information from the step 1 form to the step 2 form!
Note: By default your Carrot site should come stock with query string set up on the step 1 and step 2 forms, however this guide will be necessary if you create new forms or edit the fields on either form.
Why Use it?
- Less work for the lead = faster submission time
- Overall better user experience
- Easier submission process = more chance to convert
Requirements
- Must have a form that forwards to another form
- The step 1 form must have the query string
- The step 2 form fields must be set with parameter names and set to populate dynamically
How To
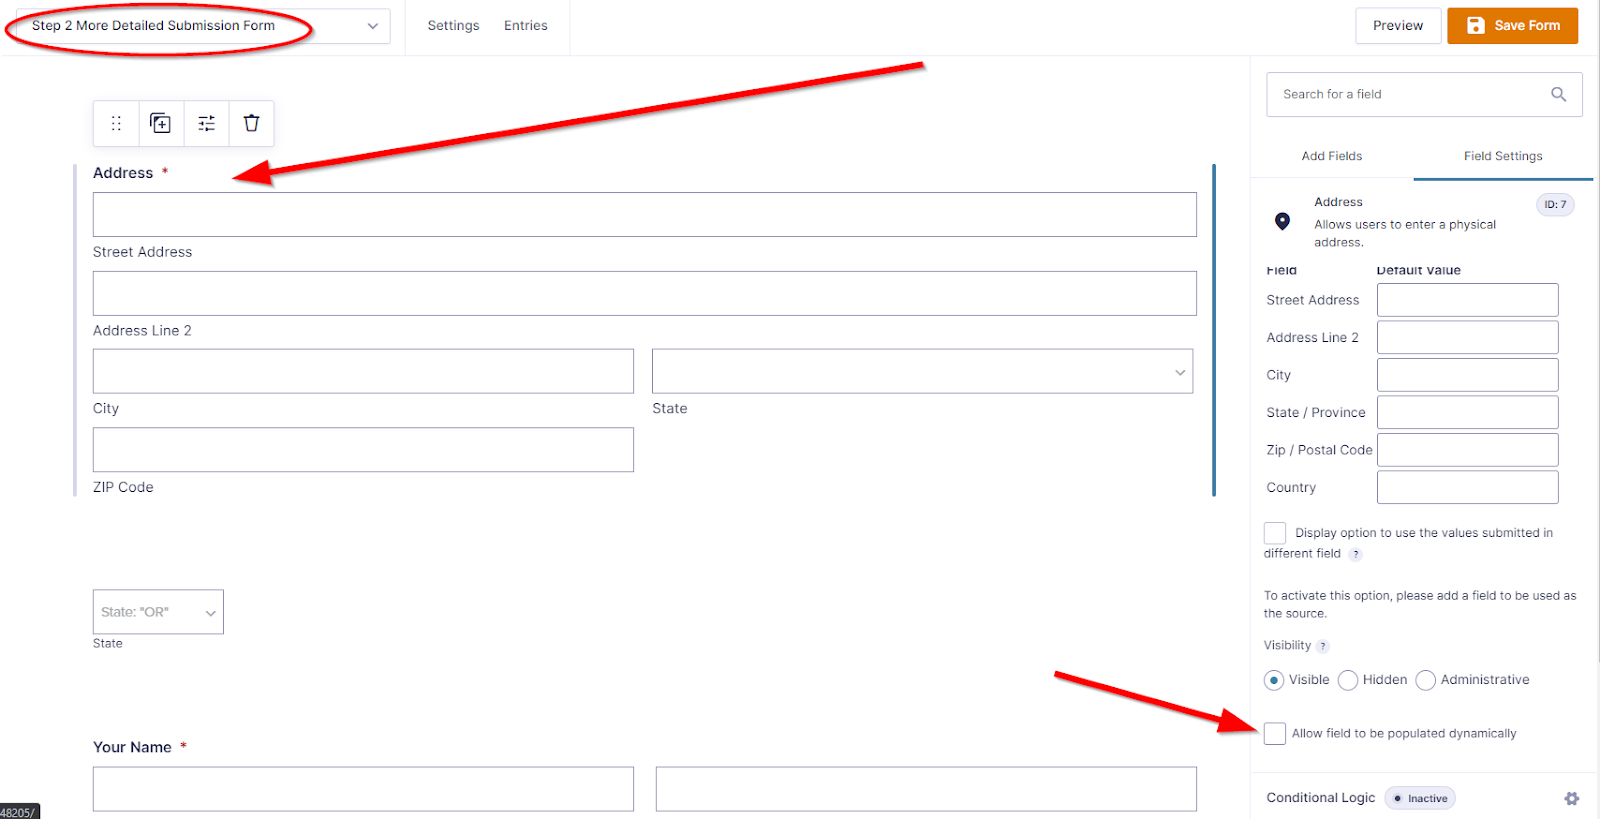
Step 1: Set the Step 2 Form Field to “Populate Dynamically”
Lets start with the Address field since that is the most common field on both step 1 and step 2. You can do this by going to content > forms in your site dashboard, then edit the step 2 form. From there, click on the Address field, and in the right-hand pane go to field settings > advanced, then check the box for “Allow field to be populated dynamically”.
Step 2: Set Parameter Names for the Address Subfields
In this example, we are using an Address field which is 1 field, with multiple subfields (street address, city, state, etc.). If it were a Name field, there would be 2 subfields (first and last name), and fields like the Email field have no subfields. Regardless, there must be a parameter name given to the field and/or subfields for the query string to work.
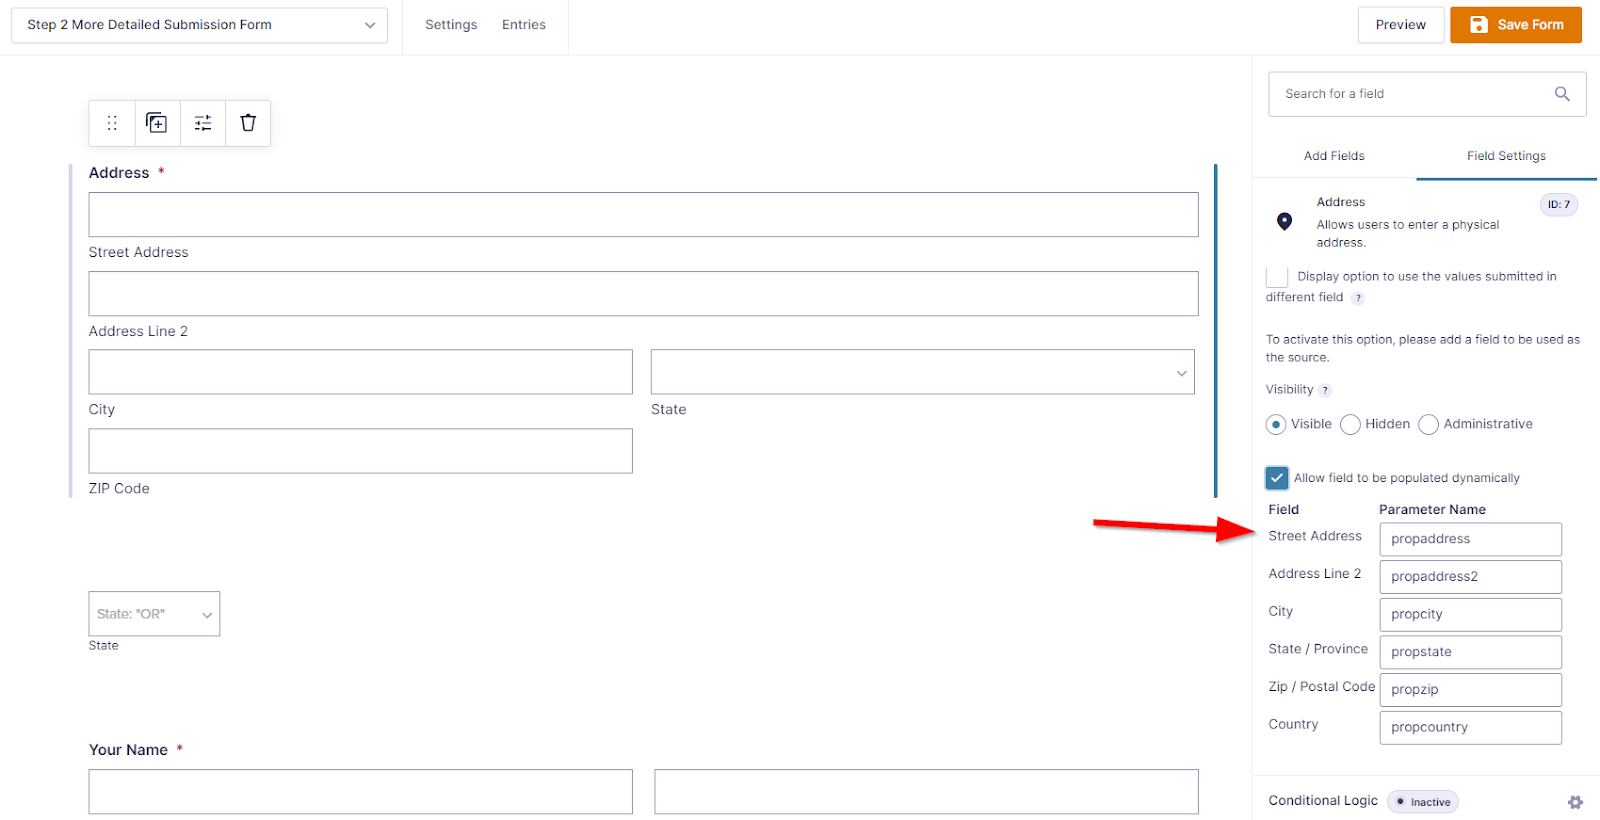
We recommend these simple parameter names for the address subfields:
- propaddress = Property address (street address)
- propcity = City
- propstate = State
- propzip = ZIP code
- propcountry = Country
*Note: When passing property address info, you must pass the data to a non-autocomplete address field. The step 2 address field cannot be set to “US – Autocomplete”. This can be done with any text based field, for example: email, phone, name, address.
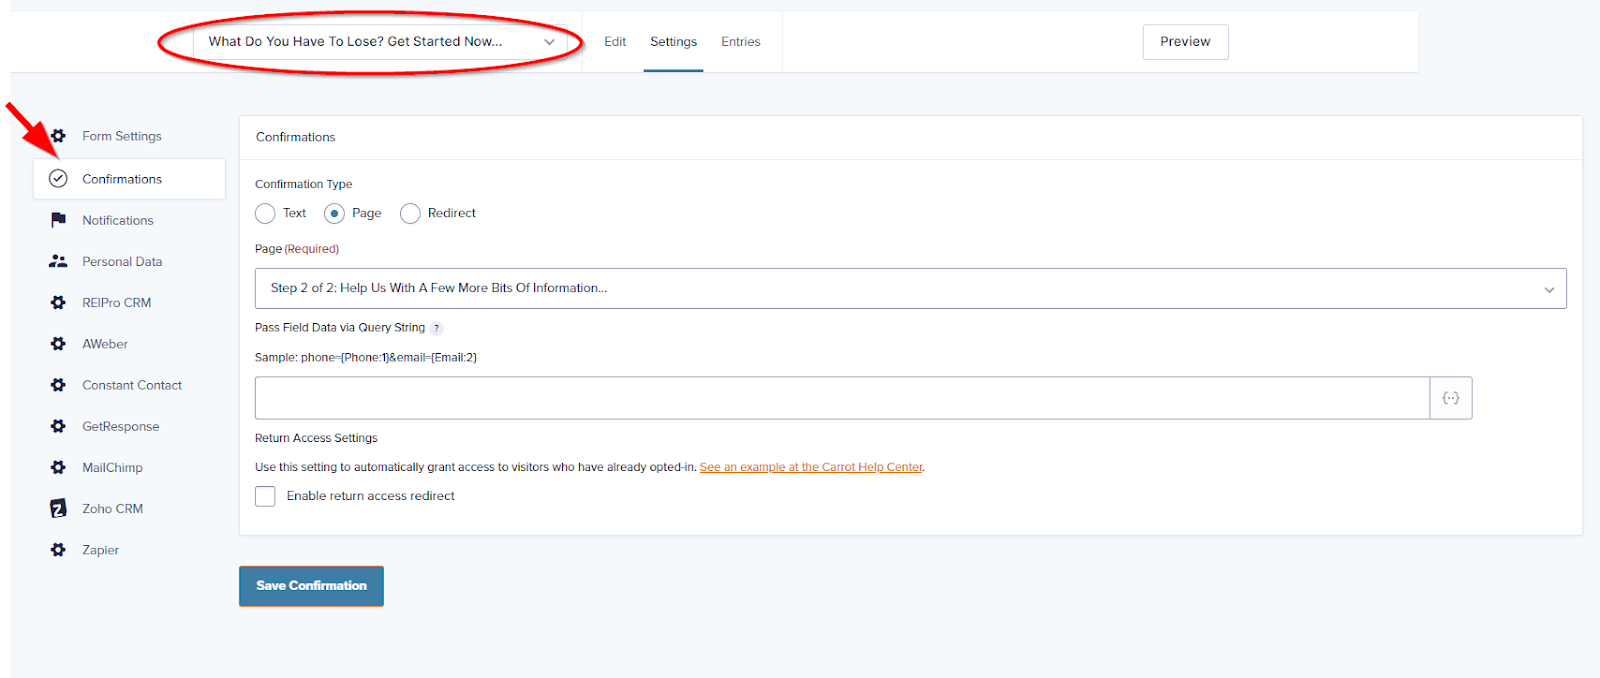
Step 3: Set the Step 1 Form to Pass the Data via Query String
A) First, use the form dropdown on the top of the editor to switch to the step 1 form (after saving of course!), then go to settings > confirmations. From there, click on the default confirmation to edit it:
B) In the query string field, type in the first parameter name you set for the step 2 form followed by “=”, then populate the respective field with the field generator:


It should then appear like this:

Step 4: String All the Parameters Together
Now the propaddress parameter is mapped to the street address field. Let’s follow through with the rest of the parameters! Each time you populate a field using the field generator, you’ll want to string them together with the ‘&’ sign.
Here is an example: parameter1=(field(subfield):field ID)¶meter2=(field(subfield):field ID)
And here is what it looks like after using the dropdown to generate fields:

Step 5: Save and Test
Once you’ve got your query string built, go ahead and save your confirmation settings and view your site to test your query string. Start with your step 1 form and fill out the details:
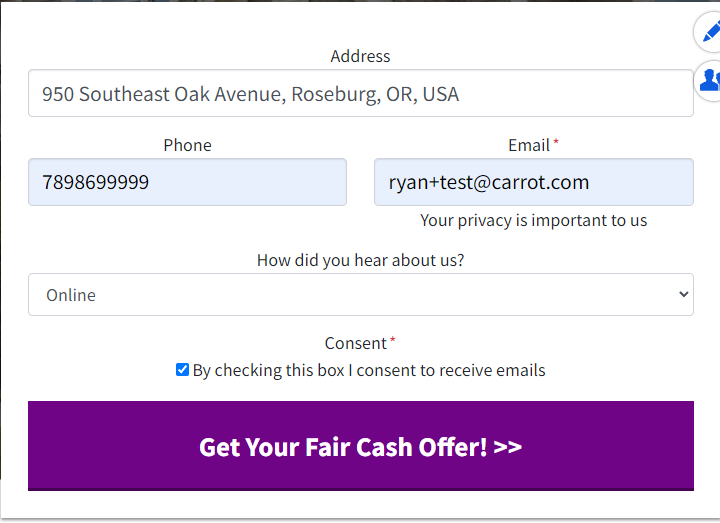
It should pass over to the step 2 form like this:

Conclusion
That’s it! You’ve successfully set up a query string to pass form fields to another form! This can be a really handy feature to ensure you get the proper data from your leads, but also make the submission process quicker and easier for them.
We understand that this is a more technical set up, so if you have any questions or hit any roadblocks with setting this up on your site, please don’t hesitate to reach out to our Customer Experience team for assistance!
Learn More
- Forms Overview
- How to Add Opt-In Checkbox to a Form
- Form Notifications
- Address Field Settings
- Adding Captcha to Your Forms
Close More Deals
with Carrot CRM
Grow your revenue and turn more leads into closed
deals with Carrot’s built-in CRM.
Premium Support
& 1:1 Strategy Calls

Members with our Premium Support Add-On can book
a 1:1 video calls for tech questions & strategic advice.