There may be times where you want a page or post with specific content password protected, so only those with the password are able to access that content. Some cases may be, a special property list or intake form. If you’re looking to lock down a page or post on your website with a password, you’re in the right spot! This guide will dive into how you can do this.
Note: Auto-generated pages such as the Property Listing page (/property/) cannot be Password Protected as they do not have a page editor like others. You can however, password protect individual properties.
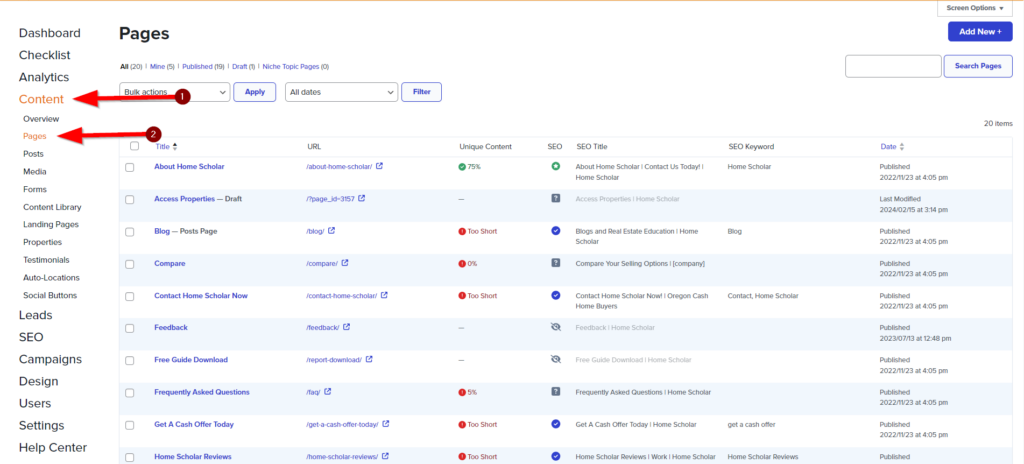
Step 1: Go to your Site Dashboard > Content > Pages (or Posts) Section

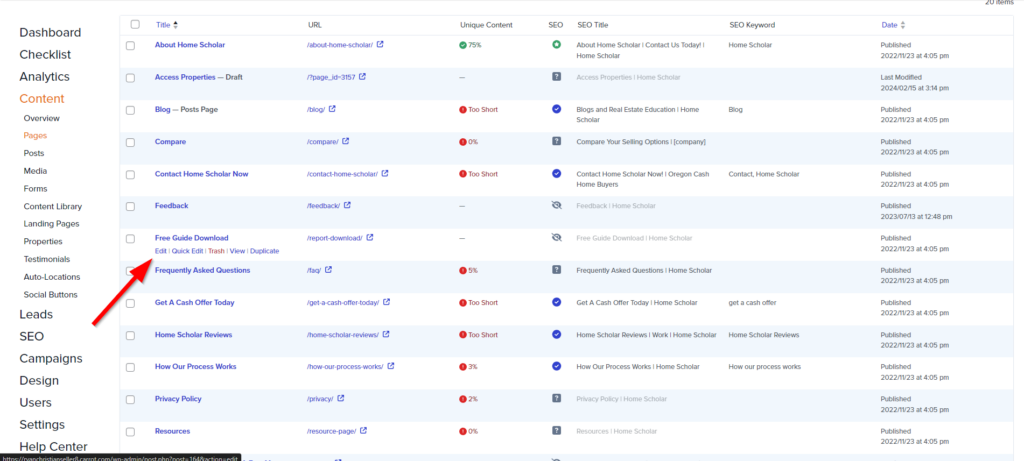
Step 2: Edit the Page
In the content > pages section, find the page you want to password protect and click “Edit”.

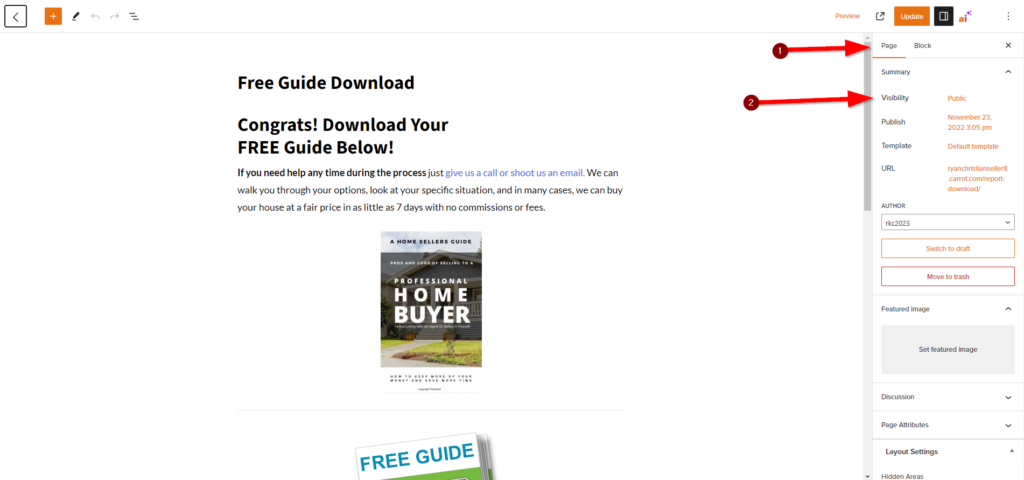
Step 3: In the Editor, Click On the Pages “Visibility” Setting
The “Visibility” setting will be present in the right-hand sidebar, under “Page” settings.

Step 4: Set It to “Password Protected” and Enter the Password
Be sure to use a secure password, and store the password in a password manager or somewhere secure.

Step 5: Click the X in the Top Right Corner, Then Update Your Page

And that’s it! You’ve successfully password protected a page. Now only those with the password can view the content on that page. Also, a small tip for SEO, is that password protected pages should be set to “noindex”, as web crawlers may return an error when crawling the page and make it appear as if there is a serious issue. They should also be not linked in any navigation so typical users don’t stumble across it. Password protected pages are usually sent out via emails to those who have already submitted a form on your site, or they are part of a specific form submission process on your site, where the user is promptly provided the password.
