
This feature is included in our Integrations add-on! If you currently have only limited access but would like to take advantage of this helpful feature, you can update your membership options.
We recommend Carrot CRM for seamless integration into our system. Carrot CRM has all the features you need to convert qualified leads into deals, plus customization options to align with the way you work.
However, if you want to connect a different CRM to your Carrot website, you can do so. We offer direct integrations with some popular platforms, or you can use Zapier to connect your favorite 3rd party apps to Carrot.
Zapier is a really cool software that allows you to tie in many other systems to automate workflows and processes. You’ll want to use Zapier if there is not a direct integration.
In this tutorial, we’ll walk you through how to set up sending leads to a CRM with Zapier, using Podio as an example. Podio is only used here for example purposes.
The steps found below are universal to any CRM that is supported with Zapier, which is most CRMs. There are 2 major parts to this setup, creating and adding the webhook, then linking your CRM and mapping fields.
This process is similar to the actions you will want to take for other CRMs and software you’ll be integrating with Zapier. Most of the steps will be the same, however Podio does have a more in-depth setup. You’ll find that other CRMs have less steps than what is shown on this guide.
If you have any questions during the setup process, we’re happy to help but the experts of Zapier are on Zapier’s team. You can learn more about using Zapier and contact their support team at Zapier.com/Help
🚨 NOTE: This tutorial uses the paid version of Zapier and an updated trigger method, choosing premium app integration “Webhooks by Zapier”, since Carrot is not listed as an application in Zapier’s database. If you had used the previous version, you have been grandfathered into that process. However, any new integrations using Zapier will require a paid plan.
Part 1: Creating and Adding Your Webhook
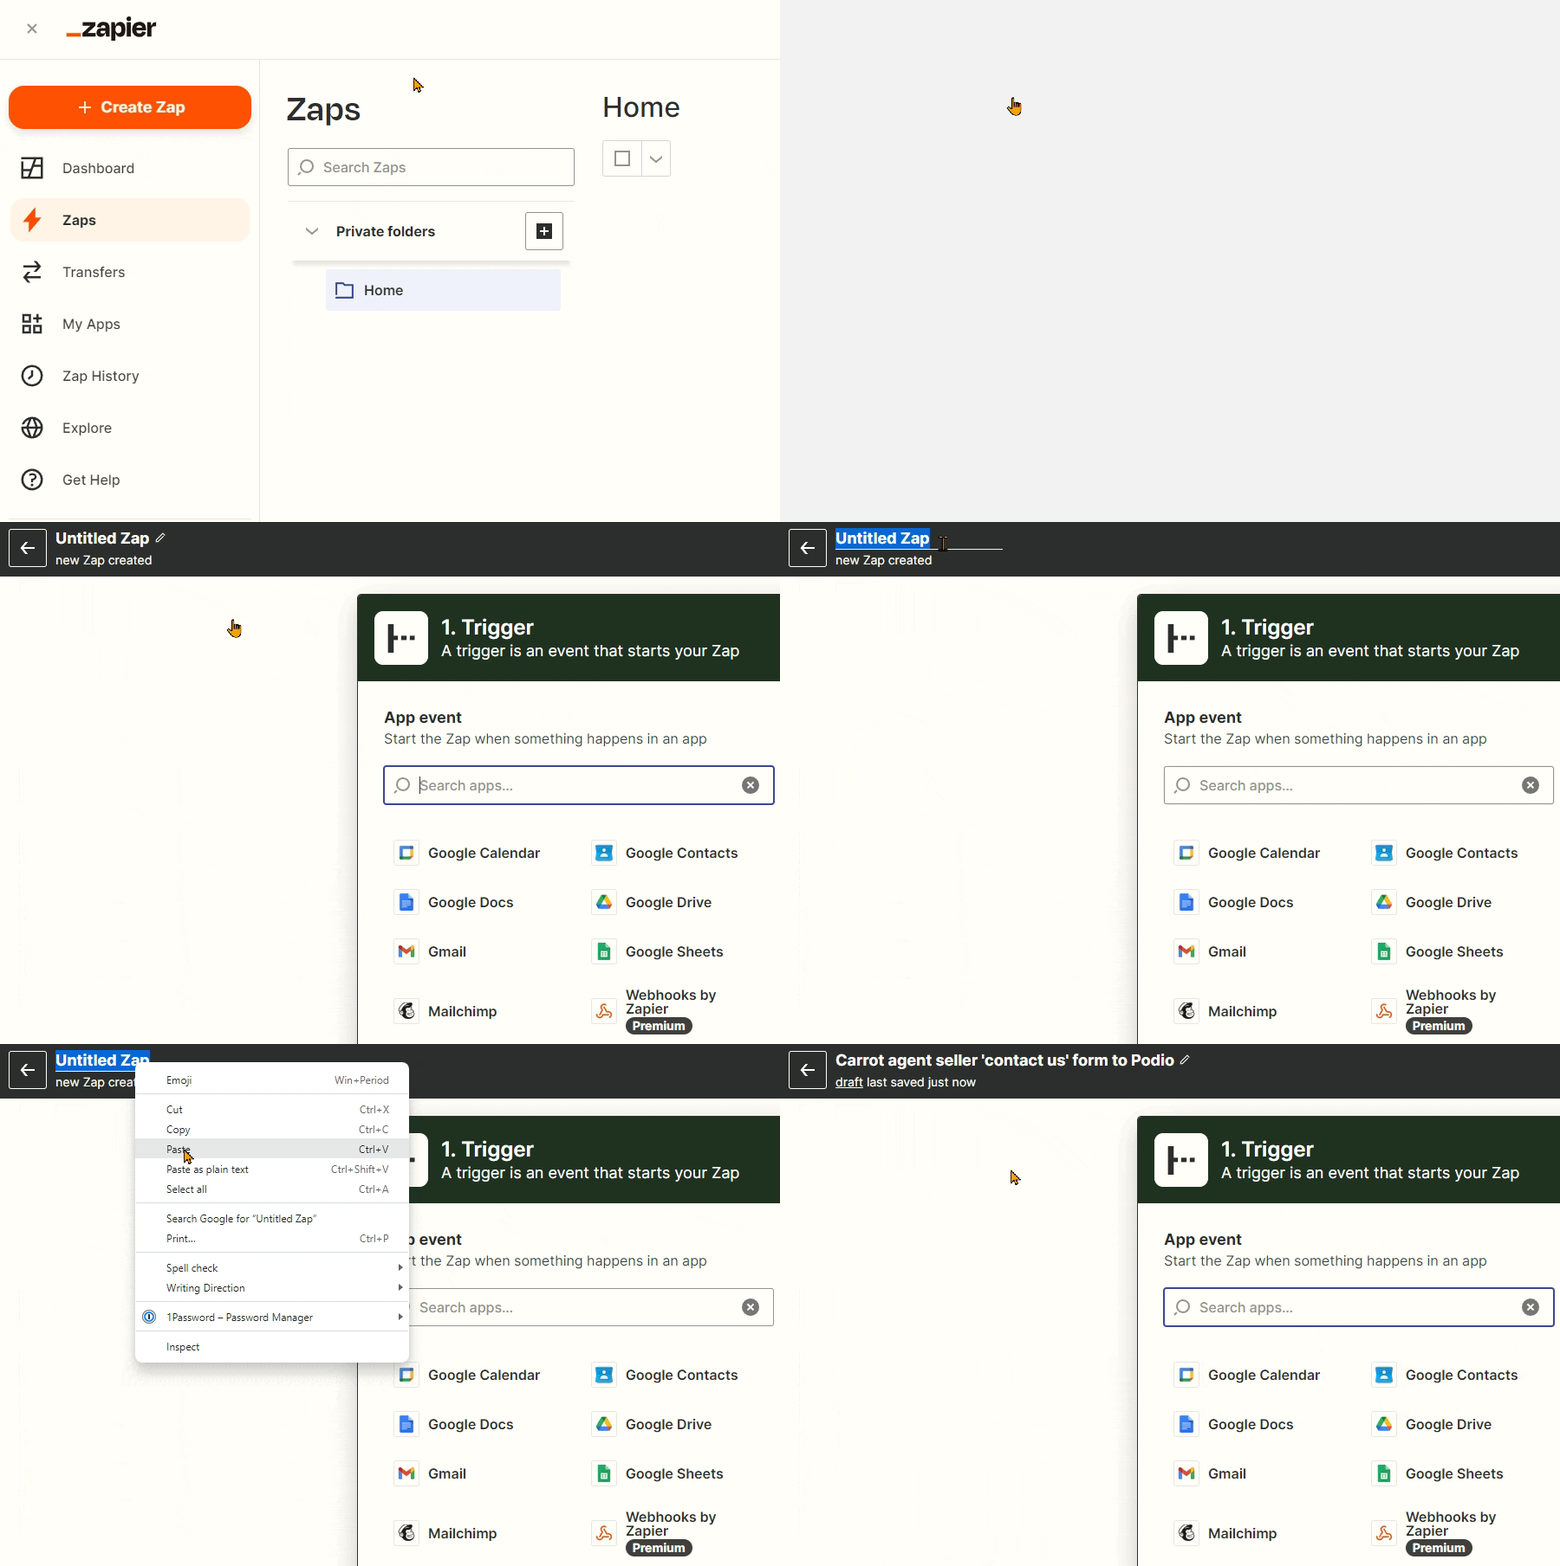
Step 1: Let’s start by making a Zap
Sign in to your Zapier account, then click the button on the top left to “Create Zap”.

Step 2: Name your zap
Enter a name for this zap that explains the purpose of this zap.
For example, if you are mapping your agent seller Contact Us form to your Podio account, then you could name the zap “Carrot agent seller ‘contact us’ form to Podio.”
This will make it much easier to reference as you add more and more zaps to your account.
Step 3: Add the Zap’s Trigger
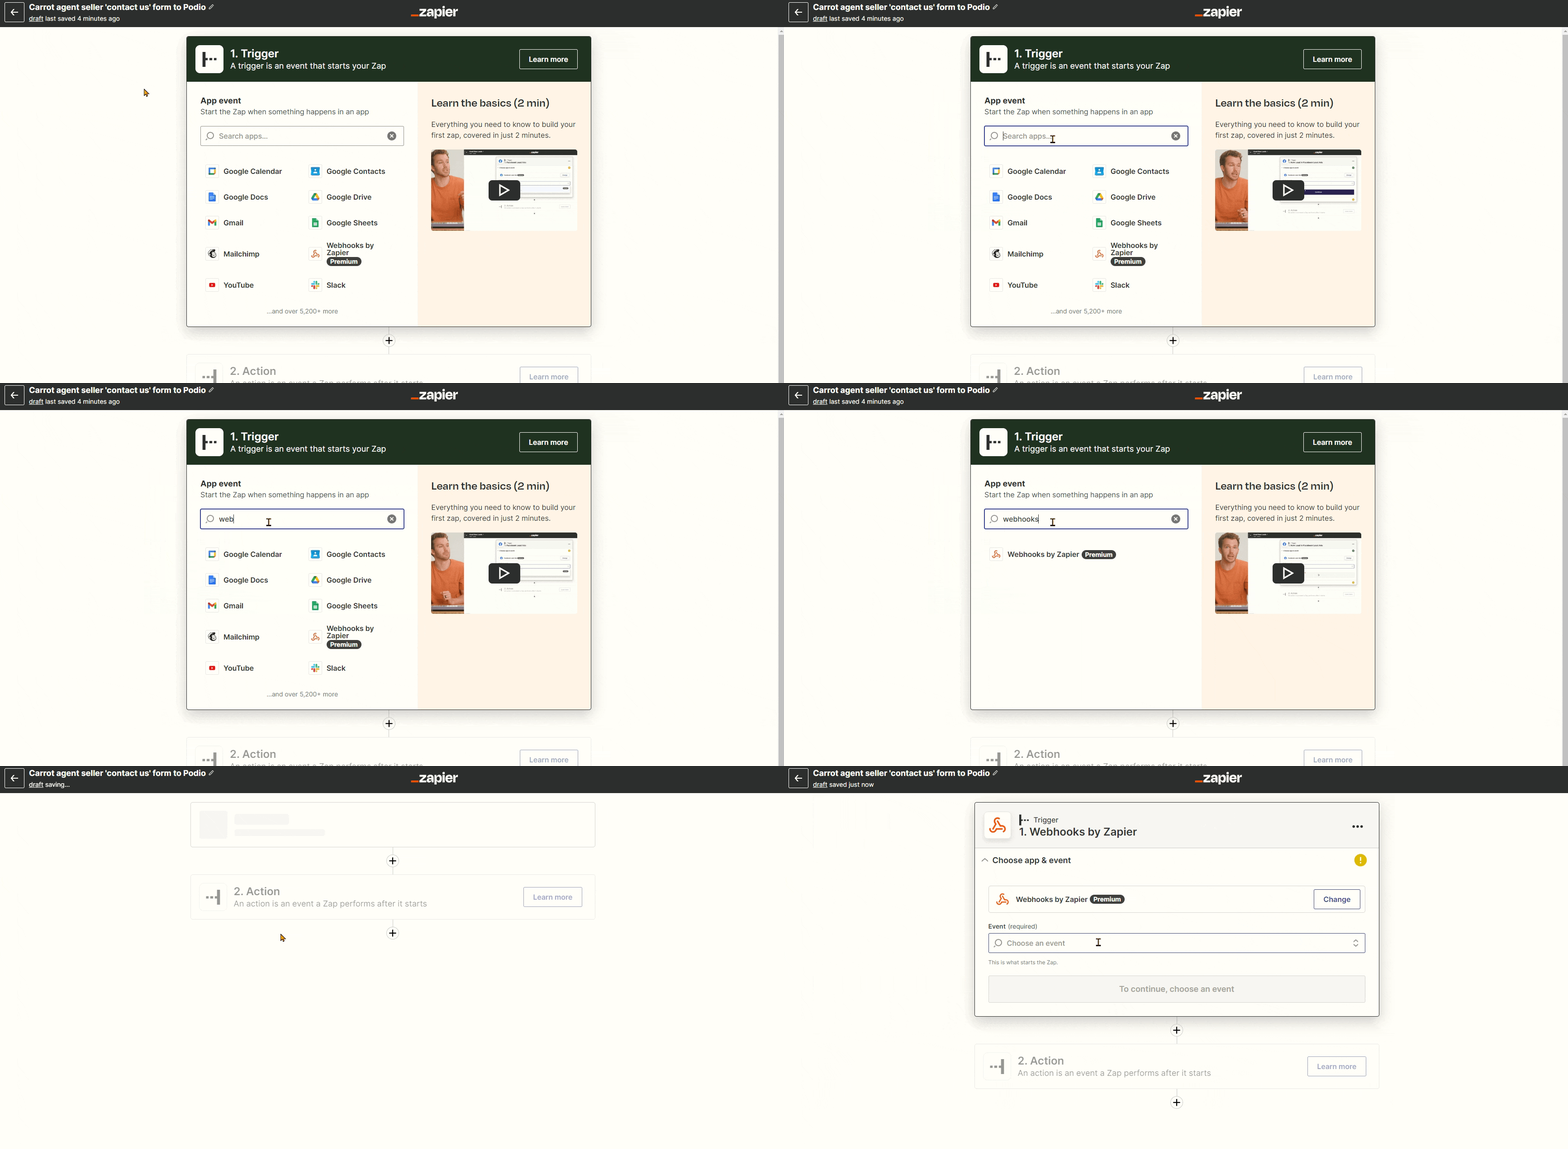
- Now we’ll set up the Zap’s trigger. Search for “Webhooks by Zapier” in the search bar that’s presented to you on this page (shown in the GIF below) – Click on Webhooks by Zapier
Note: Carrot is not added to Zapier as a supported applicable as of yet. Searching “Carrot” here will only yield “Carrot Quest”, which is not us. You must use the “Webhooks by Zapier” option.
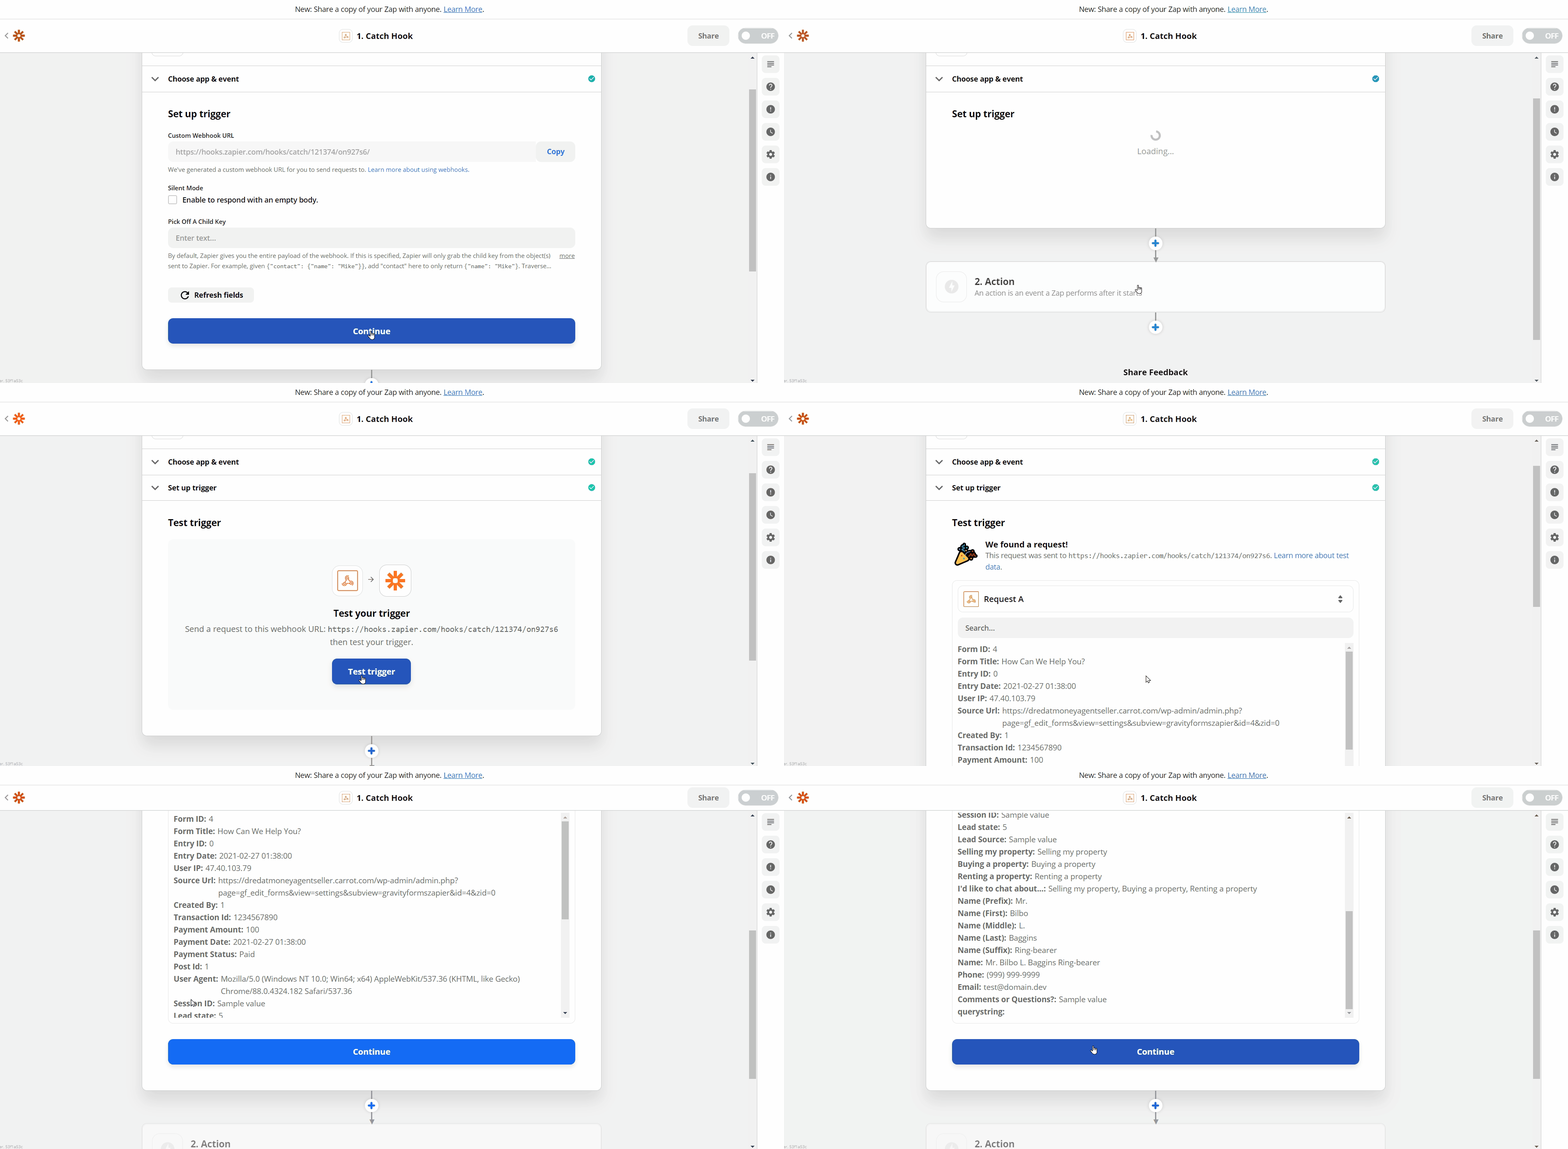
- A drop-down menu will appear before you, from the 3 available choices, click “Catch Hook”
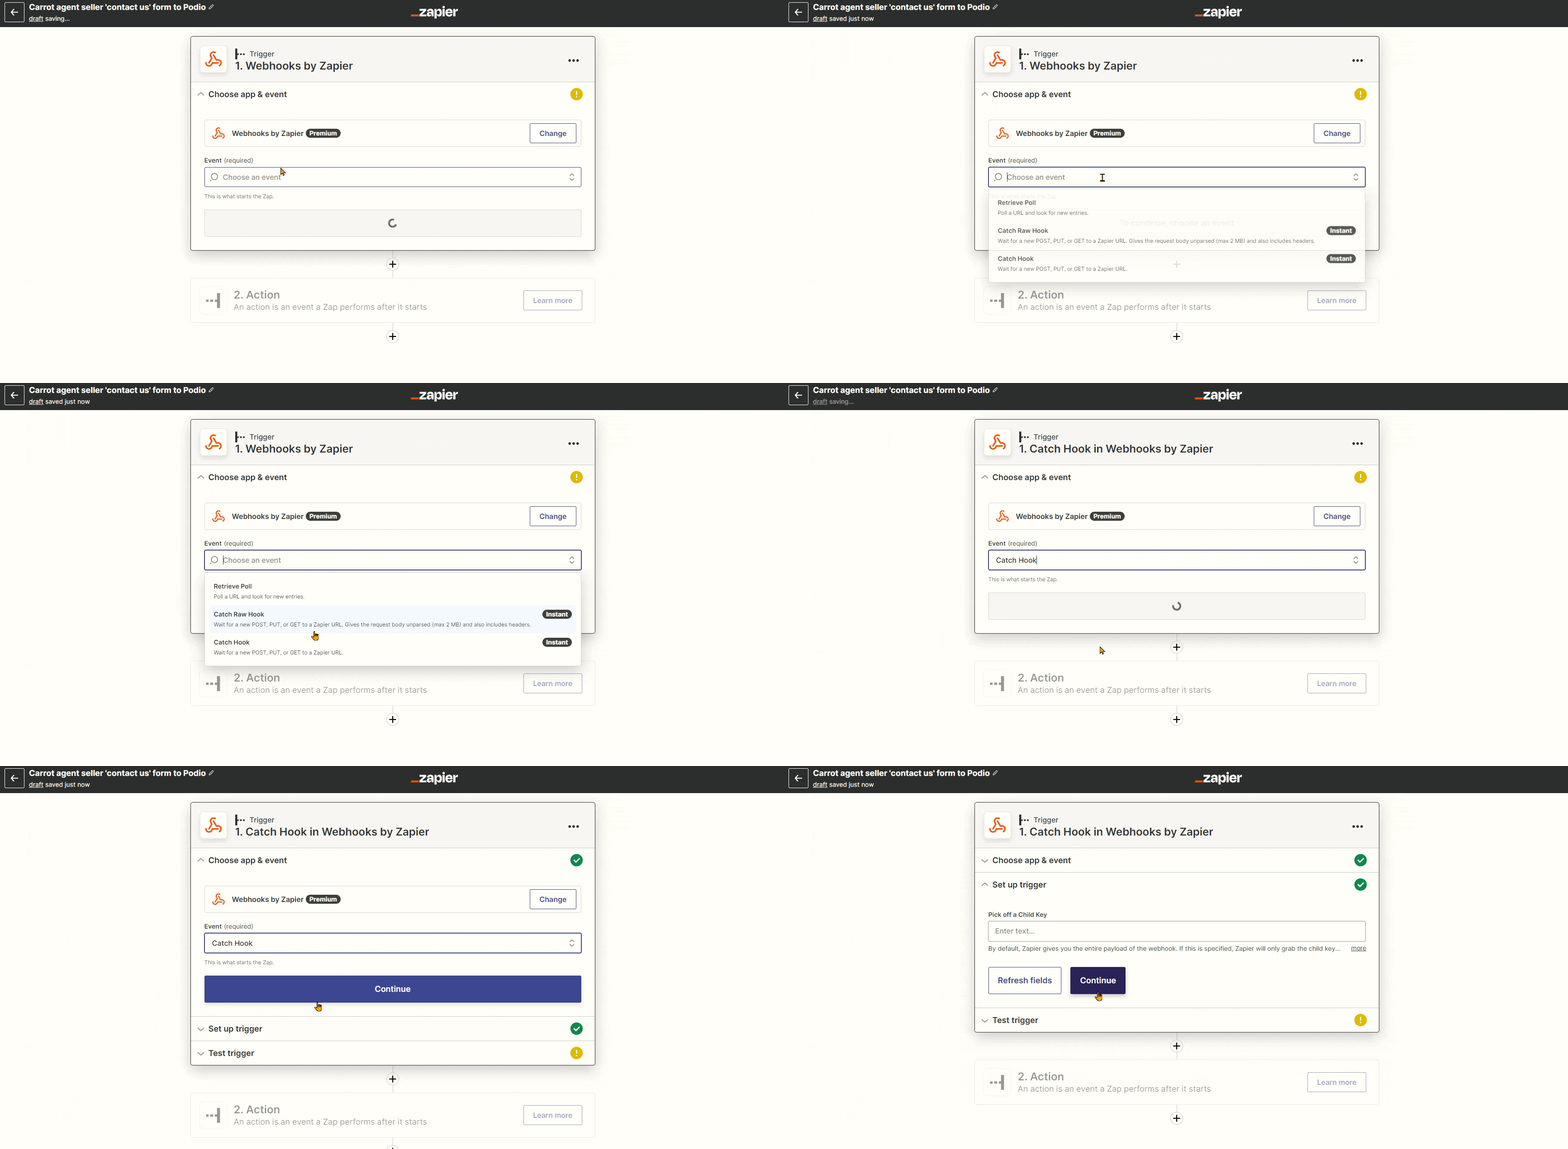
- Leave the “Pick off a Child Key” field blank. Click the “Continue” button to progress:

- Finally, copy the Webhook that you created:

Next, you’ll navigate to your form in your Carrot site and select the Zapier setting to paste your Webhook.
Step 4: From Your Site Dashboard, Navigate to Your Zapier Settings
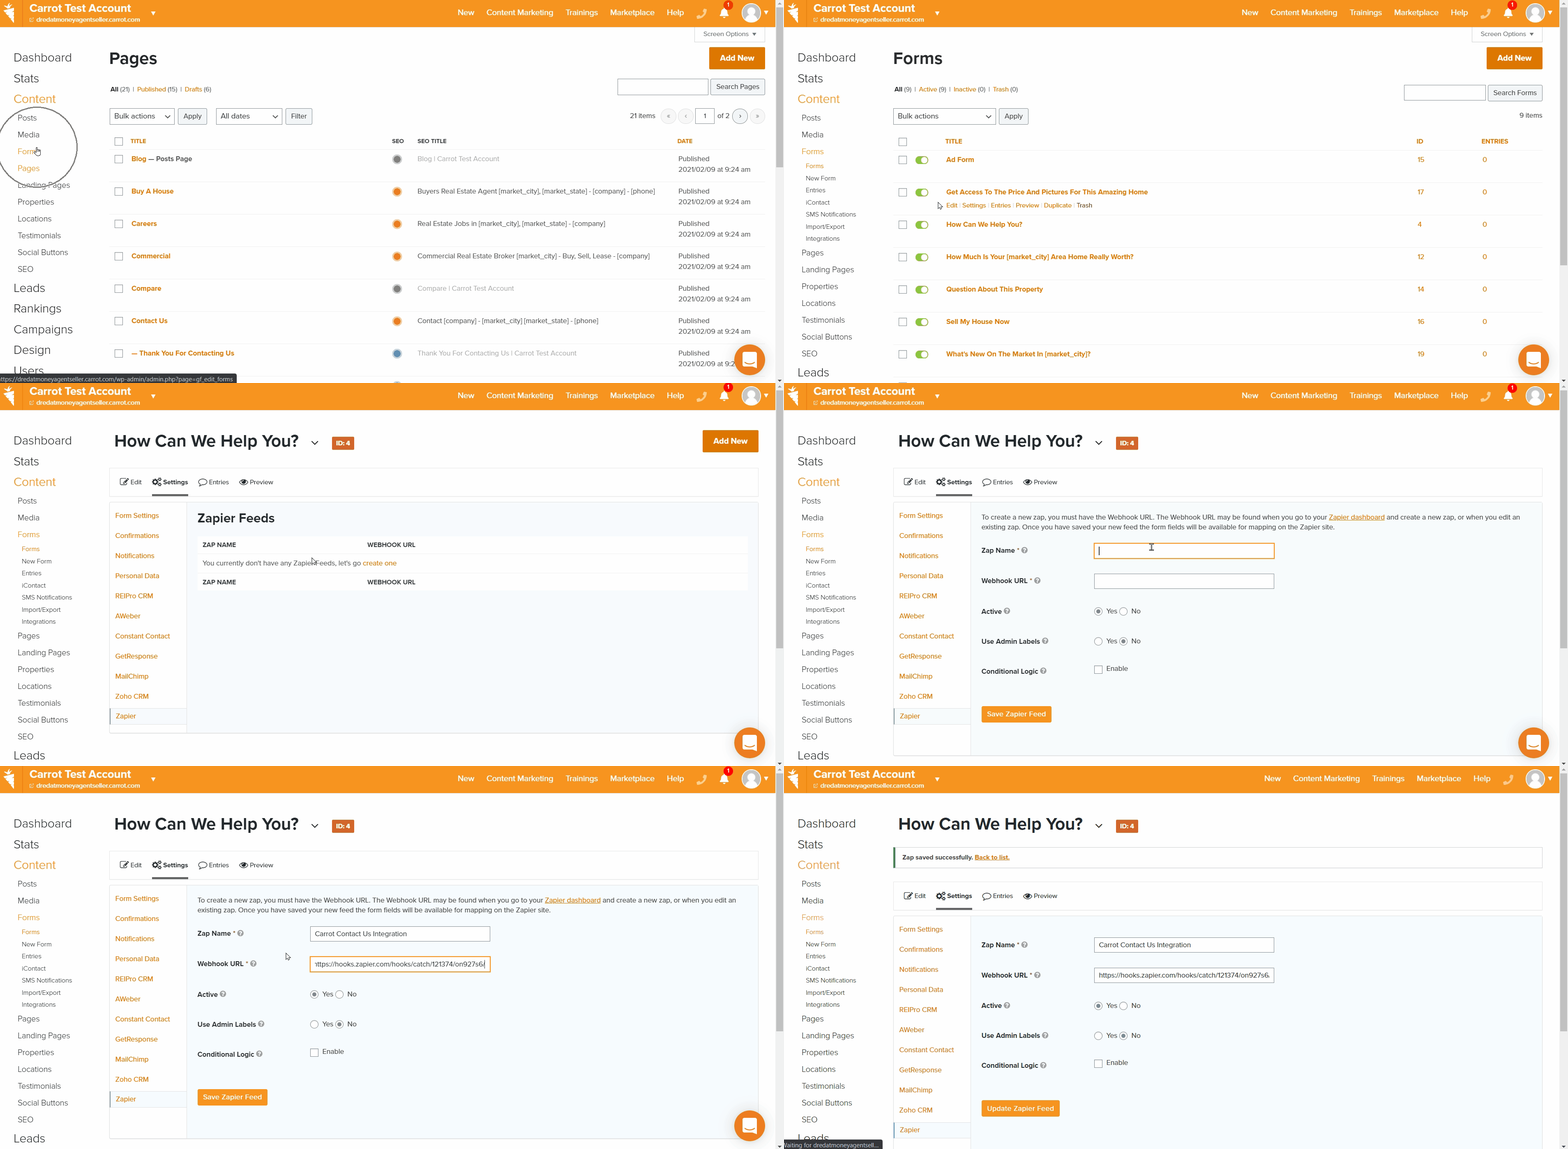
Go to your Carrot account and click the “Content” option for your site. Navigate to your form’s Zapier settings to paste the Webhook.
Click the “Forms” option on the left side and hover over the form you want to integrate. You’ll see a “settings” option.
Hover over that to produce a drop-down list and select Zapier from that drop-down. From there, click “create one” and name your zap.
Paste your Webhook and click the button at the bottom of that page to “Save Zapier Feed.”
Step 5: Finally, Back in Zapier, Test Your Form Submission
Click “Continue” on the Zapier page then click “Test Trigger.”
It will then pull in some sample form submissions from the form to test the connection. You should see all of the items on the form collected.
For example, if you collect the name, phone, and email, then you should see the name, phone, and email on the list of the test information.
Click the button to “Continue” when you’re ready.
Learn More:
At this point, you should have a Zapier webhook created, added to your Carrot form and have a successful test. Next up, we’ll dive into connecting your CRM, and mapping your Carrot form fields to your CRM field.
For more involved Zapier questions, head to Zapier’s Help Center and contact their support team at Zapier.com/Help.
Part 2 – How to Integrate with a CRM (if applicable)
Step 1: Integrating with a CRM in Zapier
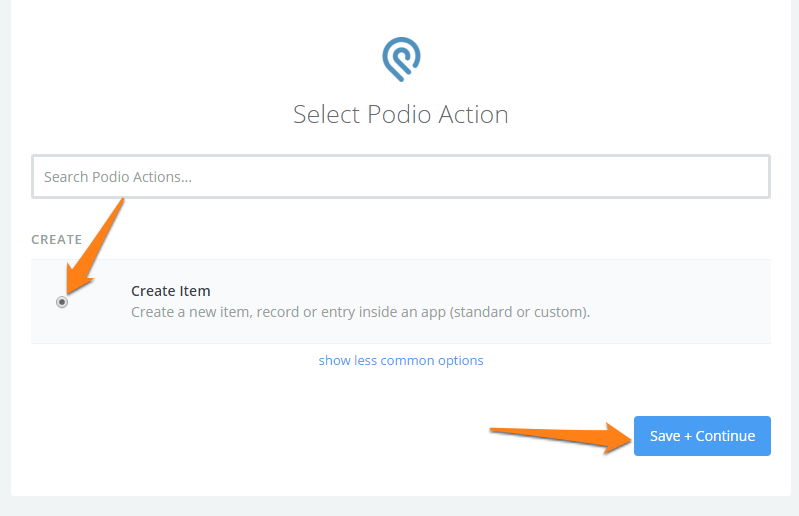
The steps in this next section may vary depending on the CRM you are integrating with. However at a high level, it’s the same process for all CRMs. First you choose your CRM from their database, sign into your account, define an action and then map your CRM fields to your Carrot form fields.
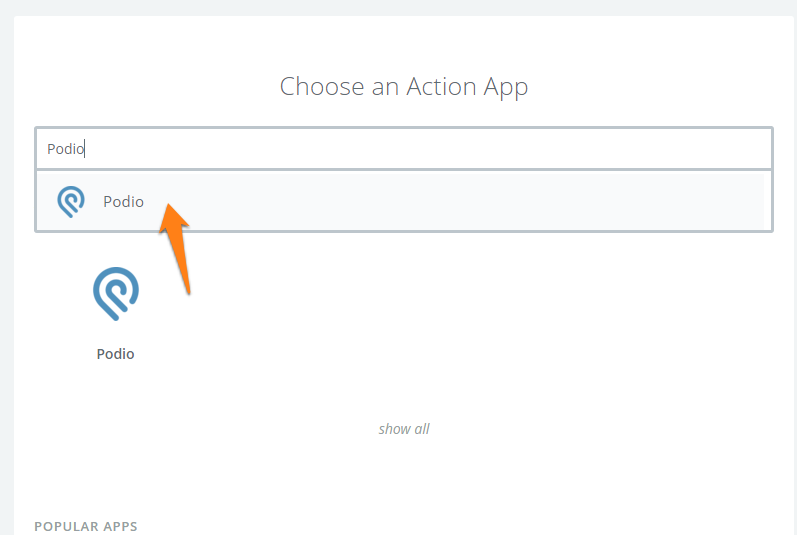
Next up, choose the app you are integrating your forms with. In this example, we’ve selected Podio:
Step 2: Add Your CRM Account
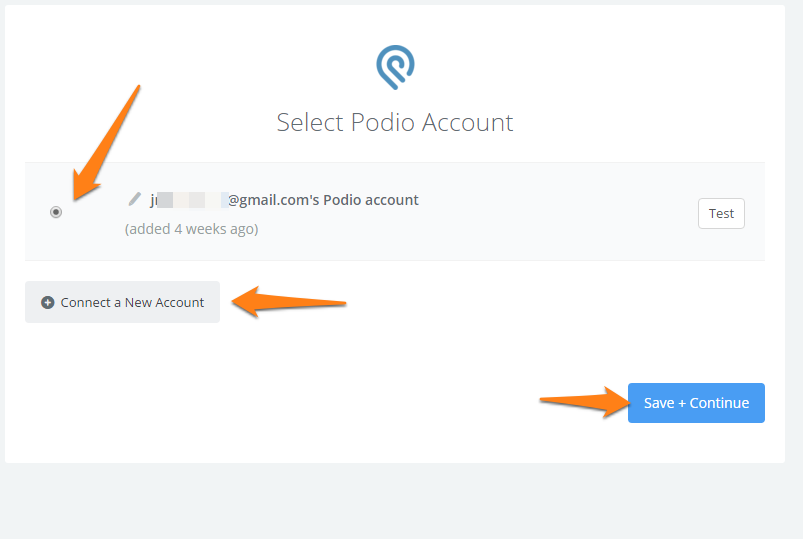
Select your CRM account (in this example, a Podio account) and hit Connect a New Account to add your account. Then click Save + Continue:
Step 3: Setup Your CRM Submissions with Zapier’s “Zap”
Choose the Organization, Workspace, and Application to send the leads to.
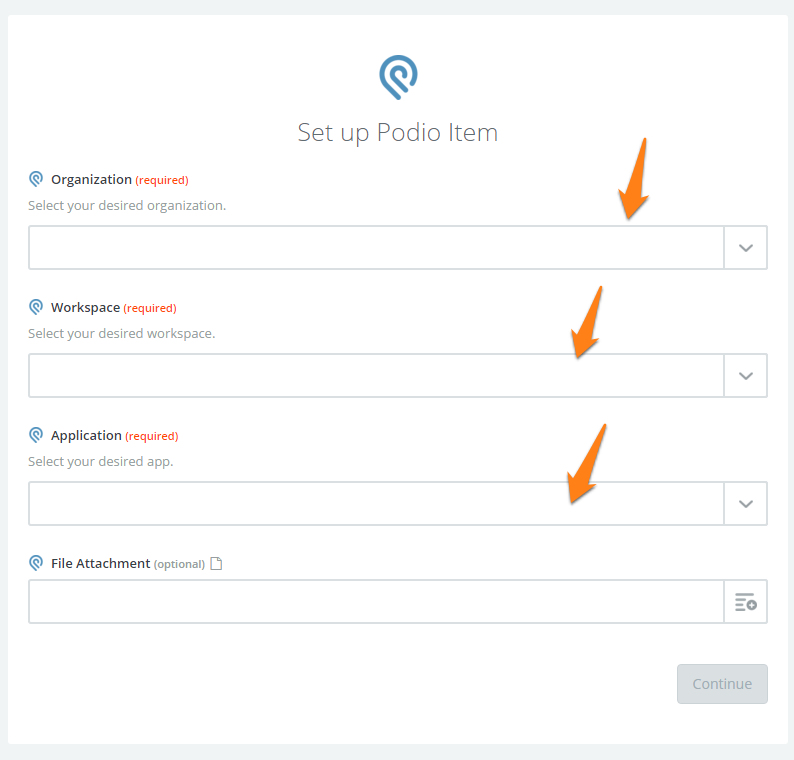
Step 4: Map Your Form Fields to Your CRM Fields
In this section you are telling Zapier which form fields need to be imported into which CRM fields. These will vary per CRM and per user depending on your configuration. The field that you select for each of these is the form fields on your Carrot site that you are integrating with. For example, if you have a name field on your Carrot form, you will want to input that for the name field in your CRM.
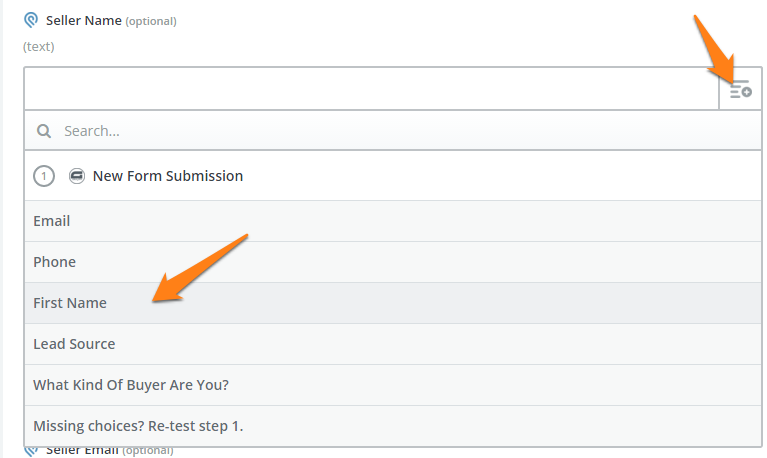
So, it will look something like this, depending on your CRM app:
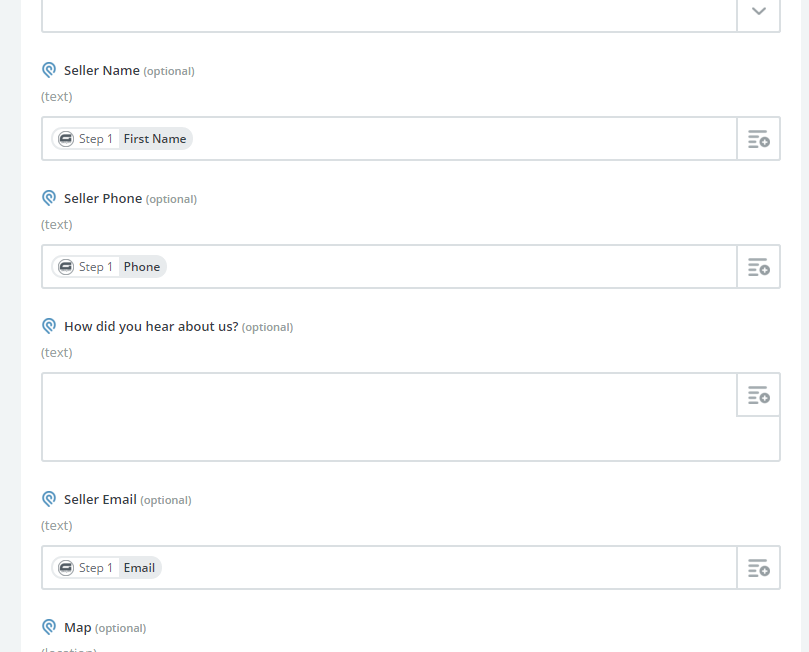
Hit “Continue” when done.
Step 5: Test Your CRM Integration
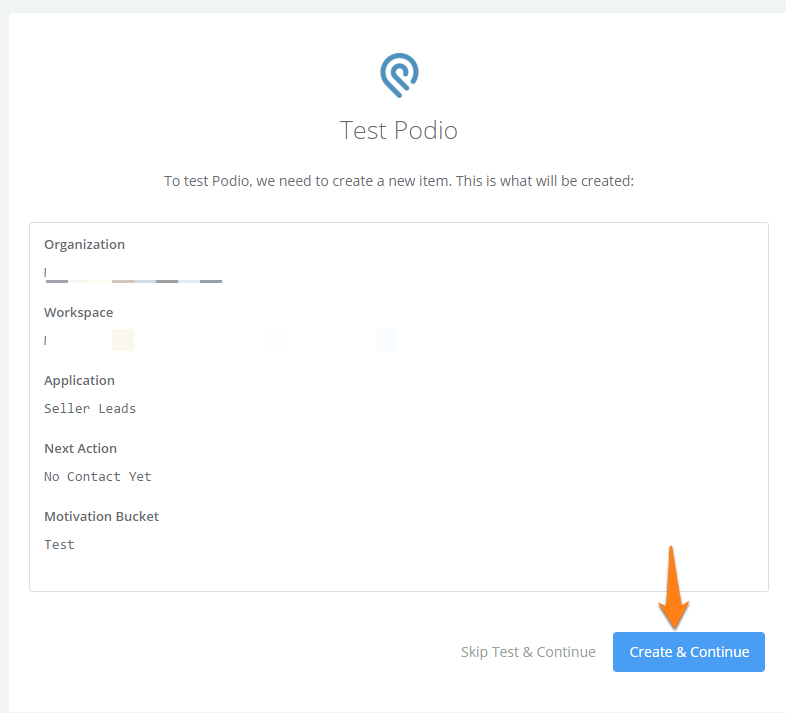
Step 6: Turn the Power On
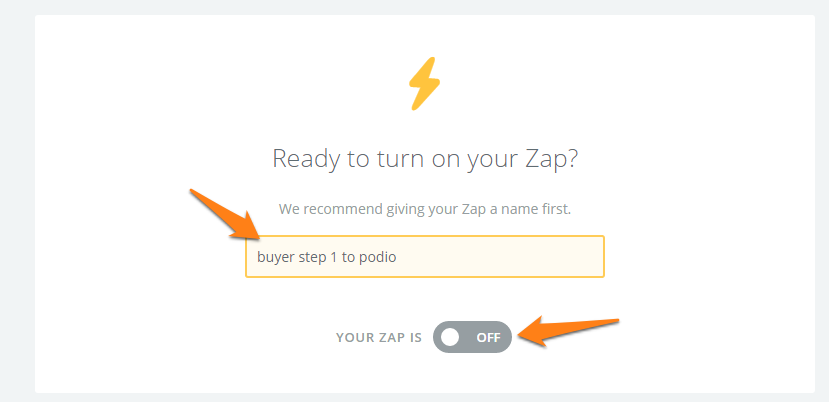
Name the Zap and turn the Zap on.
Step 7: Finish the Testing Phase
Check your CRM account to see if the test lead came through after submitting an opt in on your site.
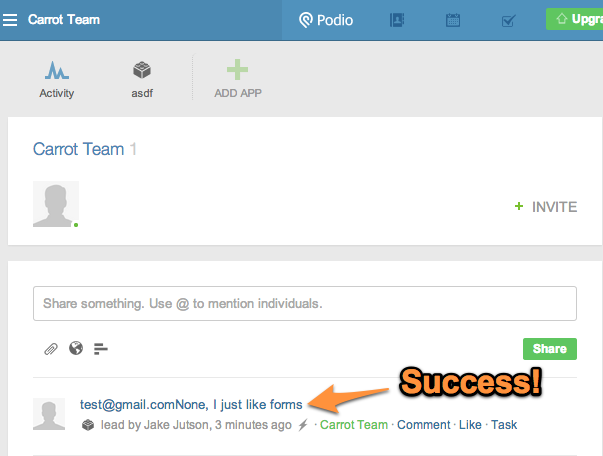
That’s all it takes! We understand that this can be a long and rather confusing process, so please don’t hesitate to hit us up at support@carrot.com or live chat below if you’re having any trouble at all!
Beta and Invite Only Zap Help
Investor PO: is an ‘invite-only’ integration. You’ll need to click on this link to be invited to use the Investor PO integration with Zapier. Click Here
Learn More
- Get Started with Carrot CRM
- Overview of CRM Integrations
- Integrate with MailChimp
- Integrate with Zoho
Close More Deals
with Carrot CRM
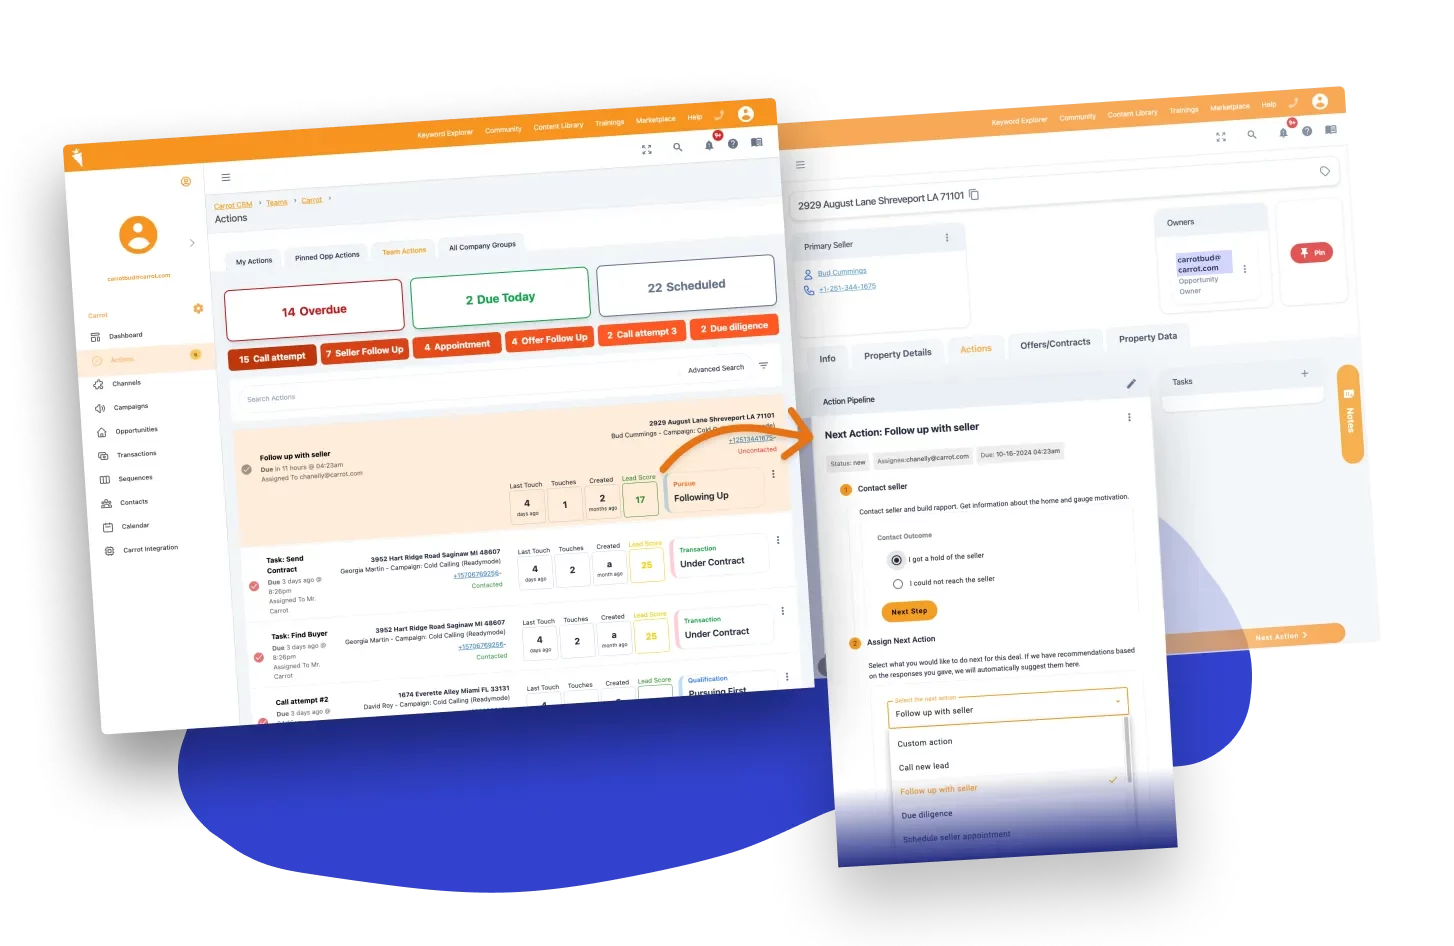
Grow your revenue and turn more leads into closed
deals with Carrot’s built-in CRM.
Premium Support
& 1:1 Strategy Calls

Members with our Premium Support Add-On can book
a 1:1 video calls for tech questions & strategic advice.

